Y'ello :)
I've been making stoof. Please bear with me while my photo-taking catches up...
Firstly, my new top of stretchy cotton sateen. I must be dreaming of spring already, I think!
This is a stash-busting success story. I fell deeply in love with this autumnal gold/orange/scarlet/khaki rose-print fabric from Tessuti's in Melbourne last year, and threw down my credit card with blithe abandon. So my colours! Close-up, the print has that slightly scratchy spotty appearance of an old polaroid. Love it.
Difficulties arose when I got home and had to come to terms with the fact that for some dumb reason I had bought only 70cm. I have no excuse for this insanity. Yes, I was an idiot. I'm blaming that state of mad fabric drunkenness brought on by places like Tessuti's. Note to self: get at least a metre from now on.
So I made a simple little pull-on Tshirt top because fortunately you don't need much metrage for this style. This is the bodice from a dress pattern, Burda style magazine 08/2009, 128; elongated a bit. I have made this pattern up twice before, firstly as a dress and then as a top just like this one, so I already know how much I love this flattering boat-neck style. It has bust darts in the front and two long vertical darts in the back for shaping. No zip or closure is needed because the neck opening is wide enough so that you can just pull it on over your head.
I could not make the sleeves as long as the pattern intended, as in my previous two versions. This is the very longest I could get from out of my meagre piece. I would really prefer them to be about 12cm longer, but meh. I can cope.
Details:
After under-stitching, the facings are stitched to the sleeve cap seam allowances just inside the previous sleeve cap stitching, and stitched-in-the-ditch down to the shoulder from the right side of the garment, to hold them firmly in place.
And I have made two little Tshirts too, one for me, and one for my husband, both self-drafted and custom-fit, using the very last of my 100% merino wool stash, bought from the Fabric Store in Melbourne last year. Now we have matching his-and-hers thermal tops, haha. Quelle romantic, non?
I've been making stoof. Please bear with me while my photo-taking catches up...
Firstly, my new top of stretchy cotton sateen. I must be dreaming of spring already, I think!
This is a stash-busting success story. I fell deeply in love with this autumnal gold/orange/scarlet/khaki rose-print fabric from Tessuti's in Melbourne last year, and threw down my credit card with blithe abandon. So my colours! Close-up, the print has that slightly scratchy spotty appearance of an old polaroid. Love it.
Difficulties arose when I got home and had to come to terms with the fact that for some dumb reason I had bought only 70cm. I have no excuse for this insanity. Yes, I was an idiot. I'm blaming that state of mad fabric drunkenness brought on by places like Tessuti's. Note to self: get at least a metre from now on.
So I made a simple little pull-on Tshirt top because fortunately you don't need much metrage for this style. This is the bodice from a dress pattern, Burda style magazine 08/2009, 128; elongated a bit. I have made this pattern up twice before, firstly as a dress and then as a top just like this one, so I already know how much I love this flattering boat-neck style. It has bust darts in the front and two long vertical darts in the back for shaping. No zip or closure is needed because the neck opening is wide enough so that you can just pull it on over your head.
I could not make the sleeves as long as the pattern intended, as in my previous two versions. This is the very longest I could get from out of my meagre piece. I would really prefer them to be about 12cm longer, but meh. I can cope.
Details:
Top; Burdastyle magazine 08/2009; 128 modified to be a top, stretchy cotton sateen, my review of this pattern here
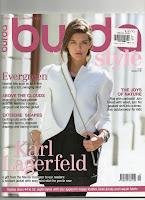
Skirt; Burdastyle 10/2010, 136 (the Karl Lagerfeld skirt) lengthened, black suiting gabardine, details and my review of this pattern here
Tights; black merino wool, made using my own custom fit tights pattern, my tutorial on how to draft your own here
Shoes; Django and Juliette, from Zomp shoes
Some notes on the finishing details for this top:
The neckband is finished with facings. I always always under-stitch facings on a garment that I wish to look sorta dressy, or just not-so casual. Top-stitching always makes things look a bit more "casual" imo, and often you want an edge that smoothly and cleanly rolls under to the inside, with no top-stitching or anything visible on the edge. Under-stitching (the red stitching in both photos below) always provides a nice clean and minimal look on the outside; and safeguards against facings popping up and out.After under-stitching, the facings are stitched to the sleeve cap seam allowances just inside the previous sleeve cap stitching, and stitched-in-the-ditch down to the shoulder from the right side of the garment, to hold them firmly in place.
But wait, there's more...
While I am really enjoying wearing my crazier leggings and tights, I guess we all agree that plain black tights are kinda the most useful type to have, and a must for winter, right? So I made a second pair identical in every way to my previous pair. I am wearing these in the photo above too.And I have made two little Tshirts too, one for me, and one for my husband, both self-drafted and custom-fit, using the very last of my 100% merino wool stash, bought from the Fabric Store in Melbourne last year. Now we have matching his-and-hers thermal tops, haha. Quelle romantic, non?
Random picture of the neckband, constructed using this method. Appearing here for no better reason than for me to feel good about the increasingly better finish I am achieving nowadays. The centre back is still a wee bit bobbly thanks to the extra thickness of fabric in the joining seam there, but it's getting there. Practise is benefiting the quest for perfection!

