I have outlined some of my thoughts in the hope that they may be useful to others starting out with Alabama Chanin too. Particularly for Australians: the thing is; the AC book is not written with us in mind; which is fair enough of course but we can't always get hold of the listed materials here. I am trying to use only materials that are readily available here in Australia.
Fabric: a couple of the boys' old Tshirts from the toss-out bag. I harvested the fabric for the neck and armhole bands from the sleeves.
![]()
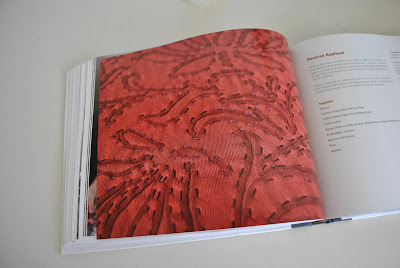
yes, the same fabric as above, and no the colour is not off. it got dyed after this photo was taken

Thread: button craft thread is specified. This is more correctly known as button and craft thread, and Natalie Chanin describes it as “one of the strongest threads (the Alabama Chanin team has) found”. Unfortunately I couldn’t find anything of this name in Perth so I'm using Gutermann’s upholstery thread from Spotlight. It is the strongest in the Gutermann range and is typically available in about a dozen shades.


Stitching:So, to machine stitch or hand-stitch? I totally cheated and stay-stitched and basted by machine! I’m undecided about whether or not I will hand-stitch all the seams in my final garment… part of me thinks it would be better to save that effort for the decorative stitching on the motifs. In some cases I allowed the knots to fall on the outside or right side, a sometimes feature of AC work. I decided this is not a finish that appeals to me, so I will probably be concealing them on the inside from now on.
The stencil; I bought the plastic sheet for the stencil from Jacksons Drawing Supplies and enlarged the Anna’s Garden stencil from my copy of the AC book. The whole process is very time-consuming, so the design should be one you're absolutely sure that you will like. I totally wanted to design my own stencil but decided to play it safe with one that I know from looking at the beautiful projects in the book looks really amazing. Using a proven design is good practice for getting a feel for how proportions and size of the motifs work for the embroidery and appliqué techniques. I think once I have a few projects under my belt then I might branch out and try my own ideas.
Printing: y'know, I've got a feeling this is going to be the most difficult part to get right out of the whole exercise...! I haven't found any sprayable textile paints as recommended, so I experimented with a watered down solution of the Permaset textile paint from Jacksons Drawing Supplies, that I use for screen-printing, mixed in a regular spray bottle. Results: disastrous! It bled underneath the stencil and the edges were unclear and blurry. NO pictures because it looked so awful :(
Attempt number two; tried stippling undiluted textile paint with a stiff and bristly paintbrush. This is effective, but took forever! This may be worth it for small areas of stenciling, and when I want to use just a small amount of the textile paint.
Permaset textile paint, stippled on with a dry brush

Permaset textile paint (Jackson's Drawing Supplies), sample pot of Dulux household acrylic paint (Bunnings)

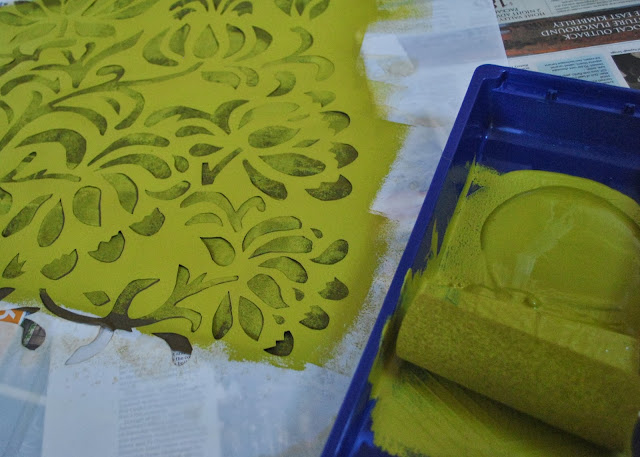
the Dulux acrylic paint, rollered onto my "real" project :)

...the size of those stitches!!!!