 This gathered pocket sits inside and at the side edge of a loose-fitting garment such as an unfitted dress or tunic top, and can be adapted to go in a loose, flowy skirt also. It is best suited to lightweight fabrics.
Firstly, making the pattern pieces… start with an A-line dress pattern. I used dress R from the Stylish Dress Book by Yoshiko Tsukiori; which has gently A-line side seams that curve outwards towards the lower hemline, but this design would work equally well for a straight, diagonal side edge too.

For both front and back pieces, both sides, draw in the above, straight lines;
blue line: starting from the the innermost point of the armscye curve, vertically straight down to finish at the level where you wish for the top edge of the pocket to hit. As a rough guide I find around 5cm (2″) above hip level to be generally a pretty good upper pocket point.
green line: horizontally, at the level where you wish for the top edge of the pocket to hit. The “bagginess” of your pocket is a personal choice; as a guide; my green line is 15cm (6″) in length which coincided with the degree of “flare” of the dress at the hemline.
red line: vertical line from the outer edge of green line, straight down. This is the new side edge of the dress/top.
orange curve; from the blue green intersection, draw a gentle pocket curve to intersect with the original side of the dress edge. As a guide, I made my pockets 20cm deep.
purple line: vertical line from the lower edge of the pocket, up to the green line. This is the centre fold on which you will cut the pocket piece.
The grey lines of the side front and side back represent the original lines of the pattern pieces.

These lines define the new pattern pieces as show above; at left is the new side edge of the dress front and back, now defined by the blue line, green line and red line. Only one side is pictured, if you want the pocket to be on both sides then obviously cut this profile both sides of the garment. Side fronts ( 2), and side backs (cut 2) are defined by the blue line, orange curve and the original side edge (grey curve), and pocket pieces (cut 2) as defined by the orange curve, with a centre fold along purple line. Remember to add seam allowances!
warning; hideous fabric alert… my apologies. This blue stuff was a handy small scrap, I also used black thread because I didn’t bother to change the thread in my machine it stands out and can be clearly seen against the blue fabric… 

Also, for the drawstring ties cut 4 strips of lightweight fabric on the bias; Mine are each 41cm (15 1/2″) long by 2.5cm (1″) wide.
Construction:

Pocket drawstring ties; stitch the long edge and turn right side out. My tips and method for turning out skinny spaghetti strap ties can be found here
(below L) Stitch front and back together along the red line, press open. Stitch side fronts to side backs along side edges, press seam allowances open.


(above R) Stitch side front piece to front along the blue line, finishing at the top edge of the pocket. Repeat for side back piece to back. Clip to end of stitching, press seam allowances to front/back.
(below L) Run a long, gathering stitch along the pocket opening stitching line (green line).


(above R) Pulling up this gathering stitch slightly to fit, stitch a pocket piece along the pocket top edge in two separate lines of stitching, leaving a short 2cm (7/8″) gap in the centre between the two.
(below L) Turn pocket piece to the inside and gently press along stitching line.

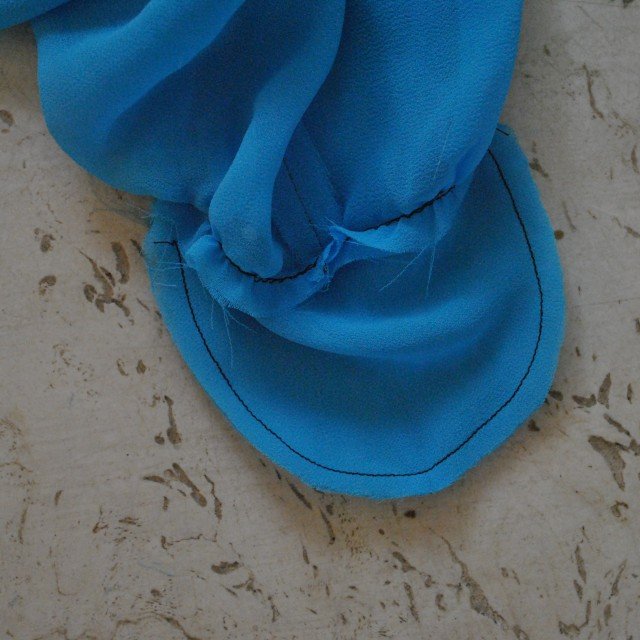
(above R) Inside, line up pocket lining and side front/back piece along the curved lower edge and stitch together. Finish pocket seam allowances and side front/back seam allowances if desired.
(below L) Pin the pocket piece to the dress along the top edge of the seam; and, keeping the side front/side back free, stitch together with a row of stitching 1cm (3/8″) in from the top edge. Effectively creating a 1cm width channel between dress and pocket. Insert a tie into each side of the channel, starting from the gap and coming out at each end. Apologies for the scraps of yarn used in this little blue sample pocket, for the real thing I did make proper turned out bias strips, really!
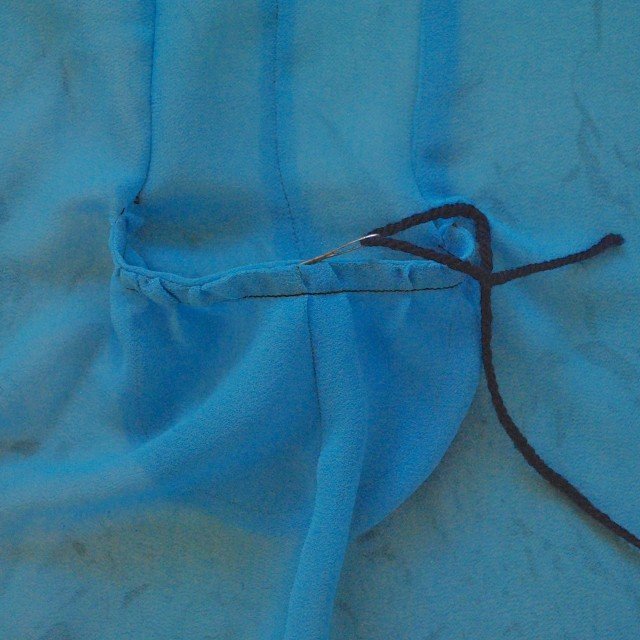

(above R) Secure the tie ends in place by stitching a few passes of back and forward stitching on the outside of the dress, through all layers.
With the ties, pull up the excess width of the pocket edge to fit and tie in a sweet bow or whatever.
And done!

Thank you to everyone who expressed an interest in how I made these pockets; I hope this is a useful and/or interesting tutorial. If you find it so then please leave a comment and let me know.


The post gathered pocket; a tutorial appeared first on Handmade by Carolyn.