Quantcast
Channel: Handmade by Carolyn
Viewing all 829 articles
Browse latest View live

fluffy blue speckles

$
0
0

Oh hey!  I’ve just finished knitting a new jumper.  Perfectly fluffy and perfectly relaxed and slouchy, the most wonderfully comfortable lounge-able thing you can imagine.  This is the We Are Knitters sparkle raglan sweater, a design by Krysten Ritter, in the “sprinkle blue” colour way.  It comes as a kit with everything you need to make it all packaged up neatly  in a lovely brown paper bag.  It’s was the absolute hugest treat to come home and find this on my doorstep! a really delightful present to cheer myself up during a sorta low spell.

And it was truly such a joy to knit!  unply-ed, unspun “fleece type yarn and giant fat needles meant giant fat stitches too, so it knitted up super fast.  Quick gratification, for sure.

And how beautiful are these wooden needles?  They look so cool… so much prettier than my old metal ones.  I wondered if they’d be a tinier bit “stickier” than metals; and yes they were, but not so much as to be annoying or a problem.

The yarn is We Are Knitters “the meriwool”; absolutely gorgeously squishy stuff!!  100% merino, and supposedly treated with a superwash treatment to make it machine-washable.  This is awesome news because I already dropped a bit of chocolate on it… whoops!  I didn’t risk the machine was yet though, I’m too frightened!  I just gave it a spot hand-wash just very gently rubbing wool-wash into the chocolate-y smudge and the spot came out alright.  When I do get brave enough to toss my sweater in the machine I’ll come back and update on whether this worked out just fine or whether it was disastrous… but I’ll be allowing myself a few more wears first, just in case!

So; there was a slightly negative thing with my kit… when I checked out the requisite five balls for my size I noticed that one ball was from a different dyelot than the other four.  This one ball had noticeably less blue sparkles in it that the other four balls.  Not too much of a problem, I thought; I’ll just use that one divided evenly over the sleeves; as in, two rows of the majority dyelot, two rows of the odd-one-out, and repeat; for each sleeve.  This worked out ok, I think but as I was doing the front and back of the sweater I couldn’t help but notice that as well, one ball of the majority dyelot seemed to have considerably more blue in it that even its fellow three balls from the same dyelot.  You can see this at the top of the sweater in the lower picture, below.  It wasn’t obvious when you were looking at the balls together, but once I’d knitted practically the whole ball it did start to stand out a little bit.

above, I’m wearing it back to front compared to the below picture…  the pattern front and back are exactly the same as each other so you can wear it either way, which I really like btw!  I’ll probably wear it like the below picture because I prefer the way the sparkles appear on this side…

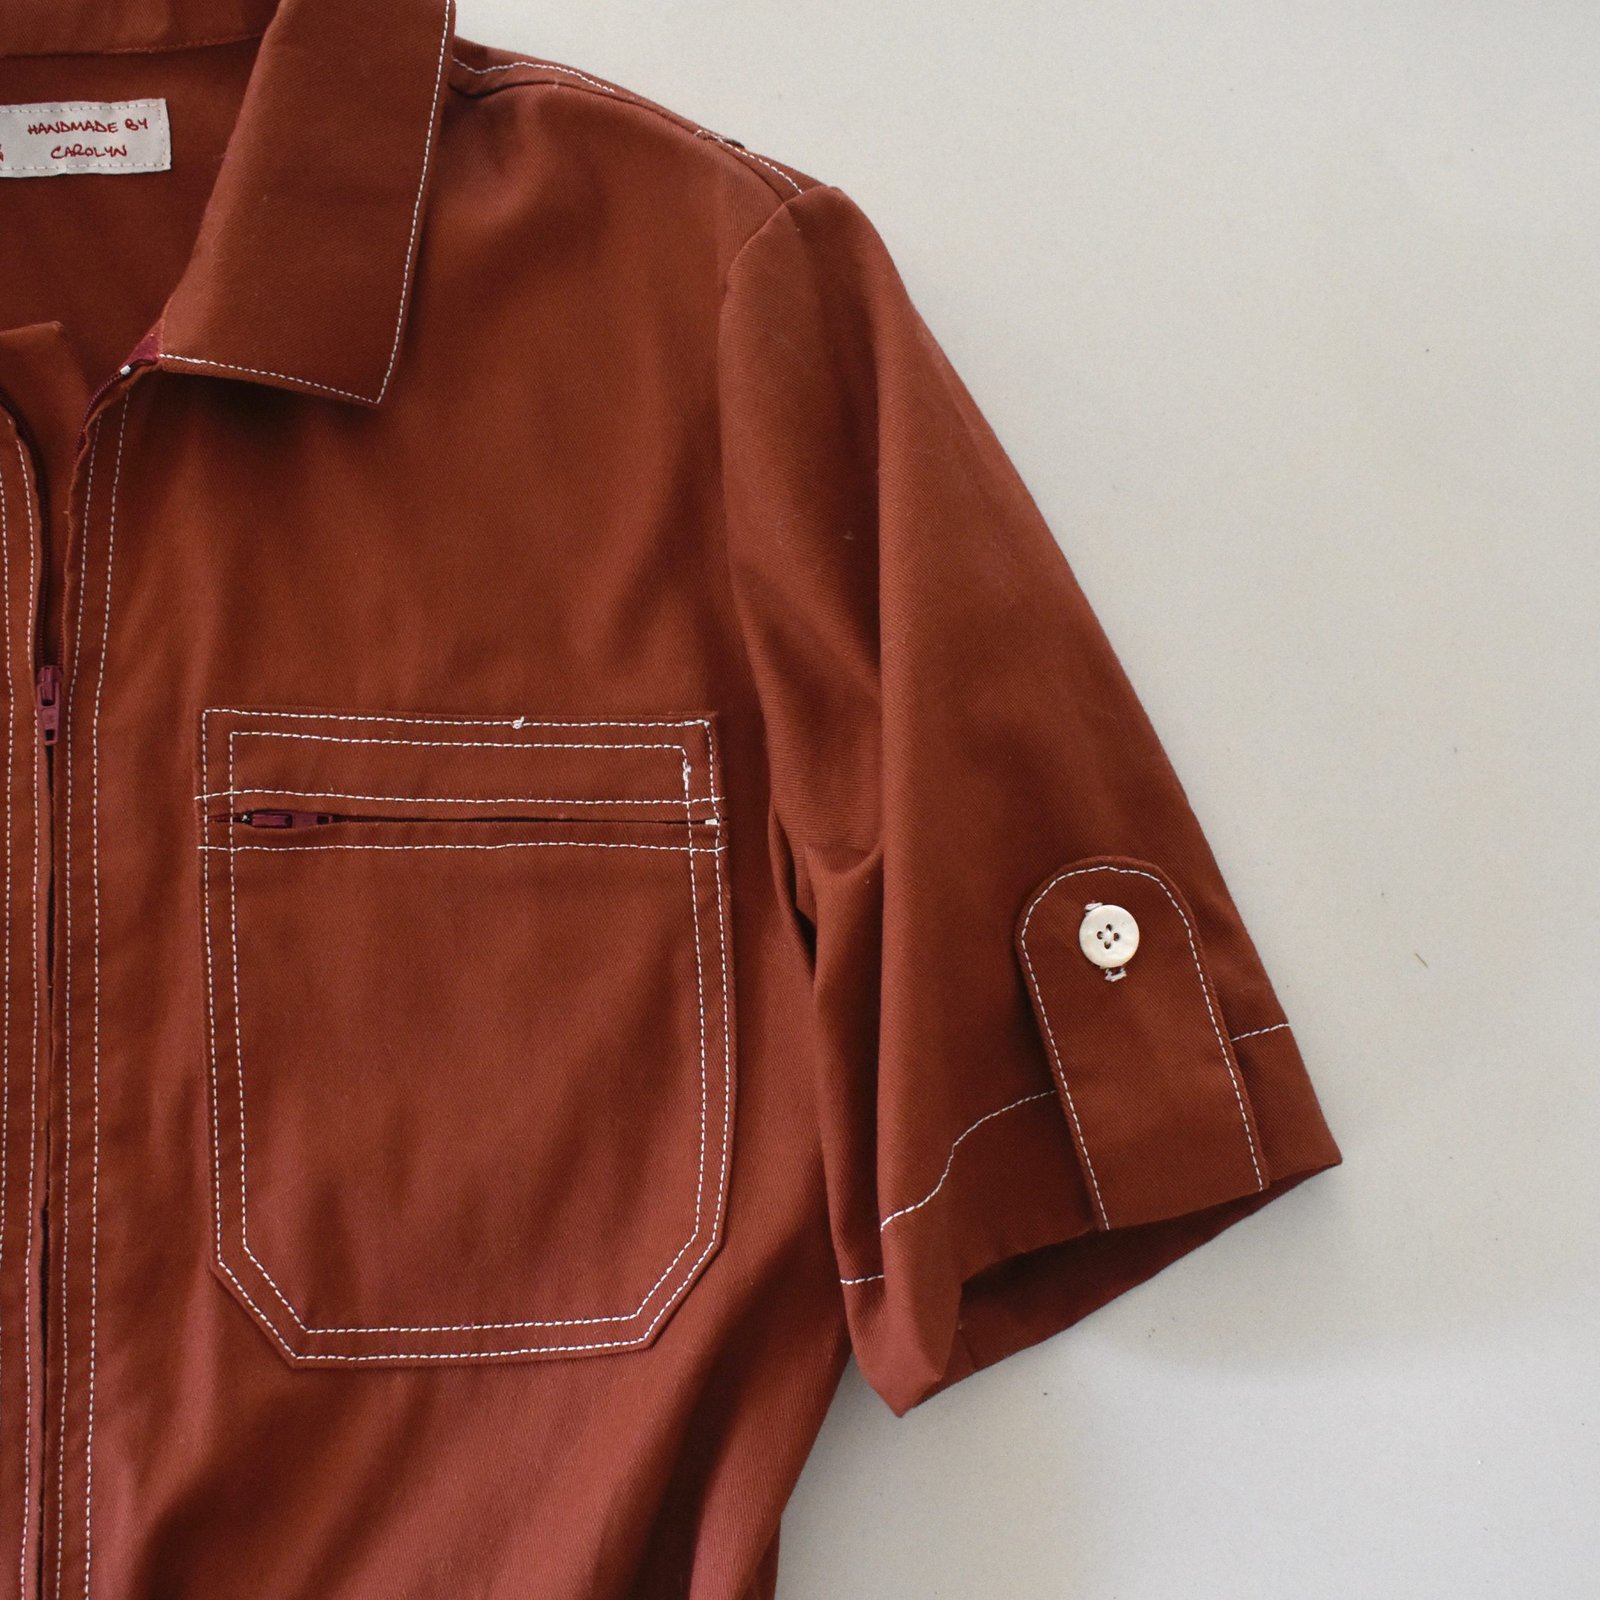
Oh, the other thing I’m posting about here is this skirt… this is the Sabrina skirt by Forget-me-not patterns that I made last year in a lovely orange-brown herringbone wool that Mum gave me once.  I recently added pockets to this, as posted here, and now I’m posting it again to point out that I’ve shortened it too.  This involved a fair amount of unpicking an intricately stitched walking vent, just so I could stitch up again closed. Lol, the things we do!  However, I’m much happier with it this length.  I really like my winter skirts to be on the shorter side, and realistically I’m never going to wear this thick woollen skirt in the warm weather!  The other, hidden bonus is that initially I stitched the burgundy-coloured lining hem in orange thread, a. because it’s the thread I used to sew the skirt in and I couldn’t be bothered changing it, and b. I didn’t have any matching burgundy thread at the time anyway.  Now I DO have some burgundy thread, so once I trimmed the lining I stitched the new hem in matching thread.  Yay! for tiny good things!

Look, with regards to the uneven-sparkle issue with my sweater; it’s fine really: I’m not actually bothered because I’m really very happy with it, and I even like that the body is a touch more blue than the sleeves and therefore has a slight visual point of difference.  Sometimes I’m a bit more obsessive about how an apparently random distribution of decorative elements can then appear not so random in the end result; a foible of the design process that a regular person probably wouldn’t even notice but which can at times send my weird brain into a frenzy of debate about whether I should unravel the whole thing and start again.  However, I shall NOT do this, because I knit for joy, not self-flagellation… and I am content to just enjoy my sweater for what it is.  Which is fluffy and warm and pretty and wonderful.


Details:

Sweater, the sparkle raglan sweater design by Krysten Ritter, in a kit from We Are Knitters
Rust skirt; the Sabrina pattern by Forget-me-not patterns in an old herringbone wool passed down by Mum? I think? shorted and with pockets added.  initially posted here
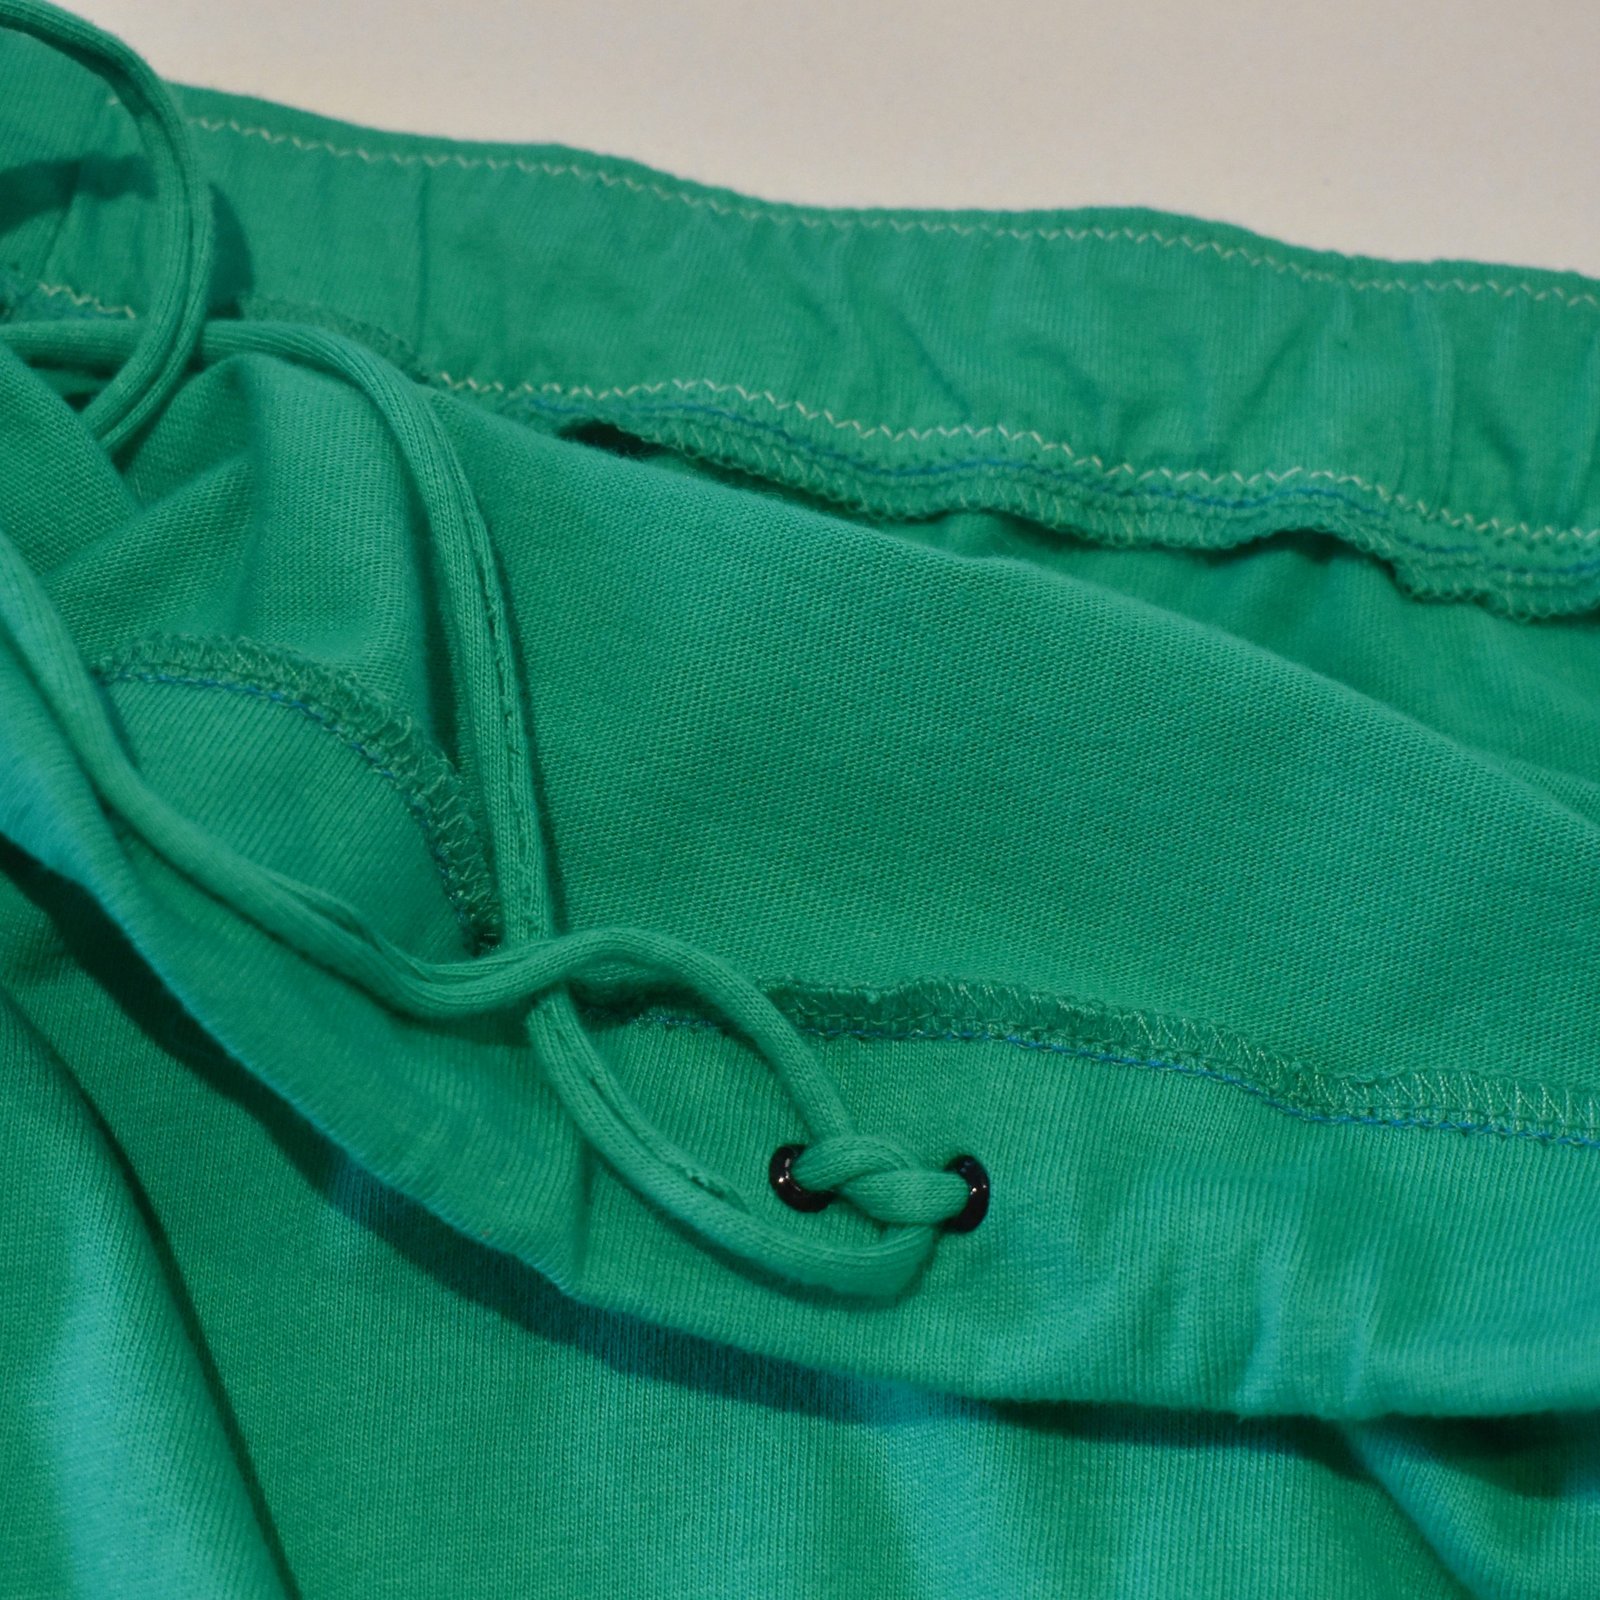
Turquoise skirt; adapted Burda 2/2015;109 denim from my NYC holiday, details here
Black tights, my own design, black stretch polyester, details here

yeah, unless it was pointed out, which I JUST DID of course! you can’t even really tell in real life.  I’ve really got to learn to not point these things out…

pinterestmail

The post fluffy blue speckles appeared first on Handmade by Carolyn.


golden yellow Jade skirt

$
0
0

… sooo, while I was knitting up my new blue-flecked jumper I was all the time envisioning it worn with a brightly little coloured little skirt.  Only problem was that I currently did not have such a thing in my wardrobe.

Ta da!!  Problem solved.

I got out one of my favourite little winter skirt patterns, the Paprika patterns Jade skirt, and bought a length of cotton jersey from Spotlight in the most perfect shade of bright golden yellow.  I’m having a bit of a thing for this colour at the moment actually, since I also bought a few new cushions for our couch in this exact same colour too, and turfed out a few of the old, drab, neutral ones.  I’m in the mood for BRIGHT! and FUN! and CHEERFUL!  I think my new skirt hits the spot beautifully!

This is my fourth time making up this little pattern, I love it so much.  This time, I added a gold coloured jeans zip to the centre back seam… it was a pity I couldn’t find one with a gold coloured tape too but you know, options are severely limited here in Perth.  NYC we are not!

I’ve always thought the only downside to this otherwise perfect pattern was the lack of pockets, and to be fair it’s damn near impossible to add them “nicely”.  I took a punt with this skirt and stitched some patch pockets onto the back.  I’m pretty sure they’re going to bag out and look terrible very quickly, especially if I actually use them?! lol, but I figure that when that happens I’ll just take them off.  Maybe I’ll substitute pockets made of more sturdy fabric, we’ll see.  Actually, to be honest, this cotton jersey, while it is indeed the most perfect colour! is none too stable full stop, and so I’m not sure how long the skirt’s going to last.  In retrospect I should have used a different lining fabric, so it’s my fault.  I’m hoping it will be good for at least this winter and spring, and I’ll be on the lookout for better fabric to make up another!

Details:

Jumper; the raglan sparkle sweater pattern by Krysten Ritter via We Are Knitters, in 100% merino superwash, details here
Skirt; the Paprika patterns Jade skirt pattern, cotton jersey from Spotlight
Tights; my own design, made in black stretch poly, details here
Boots; Roberto del Carlo, from Zomp boutique
Striped sweater below; my own design, made using a yarn advent calendar by Dingo Dyeworks, details here

this is how I wore it yesterday… I’m pretty happy it looks really nice with my striped jumper too!


pinterestmail

The post golden yellow Jade skirt appeared first on Handmade by Carolyn.

an exciting need for maternity gear!

$
0
0

so, I have some very exciting news!  I’m going to be a granny again!  Well of course I’m already a granny to darling little Arthur, but I am going to be granny to TWO.  That’s cause for celebration, I think!  Especially if by celebration, I mean celebratory sewing … which is specifically the kind of celebration this blog recognises, hehe.

Cassie is quite early on in her pregnancy but is already uncomfortable and in need of maternity clothes. Kelly passed on to her one or two of the things I made for her last year, but they are different sizes and so Cassie needed some things of her own, too.

Exhibit A!

I printed out another Closet Core patterns Ebony pattern to cut out Cassie’s size… now I know it’s not technically maternity, but in my opinion this makes a really good maternity option!  And there are so few! Honestly, you  go and check out the maternity range around at the moment and it’s quite shocking how few there are on offer.  Quite disgraceful, to be honest!  There used to be lots of options back when I was sewing for my own pregnancies, but those options seem to have sadly dwindled…  today’s pregnant ladies who sew for themselves have to be resourceful because there is practically nothing at all being designed specifically for the expectant figure.  And even less that’s very interesting.

Anyway.

The first thing I made is the above cotton jersey floral dress for Cassie… she absolutely loves it, which is great because I was initially not a fan of the fabric she chose!  However, once I’d made it and she put it on I could see she looks lovely in these fresh, bright, pretty springy colours.  She wanted something that could work for just about everything, casual and comfortable for both at home and out, she can wear it to work, and even to a formal event if she wants with the appropriate shoes.  Specifically, she has a friend’s wedding coming up, to which she is planning to wear this; and with her high heeled black booties I think it’s going to be lovely.  Plus, it’s stretchy fabric, so it’s very comfortable too, she can curl up on the couch in it just fine.  Pretty? and comfortable too?!!  win win!

I used the aforementioned Ebony pattern, of course, with the set-in sleeve.  The swing of the skirt is a little less than the pattern, because the fabric I had wasn’t as wide as needed.

Exhibits B! and C!

This top is another Ebony, naturally, in the tunic length and with the raglan sleeves.  This spotty cotton jersey is absolutely lovely! such a pretty print.  Oh, both of these fabrics, the spots, and the green, plus the previous blue/pink floral, were all from Spotlight.

please excuse the lumpy look, there’s a cushion doing baby stand-in duties in there and it’s not doing a very good job…

The skirt is Burda 7023, one I made several times previously for Kelly, so we know it’s a fantastic little pattern.  Thanks again to my lovely reader Graca, who very kindly sent this to me!  xx

I did the same thing I did before for Kelly’s skirts, with a self-drawstring in the front band coming out through little eyelets on the inside, so she can tie the front up tighter during these earlier days before she’s very big.

Exhibit D! and sorta E? though I’ve shown this little top here before so it shouldn’t really count actually.  Cassie made the skirt herself, using the Megan Nielsen Axel skirt pattern, and a pretty embroidered and pleated organza that she bought from Megan Nielsen store too actually.  It has a stretch jersey waistband, and is lined with lightweight cotton jersey too.  The little top is one I made for Kelly, and is a streamlined Closet Core patterns Ebony, first blogged here.  I made it using the same oatmeal-coloured, lightweight cotton jersey Cassie used for the waistband and lining of her skirt…  I originally bought this gorgeous stuff at Homecraft Textiles.


I just wanted to add pictures here of two other me-made clothes that Cassie is finding very useful in her pregnancy, a sort of pregnancy-appropriate, pattern round-up, if you like.  Both these dresses are getting worn a LOT.

Exhibit F: this Megan Nielsen patterns Sudley dress that I made for her in 2017, in a gorgeous spotty rayon from Spotlight, originally blogged here.

and also Exhibit G: this Burda dress also from a few years ago, made using a really beautiful, Amalfi coast printed crepe from Fabulous Fabrics, and Burda 02/2015/107, and originally blogged here.  This was my Christmas present to her from 2015, so I’m thrilled she’s got so many years of great wear out of it!

pinterestmail

The post an exciting need for maternity gear! appeared first on Handmade by Carolyn.

a little packet of masks

$
0
0

… we are so very very fortunate here in WA so far, there have been no outbreaks of covid-19 but we’re not taking that for granted! everyone including me is continuing to practise social distancing and hygiene because for sure the current virus-free state of our state cannot last forever.  Masks are not mandatory yet, but one person in our lives who is very health-vulnerable is Craig’s Mum, she is being super careful and wears disposable masks everywhere.  However, they probably cost her a bit so I offered to make some for her.  And she accepted, so I got to work!

Voila!

I made seven differently coloured masks, all are simple, two-layered and pleated so as to expand to fit over your nose and chin too, using this pattern and tutorial on the Makers Habitat youtube channel here.  I made seven so she can wear different colours to match different outfits, and included one pretty floral one too.  I also cut seven cotton denim inserts, which I shall explain later.  Because masks and inserts are small fiddly, nothingy things liable to getting lost, I also made a little custom-sized pouch for her to keep them all safe and together in one spot.

All the solid colours are tightly woven poplin (Spotlight), the floral is a linen, leftover from this top I made for Cassie (Fabulous Fabrics), and the linings are made from tightly woven cotton voile (Spotlight).  The denim inserts are all cut from a piece of coated cotton denim, and I finished the edges simply on my overlocker.  I cut the mask straps from a small leftover piece of white cotton jersey.

Some sewing notes; I’ve found it a really good idea to understitch the top and bottom edges of the mask/lining seam after the first sewing step.  The masks look so much nicer if you do so!

And I cut my straps to be 30cm x 1cm using my rotary cutter and ruler, no finishing because it’s not going to unravel, and just allow the cotton jersey to roll up naturally, if it wants.  I just tied them in very loose knots so they don’t pull out, and Craig’s Mum can re-tie them to fit herself properly.

So, why separate inserts?  Well, homemade masks are considered ok here; as long as they are made of at least three layers of fabric, preferably tightly woven and with the inner layer being of something like denim.  Basically all the patterns and tutorial out there are for two layered masks.  I trialled a few different mask patterns in three layers of fabric, with an inner layer of denim, but actually found this to be a really bad idea; the masks; and the seams! were terribly thick and bulky.  Oh, long story short; I popped it in as an insert and I think it’s going to work really well.  You do have to put the inserts in; which I hope is not too fiddly a thing for her! and push the corners up into the corners of the mask, but once they’re in it’s very comfortable to wear, and you can breathe through the layers quite ok.

The little pouch was fun and easy to make! and it fits all the mask components perfectly… I cut it from an old tablecloth that Sam bought at the Salvos to make part of a costume; the fabric is quite thick and stiff and it stands up by itself.  I pin tucked all the side and bottom edge seams, which helps to stiffen it too, and used a brown dress zip from my stash for closure.   I also put a piece of cardboard in the bottom of the pouch to stabilise it.

pinterestmail

The post a little packet of masks appeared first on Handmade by Carolyn.

some noice new basics…

$
0
0

I’ve had this post sitting just as a draft for weeks now and just keep adding new tees to it but I’m rapidly coming annoyed with myself that when I wear one of them I have to write “not blogged yet” in my ootd blog.  So I’m hitting “post on this thing right now.  I know I know, so ridiculous!

A long-term goal of mine is to have a full complement of colour range in my winter tees; so every time The Fabric Store has an online sale on their merino I tend to hop on and pick up a coupla new colours.  Then that luscious new fabric just sits there in my stash for a few years.  Occasionally I admire the pretty colours and dream about how wonderful it’s going to be when it’s done.  Of course winter is nearly over, so it seems like the perfect time for me to finally get going!  Actually, it’s not such a silly plan of attack really, because it’s right about now that I become so heartily sick of my winter wardrobe that I don’t want to wear any of it, so it’s been rather nice to have a few new things to inspire me!

First up, above: a gorgeous strawberry-milkshake pink – technically Rose pink –  new Pattern Magic twist top, from the first Pattern Magic book by Tomoko Nakamichi.. I’ve made this design up several times before and have loved each and every one.  I love this one too, though I kinda wish I’d made the straight-grain sleeve just a leetle bit wider because while it’s fine while I’m wearing it it’s hard to squeeze my hand through the sleeve and pop it out the other end!  I had actually anticipated this and made it a few cm wider, but it’s still a wee bit snug.  Wearing it here with a skirt made using Vogue 1247, and a scrap of denim given to me by a friend cleaning out her stash… details here

Secondly, a  new Nettie tee, with a collar variation that I’ve used before, and love.  Yes, it might look boring but I absolutely know this is going to get worn to death!  This is in the Vanilla colour way. which I think is my perfect white.  I made this one with the sleeve and lower hems finished with a self-band, as per this method..  worn here with my newest skirt, my sunshine-yellow Paprika Patterns Jade skirt, details here

Thirdly, another modified Nettie using this stunning burnt orange merino, actually colour Paprika from the Fabric Store…Worn here with my Sabrina mini-skirt, made with a beautiful herringbone wool tweed, inherited from my grandmother’s stash, details here

Fourthly; yet another Nettie, made with this Avocado merino from the Fabric Store; with a slightly wider and higher collar… to be honestly I’m not totally sold on the collar, it’s maybe a scant 1cm too high and I haven’t ruled out cutting it off and shaving off that little bit!  mostly just for appearance sake, I may even be glad of the height when the weather is cold again.  We shall see, we shall see…  worn above with my blue Sasha trousers, also a Closet Core pattern, and blogged here.

Anyway, I really like how fresh my little collection of new basics is looking right now!

pinterestmail

The post some noice new basics… appeared first on Handmade by Carolyn.

snowy white dress

$
0
0


It’s a bit sad that this dress looks like a white-out and doesn’t photograph as “exciting” because it’s a thing that’s been on my sewing bucket list for YONKSSS, and I absolutely love it!  I think it’s elegant and beautiful and, excuse me for saying so, but I think perfect also … and I’m gonna wear this to death!!

Cassie gave this piece of soft ivory crepe to me for Christmas one year… quite a few years ago actually.  I feel a little terrible that it’s taken me such a long time to getting around to making it up, but I also don’t! because I really wanted its outcome to be perfect. Ok ok, to be as close to perfect as possible… and I’m so very happy with how it did turn out that at the same time that I’m relieved I waited til I was really ready.

The crepe is from Fabulous Fabrics, as is the lovely, light beige lining fabric.  It’s actually leftovers from my mother of the bride dress, for Cassie’s wedding, and beautiful quality too.

Ordinarily I wouldn’t put one of my labels into the back of a delicate dress like this, but I’m determined to use these labels as often as I can, because they’re such fun! and it gives me such a kick to see them in my clothes.

For the hem, I used this triple-stitched method, which makes a really nice, beautifully clean finish.  The only thing to be careful of, especially in a slightly “sponge-y” fabric like crepe, is to just slightly stretch the fabric as it goes through the machine… if you don’t I find the fabric bunches up just a bit, draws in the hemline.  Stretching it doesn’t give the expected lettuce leaf finish but instead gives a beautifully smooth hem.

This is my eighth thing in my #maketwelve this year, from my twelve selected designs and fabrics… hmmm what should I possibly make next?!! I wonder!

pinterestmail

The post snowy white dress appeared first on Handmade by Carolyn.

heaven…

$
0
0

Heaven by name, heavenly by nature?  Well, I think it’s a pretty nice dress, at least!

🍓
this is the new Heaven dress pattern by @fibremood; an unusual design with a chic, wide trapezoidal neckline and an interesting combined sleeve/yoke arrangement that I’ve only ever seen in a few Japanese patterns before now.

I’ve learned to overlook the awfully unflatteringly “puffy” line drawings featured in all the fibre mood patterns, because the finished products are invariably not at all like that! anyway I was quite intrigued by the lines of this design…  initially, while perusing the promotional photos… see below! I did worry that the sleeve/bodice corner junction at the neckline looked like it might be a little on the tight side… however when you’re wearing it, it’s more like nicely “firm” rather than tight and I think that structure is necessary to keep the neckline in place and also from gaping open.  The dress is actually very comfortable and I really enjoyed wearing it!  I even got down on the floor and had a play with Arthur in it, and was perfectly fine!

🍓 I also feel like it turned out to be pretty cute too  🙂  I bought the lovely cotton/linen mix fabric from the upholstery section in @spotlightstores … I just fell in love with the gorgeous deeply, dusky-raspberry pink colour and HAD to have it!

🍓This dress really was a fun thing to make, very quick and easy… I like the way the elegant and unique sleeves are set off against a sleek, just slightly fitted body section.  I like the sleeves pushed up, but they do look very elegant let down to the wrists as well, I think.

sleeves down

🍓 closure is by invisible zip in the L side seam.

🍓I didn’t line it but to be honest I think it would be better lined, particularly for an “autumn” dress, which it is definitely designed to be. I might even have a go and add a lining somehow, when I get a bit more time… I will update here when I do!

another bonus; all that ugly overlocking will be covered up if I line it!

It has to be lined, a petticoat will not do.  I did try it with a few of my petticoats and they all show at that wide wide neckline.  Yes, my bra strap shows at the neckline in a few of the pictures here, which I know is such a no-no.  However I felt a bit better about this when I noticed that even the model’s bra strap shows too.  I’m in good company!

🍓 btw, I did NOT shorten mine, this the length of the pattern.  I honestly think they must have added length to the above one modelled for the magazine!  Actually, I prefer it as that little bit shorter than knee length… it feels more like an autumn-al length, if that makes sense.

Details:

Dress; the FibreMood Heaven pattern, upholstery linen mix from Spotlight
Shoes; asics, from the Foot Locker

pinterestmail

The post heaven… appeared first on Handmade by Carolyn.

sockies

$
0
0


my previous batch of sockettes has been worn practically threadbare, so I indulged in a happy rummage through the prettiest of my cotton jersey scraps, followed by some samurai wielding of the rotary cutter, a spot of rapid vrrrm-ing though the machine, and voila!!   new ones!

I used the syttochprytt ballerina sock pattern which is apparently currently sold out in the shop so I’m hoping it gets restocked soon because it’s such a goodie, no seam underneath the foot and so quick and simple to make.

All my cotton jerseys are leftovers from previous projects… so apart from the skinny elastic around the top they’re basically “free”!   I love using up leftovers!!

pinterestmail

The post sockies appeared first on Handmade by Carolyn.


stuff for Arthur…

$
0
0

those little pursed lips!!

So, Kelly had lent me one of Arthur’s onesies so I could make a better fitting pattern than the Burda one I’ve been using up until now… for some reason that pattern makes for a very short, wide onesie.  And I guess he could be a very tall, skinny baby?  Although I think the sizing could be a bit off, because he looks like a perfectly normal shaped baby to me?!

Anyway, my first go was using one of Tim’s old T-shirts, above.  To be honest, these are my favourites for babies, teenage T-shirts are so cool and so they of course make for very cool babies’ onesies too!  I used some of the details for the new onesie, even the little Rusty tag which I un-picked and re-stitched into the sleeve seam.  Cute!

Then I made him a new one using new fabric.

So, dilemma… The new one will be a lot more robust, because of being made of new fabric, obviously.  The ones made out of old T-shirts are a little fragile, since the T-shirt itself has been washed and worn, over and over and over by the time you’re refashioning this much-loved thing, with all its sentiment and memories, into a new thing for your much-loved baby.

The new onesie, though it’s going to be a “better”, has none of that, so it’s just not quite as cool or interesting.  I kinda love the refashioned ones the best, though you know they just can’t wear them with as much confidence in durability as the new.  Hmmm.  Anyway, he still looks cute in them both!

And, I have a reasonably good pattern now.  The clincher, which gives it a really great fit, is that gusset bit.  To make the neckline fit over his head, it is one of those open ones, where the front laps over the back at the shoulder, but is otherwise not stitched together.  It works really well.

Also, I’m looking forward to making Cassie’s baby some things out of the new pattern too.  When/If I get time!

pinterestmail

The post stuff for Arthur… appeared first on Handmade by Carolyn.

a colourful coat

$
0
0

I made this new coat-ish/dress-ish/shirt-ish sort of a thing for myself!

How beautiful is this linen??  It’s stunning, isn’t it.  I’m head over heels in love with the print – gorgeously colourful, bird-strewn, with the looks of an ancient, beautiful patchwork… the colours are so painterly/flower-garden with that lovely distressed quality that appeals to my quixotic little heart that likes stuff to be rustic but also pretty too.   I’d only bought a shortish length really, and it really teetered on the verge of being Too Good To Cut, I had it laid out for quite a while, trying to gathering the courage to take the scissors to it!  I only managed it really because it was on my list of twelve things and having those intentions blogged sorta forces me to stick by my own self-commitments.  I bought it some time last year from Fabulous Fabrics, using a voucher that was a birthday gift from some of my lovely friends.

The pattern is the Carolyn pj pattern by Closet Core patterns, yes, the one named after ME!  I can’t say still how thrilled I STILL am to have a pattern named after me, it was such a huge honour, and I often think how I’d like to have more of “my” pattern in my own wardrobe too… I still wear my white Carolyn shirt quite a lot.  I saw Rosie from ArtworkerProjects had made her Carolyn as a shirtdress, and this made me think I’d like to make something like that, and I’d also seen, and pinned this beautiful coat once upon a time, and the two thoughts slowly alchemistry-ed  and absolved themselves into this one project in my mind, eventually…

I lengthened the body pieces, obviously, and I also lengthened the turning point of the lapel a little, so the coat buttons a little lower than it does on the pattern.  The other, internal, change I made was to add a back facing… this stabilises this area, something not necessary in a shirt but that you definitely want in a coat, for sure!

Oh, I added pockets… #ofcourse

I finished all the internal raw edges with HongKong seaming… because obviously in a garment that will flap open while you’re wearing it you want the insides to be as pretty as possible!  For this, I used the leftovers of the turquoise poplin, that I used for one of the masks I made for Craig’s Mum.

Now’s the moment when I indulge in a bit of zero-waste bragging, ahem #insufferable?  #moi? … so; I made a long bias strip using the entirety of the turquoise leftovers and have about 15cm of it left…  when this happens in a project it’s actually SO satisfying!!  Also, there are only the smallest of the colourful linen print scraps leftover too…  I might have enough for a doll’s mini-dress, but not much else!

For the button, and continuing on with my policy of not buying any buttons unless I Absolutely Have To; I found this purple, wool-covered button in my stash, and I love how it doesn’t really match, but at the same time it’s kind of a perfect match too.

So, if you hate obsessiveness in sewing, look away right now.  I initially just used off- white thread in my bobbin for when I stitched down the front and back facings… and it looked pretty terrible. I tried to not let it bother me, but ultimately twas a lost cause… eventually I had to unpick most of it and re-do it using matching threads.  So, some of the sections are in blue, some are in red, some are in off-white and some in pink.  Yes, this is a weird thing to do, but I’m very satisfied with how it looks, so… yeah.  I think it was worth unpicking and re-doing, from my point of view!

This is the latest, and ninth, thing in my little collection of twelve things, that I proposed I would make for myself at the beginning of the year and … regretted…?  many times over?!?!  ok, not so much “regretted-regretted”, because I sincerely love all the fabrics, and have sincerely loved all of the finished products too, just “regretted” as in “have struggled with” as in I just don’t have as much spare time nowadays to lavish on them as I initially thought I would.  I’m NOT trying to busy-brag because I kinda loooooathe when some people go on and on about not having time for fun stuff like it’s your job or something, so I apologise for those overtones… wooo!  Sorry about that.

Anyway!  I’m so happy I’ve got this made! and also that I stuck with my original “coat” plan and didn’t get sidetracked into some little sundress like I was SORELY tempted to do instead, multiple times over!  I really love it!


Details:

Coat; from the Closet Core patterns Carolyn pj pattern, linen from Fabulous Fabrics
White dress; Vogue 1351, white crepe from Fabulous Fabrics, details here
Sandals; ye olde favourites from Zomp boutique

pinterestmail

The post a colourful coat appeared first on Handmade by Carolyn.

pretty little maternity dress

$
0
0

No, I’m not pregnant, obviously, but I do currently have a pregnant daughter … She is wearing the things I’ve already made for her constantly, AND I’ve also lent to her my rusty lace Cissy dress for however long she needs it – and boy do I miss it!  Even so she is in desperate need of more options.  Well, how could I not do something to help out?

I’m modelling it here though, because she and D have moved into their new, own home and she is now a half an hour’s drive away (sob)  I still can’t get used to her being so far away!!

While I was wearing it I was reminded how much I love this cute style.  The pattern is the Megan Nielsen Sudley dress, one I’ve made for myself once previously here, and once as a dress for Cassie here.  I really like the oversized, comfy skirt and three quarter sleeves, which I have gathered up with a loop of skinny elastic inserted in the casing; and the keyhole neckline with spaghetti tie is really pretty.  Otherwise, the style is quite similar actually to the aforementioned Cissy dress in many ways, with a few key design point differences of course! but the style and feel make them very much sister designs, I think.

The fabric is this, very pretty, rayon crepe from Minerva… isn’t it lovely?  I think it’s really sweet and “granny’s wallpaper”, in a pretty old-fashioned sort of a way.

Now I have a confession, I initially cut out a different thing from this fabric, and … well it was terrible.  There’s no sugar-coating it.  I was quite depressed about it actually, had bought the pattern with great expectations and excitement, and it didn’t take long before I realised it had … issues.  I won’t name and shame it, well, not just yet! but I think I’ll give it a revisit at some point and work out a re-jig.  I already have plans.. but more on that at a future date!  I managed to cut out the Sudley pattern from the pieces, and miraculously I’m fairly confident I have enough small pieces leftover that I think I can cobble together for a thing for me too.  I just need to get around to it!!

… crazy Spiderman picture inspired by a Vogue magazine shoot…

pinterestmail

The post pretty little maternity dress appeared first on Handmade by Carolyn.

a blanca flight suit with a difference

$
0
0

I really loved the industrial-chic vibe of the Closet Core patterns Blanca flight suit pattern as soon as it came out… loved the zippered breast pockets, the front opening zip, the front hip pockets, the er.. bottom? pockets; sorry have momentarily forgotten the technical term for those things.  Anyway…  such a plethora of fabulous topstitching possibilities!  I actually love top-stitching, it’s one of those calming zen activities that pleases my inner love for well-ordered neatness…  and just the pure and simple visual joy of looking at that evenly dotty line marching its way across cloth.  *happy sigh*

I think though, that I’ve long come to terms with the fact that I want only a limited number of trousers/pants in my wardrobe.  I have some nice ones that I enjoy wearing but the thing is that I really really love dresses and skirts the most.  And jumpsuits, I’m even more happy to have none!  But of course, how easy is it to make the Blanca pattern as a dress?  Super easy!  I didn’t take any pictures, but you just simply cut the pants pieces in a skirt shape instead.  I think I added a squidge more width to the hip area too… just in case, with a view to removing it if I needed to.  I didnt  #pearfromwayback

I also added a walking vent to the skirt back in the centre seam… It’s not really necessary for walking, I put it in mostly for visual purposes because I thought the back skirt would look a tad bland without something there.  I’m really glad I did think of it, because I think it does add a touch of interest.

Want to see something funny/annoying?  I originally cut the vent to a certain length which I thought would look visually nice.  Then I hemmed the skirt and of course the vent became too short!  So I had to carefully unpick it, and splice in a little wedge of fabric neatly to fill the gap, and redo it.  Was this easy?  NO!  Ha!  I think it looks neat enough, and since it’s hidden inside the vent away from view you can’t really see it at all.  I’m pretty happy with how almost-invisible it turned out though, even if you’re looking!

Note to self though; if you’re putting in a walking vent ad hoc, cut it way way too long to start with.  You can always cut the top down if it’s too long, and if it’s not?  This simple precaution will save you a heck of a struggle later on.

Those tabs are supposed to be down near the trouser hems in the original pattern, I put mine on the sleeves instead.  The buttons are pretty marbled ones from my stash.  Oh, fabric… I bought this rusty coloured cotton twill from Spotlight stores, fun fact: this is actually the very last piece of fabric I bought before lockdown commenced.  I bought the wine coloured zips at the same time, and I already had the ivory topstitching thread in my stash.

Look at this perfect belt buckle!!  I bought this from Closet Core patterns too… it’s the absolute perfect finishing touch.  I had to wait a whole month for it to show up, but I’m so thrilled with it!

I had a small scrap of striped linen, leftover from this Perth top I made for my sister-in-law S, which I managed to cut the lining for the front pockets.  I love this little Beetlejuice touch peeping out!

Back belt loops, back pockets.  Any excuse to indulge in a bit more top-stitching…

Who says you can’t fly in a dress?  Up up and away!!

pinterestmail

The post a blanca flight suit with a difference appeared first on Handmade by Carolyn.

Tjilkamala Rockhole

$
0
0

I’ve made up the first of my indigenous fabrics that I bought back in … June? I think, and I posted about it here… 

this stunning print is Tjilkamala Rockhole, designed by Alice Nampitjinpa; it was produced by Ikuntji Artists and I bought it through FlyingFox Fabrics

I decided upon a simple little dress with matching hat ensemble, inspired by this Marimekko outfit I’d seen many years ago…  btw I had to search and search and search to find this image!!  Note to self; always “pin” your favourite pictures!

I picked one of my favourite “simple” little shift dress patterns, the Named Inari tee dress, and Vogue 8844 for my matching hat.  These are both patterns I’ve used many times before, and I love them both.  I did my usual modification for the Inari dress by putting inseam pockets into those elegantly swooping side seams.  Oh, and I also widened the sleeve at the hem edge with a big big wedge insertion, as described here.  This adjustment enables you to lift your arms over your head without the dress riding up so much as to expose your knickers underneath.  Truth!  It does make quite a difference to the wearability of this dress, particularly in a non-stretch fabric.

For the neckline facings, I used a deep chocolate brown cotton voile, bought originally from Fabulous Fabrics.  I also cut the artist’s name and that of the print from the selvedge, and stitched them to the back facing.  I like doing this for special fabrics, and this is surely a very special fabric!

I did a search to find out which way up the print was supposed to go.  To the best of my knowledge, this is correct  🙂

I’ve made the Inari so many times before I don’t have much else to add … oh, except I did do something a bit different with the hem!

wait; what’s this?  WHERE’S THE HEM?!!


So the hemline for the Inari has side splits and a high/low hemline, so you can see the underside of the fabric quite clearly when you’re wearing the dress, especially when sitting down… and the wrong side of this fabric is the solid, deep chocolate brown that is the background of the print.  I decided I didn’t like the idea of seeing the print of the hem visible inside the dress and only wanted to see plain chocolate brown fabric.


So; to “camouflage” those hems I cut wide bias cut strips of same chocolate brown voile that I used  for the neckline facings and attached these along the fold line for the hem.  I then folded the top edge over and inside the raw edge of the hem, to hide the print and machine stitched close to the edge.  Finally, I hand stitched the hem to the dress as normal.  So yes, the full 3cm hem of the dress is there, and essentially the chocolate brown voile is acting like a “mask” over the top of it, hiding the print.  The side splits were also “masked” under bias cut strips in the same way.

All side splits and hems were hand-stitched, so as to avoid any visible stitching on the outside of the garment that would besmirch the purity of that beautiful print.

The hat: I LOVE the hat! even though if I’m realistic I know I’m probably going to get more wear out of the dress, but I still love it!  Serendipitous thing; when I dug out the pattern, I found to my great joy that past me had cut an extra brim interfacing, once upon a time. It was neatly folded up in with the pattern pieces.   I’d completely forgotten about it, but I guess the last time I’d made the pattern I must have thought I needed two.  Yay, past me!  Making the hat is simple enough… you can read my review of this terrific pattern here…  I used the same chocolate brown cotton to line it as for the inner bits of the dress.  I did put my own label in the hat!  I also put in a hanging ribbon in under the grosgrain ribbon just a small scrap from my sewing basket.  A hanging loop is not part of the pattern, and not an essential thing either, but it’s also something I think comes in very handy when you do have one in the hat.  I’m really glad of the one in my khaki hat and many times I’ve thought about putting one in my white hat.  I think I’m just going to get on and do that right now…

I bought the chocolate brown grosgrain ribbon from Spotlight.  You can see here a patched bit in the brim lining… I didn’t do this because I didn’t have enough fabric, I have plenty!  I actually have enough leftover for a little skirt sometime down the track too, but only if I was a bit devious with my cutting out here.  I decided a small patch in the brim lining was a small sacrifice to pay to leave myself enough fabric for that future skirt!

my labels are from the Dutch Label Shop

So, obviously I’m pretty happy with my new ensemble!!  It feels super special. I love how it’s such a visually exciting and eye-catching print, but most of all I love how it’s also so completely Australian.  It’s just beautiful.  I am particularly happy and thrilled to have found places to buy indigenous fabrics, to be able to support indigenous artists, and of course I am most certainly going to purchase more in the future, once I’ve finished making up the other print I bought in June.  I already have my eye on a few more!


Details:

Dress; the Inari tee dress, pattern by Named, in Tjilkamala Rockhole print cotton, designed by Alice Nampitjinpa
Hat; Vogue 8844, in Tjilkamala Rockhole print cotton, designed by Alice Nampitjinpa
Sandshoes; Trenery

location; Winjee Sam, Yallingup

pinterestmail

The post Tjilkamala Rockhole appeared first on Handmade by Carolyn.

I made some cool blue sandals (shoes)

$
0
0

Woo-eee!  I really really wanted to add another pair of handmade shoes to my collection this year and after a whole bunch of postponing and procrastinating and a little bit of prevaricating too… ta da!  I basically had to force myself to get started – I hadn’t made a pair of shoes in over a year and it suddenly seemed quite daunting, and hard! but of course in the end I really enjoyed myself making these.  And I LOVE them!

I bought this quite thick blue suede from The Fabric Store in Auckland, during one of the massive stopovers that Air New Zealand gives you when you’re flying onto North America.  Which I have done twice over the last three years.  I think this might have been the Alaska trip.  I’d originally thought I’d try to make closed toe, oxford style shoes or derbys but realised the suede was really too thick for that.  You need for the leather/suede or whatever to be quite flexible and easily mouldable around your lasts without wrinkles or puckers, which is pretty much impossible in a thickish material.  So I eventually went with this, quite simple style instead.

Cute, huh?!  I’m pretty thrilled with them!  Most of the other components are from one of the kits I bought from Lisa of the Shoe Camaraderie, and I followed all her instructions too.  Although like I mentioned, I used my own leather and the design of the uppers is my own too.

I really wanted a matching blue thread for those visible stitches on my shoes, but didn’t have any, not even embroidery thread in the right colour!  which is why I settled upon the beige waxed thread that Lisa supplied with my kit.  Obviously this is the perfect stuff to use for the job anyway, and I think I’m fine with it being a contrasting colour, since it is the same colour as the bottom part of the sandal too.

Having a kit makes it all so much easier, plus I’ve done two workshops with Lisa now… so you’d think I would just barrel through, no problem; whip up a pair of sandals in no time.

Nope!  I stuffed up on multiple occasions!

Firstly, I went to the effort of masking up my lasts and drawing out a fabulous and as it turned out, ridiculously complicated style for my sandals.  And made a pattern and all.  Let’s just say, it did NOT WORK.  I did try pretty hard to make it work and then moved on to trying to force the pieces into a different design, which obviously was not going to work either.

Settled upon this, much simplified design, cut out a whole new set of pieces.  Confidently whipped up a coupla buckle and strap sets and practically finished the sandals.  Smooth sailing!

Noticed the buckle and strap were going the wrong way, ie buckling forwards rather than backwards.  *cue silent scream*

I almost just let it go, but then realised I had plenty of leather actually, enough for new straps, and if I was going to do this thing, may as well do it properly.  Cut new strips, made new buckle and straps sets.  Completed the rigmarole a second time.  Obviously not quite so smooth sailing this time.  It never is.

Next, I’d applied glue to the soles with great thoroughness and excellent coverage… or so I thought.  After leaving them overnight, I noticed in the morning a few millimetres of lifting on the side of one of the sandals.  This is very very bad.  You do NOT want gaps.  I managed to pry open a slightly bigger gap, enough to dribble more glue down, spread it around with an opened-out paper clip, and propped it open with another paper clip to go tacky.  I gave it masses of time, and fortunately this very very NOT-recommended trick seemed to work.  A miracle!!!

On to the finishing touches… went around to Tim’s place to retrieve the sander, which he has for some time, I might add.  Plugged the sander in, very happy I was basically on the home stretch now, and turned it on.  Nothing.  Dead as a doornail.  Hunted out a different extension cord, tried different sockets.  Brushed sawdust and cobwebs from out of likely looking spots.  Nope.  Finally rigged up the the orbital sander instead and got the job done, which did take longer but of course not nearly so long as if I had to sand by hand, so all’s good.  Apart from the fact that maybe we now need a new belt sander, of course!

So, this is the tenth thing in my make twelve, the “making plan” I set up for myself at the beginning of the year.  This particular project was arguably the most intimidating out of the entire twelve, maybe the most challenging too.  I do love making shoes but it’s definitely next level stuff, catapulting me right out of my comfort zone … so I feel like the final two are going to be easy peasy, lemon squeezy!  We shall see!

pinterestmail

The post I made some cool blue sandals (shoes) appeared first on Handmade by Carolyn.

this fabric is gorgeous!!

$
0
0

The funny thing was; I knew I was going to like this dress because the fabric is just so utterly divine, the pattern that I was a little hmmm about…?  but I’m completely in love with the end result so all’s well that ends very very well!

So, fabric first… this is a cotton lawn from Storrs of London.  It is described as a 100% Egyptian Superfine cotton lawn, and it is, as already mentioned; DIVINE.  It has the exact same feel and hand, and gentle light crispness as Liberty… although diehard Liberty aficionados might come for me, but that’s just my honest opinion!  This particular design is Cap Ferrat, and I honestly struggled to choose just one because there are so many breathtakingly lovely colours and prints to peruse.  I absolutely have to get some more for a shirt for Craig… or maybe just another piece for myself hmmm  hehe…

The pattern, this is the popular Deer and Doe Mysotis dress, of which I’ve seen more lovely versions than I can mention!  I actually bought the pattern two years ago, and it’s taken me this long to finally get around to it, which is a little embarrassing, huh.  I dunno, I’ve just been busy. #weddings Anyway, I’ve always liked the style and thought this gorgeous print would look nice in the style.  And it does!

So like I said, I did have reservations about it though… as I shall now address.  The bust darts on this thing are FIERCE.  I think it really is intended for a far more busty lady than myself, to be honest and was quite worried I was going to end up with the dreaded deflated balloon look on my chest.  I debated whether to tone them down, perhaps to redraft the front to be a more gentle princess seam or something.  Eventually I did reduce the darts a bit but still went for the double darted style as designed, and while the front is still a wee bit flooffy on me I don’t think it’s too bad.  For a future version I will definitely tone them down even more though.

Everything else about the style I love, though.  The sleeves are super lovely, and I completely adore the gently V neckline too, and even the gathered skirts are beautifully proportioned and look very on-trend to my eyes.

It does feel quite short on me! and I even made the hem a teensy bit longer, and hemmed as narrow as I could.  Probably best to avoid touching my toes in public… but I do think the style is super cute though, so I’m happy.  Cute and flirty and fun and perfect for summer.  Everyone needs a sweet little red dress for summer!  🙂


Normally I find gathering to be a pain in the neck, but this crisp, very lightweight cotton took to it beautifully.  Yes, I can’t believe I’m saying this, but the gathering was actually a dream.  You know how some fabrics are just a delight to work with, from the very beginning of a project to the end?  Well that’s exactly what this stuff is.  Just pure joy.  In case it wasn’t obvious, I can highly recommend!

I also whipped up a quick mask!  Haha,  I felt extremely self conscious wearing this! even though I was by myself taking these photos, apart from Clara; see, we are extremely lucky so far here in Western Australia that our hard border closure has ensured we have no community cases of covid-19, so we have not had the need to wear masks yet; but I think no one is kidding themselves that we will never get cases here.  I think it’s inevitable, eventually.  Anyway, I do carry one of my masks around in my bag all the time, and I thought it would be fun to whip up a matching one for this dress … I’ve seen so many cute matching masks from other makers on instagram!  I lined it with red poplin, leftover from one I’d made for Craig’s Mum, and cut strips off an already partially cut-up old free Wildcats T-shirt for the straps.

So, funny story… I know it’s not obvious in my pictures here, but… did you notice my footwear?!!  SO I got dressed in the morning, in a hurry, because my days are packed solid at the moment and I just grabbed my thongs, shoved them on my feet and was off.  I took some photos of my new dress for my blog here, did some work, and then at lunchtime took myself and Clara off to the beach for our walk.  And only much later did I suddenly noticed my feet.  LOL!

Details:

Dress; Deer and Doe Mysotis, in Storrs Egyptian cotton lawn, col. Cap Ferrat
Hat; Vogue 8844, white corduroy, recycled from old jeans, details here
Mask; made using the Makers Habitat free YT pattern and tutorial here
Thongs; fipper, bought in Bali on out holiday 2 yrs ago

also, actual photo from my photo shoot today

pinterestmail

The post this fabric is gorgeous!! appeared first on Handmade by Carolyn.


limoncello

$
0
0

I originally bought this fabric simply because it reminded me of limoncello; specifically limoncello partaken after a long day hiking thr0ugh the delightfully bucolic Italian countryside… yes of course it is indeed that most wonderful variety of fabric; souvenir fabric!  I bought it in Rome, in the famous Fratelli Basetti Tessuti back in 2012, after our hiking holiday… it is a most gorgeously crisp linen in a sharp, warm, citrusy yellow with the skinniest white pinstripes.  I have used a small piece of it previously to make one of my Perth dresses, and so I have learnt that this gorgeous colour unfortunately runs like the the wind!  My Perth dress started out yellow and ended up basically beige eventually.  Sad, but true.  It’s ok though because I’m perfectly fine with giving it a refreshing new dye-bath when the time comes.

The pattern is the FibreMood Feliz.  I have to admit I was a little suspicious of how very long the skirt is! and was initially dead set on shortening it just about immediately, but actually? I kind of like it like this.  The Feliz has some nice features, specifically I like the curved back yoke and the flat, narrow collar; and I love how the workman-like vibe of those rolled up sleeves clashes stylistically with an almost impractically long skirt.  Not that the skirt is really “impractical” in a real life sense but you know what I mean.  I’m going to give it a good fair go before thinking about shortening it anyway.

Changes; just a few very minor tiny things.. Because the sleeves are worn rolled up most of the time, I decided to do a flat-felled seam finish on the sleeve seams,  The seam allowances are only 1cm so this was a tiny bit tricky! but definitely worth it.

So, here’s a slightly funny thing…. see how the back bodice of my dress pictured below curves down to the side seams? well the pattern piece, below right, is most definitely shaped just to do just this, however, the line drawings of the dress do not show this downward curve.  Mmmm…

I made the back yoke double layered and utilised the burrito method to get a perfectly neat finish on the inside.  This meant I could also add one of my labels without visible stitching showing on the outside, which is nice  🙂

The slimline, stamped brass buttons are so lovely, I got these from Fabulous Fabrics.  I’ve actually used these twice before, for this olive shirt, and this blue shirtdress, now a shirt too.  I know I shouldn’t ever be using the same buttons, you should find different ones.  But you know when you’re perusing the button selection and you see they still have that super cute button you’ve used before… and you know you’re being predictable and unadventurous but basically one knows a good thing when one sees it and in the end why fight it.

Details:

Dress, Fibre Mood Feliz, in lemon-yellow pinstriped linen from Italy
Tights, made by me here
Booties;  nylon from Zomp shoes

pinterestmail

The post limoncello appeared first on Handmade by Carolyn.

separated Cissy… and it’s green

$
0
0

Seems like a bit of a non-sequitur, but kinda sums up the whole process actually.  Let me explain…

So I set out to make another Homer and Howells Cissy dress for myself because I was so pleased with the rust lace one that I’d made first off the block.  This is back in April by the way, back when we were in a lockdown of sorts here in Perth, when we were all terrified of the virus and didn’t know as yet that there was no community transmission here.  Yes, I do indeed know how very lucky we are! and it’s fantastic that everyone here is working hard to keep things that way too… but I digress!

I needed a sewing project!

I had some khaki-olive-blue-grey, slightly crinkly cotton in my stash  that Mum had chucked my way, when she cleaned out her own stash, and it was just enough to cut out the Cissy pieces.  Awesome!  It was meant to be!  However when I put it together I was just like…. blah.  I think when you’re feeling anxious and depressed then your soul cries out for cheer and vibrancy, or even just strength, even in colour form; and drab colours just kinda drag you down … however at the time I determined a waist was what was needed.  So I proceeded to cut a straight waistband from the scant remains of fabric, miraculously I had a strip just long enough! I took off the bodice and skinny-hemmed it, making a cute little loose crop top.  I the sliced up the centre back of the skirt and inserted an invisible zip, re-folded the skirt pleats into my new waistband, and stitched on a button.  Ok! I thought.  This is going to be great!

ORIGINAL COLOUR… yeah it’s not awful, I guess


It lay in my wardrobe during winter and I was anticipating a lot of wear once the warm weather hit… and when I did my rainbow week mini-challenge I thought it would be my “green” ensemble…  I frocked up and took a few photos, a sample of which is below, and man, at that moment the not-greenness of the whole thing just killed me, so it did not feature in that week after all.  I still thought the ensemble had promise and I was on a mission to save it now!  I wanted GREEN!   I had to wait until Spotlight had restocked its dye supplies but finally they came in.   And into the spa dye-pot it went!

looked terrible in this light!…

I used a whole pack of Rit Kelly green, and I very happy with it now, I think the strong colour is just what it, or maybe I – needed!  The crop top is very cropped, and I have to be careful about lifting my arms up too high, and I’m planning next to make some pretty little lace camisoles to wear underneath.
Watch this space!

Details:

Top and skirt; from the Homer & Howells Cissy pattern, old cotton, overdyed by me
Caramel sandals; super old, originally from an op shop.  I need to replace these, desperately!

Green turtleneck: modified Closet Core pattern Nettie in green merino
Black tights; my own design, black stretch poly
Black booties, from Zomp boutique

pinterestmail

The post separated Cissy… and it’s green appeared first on Handmade by Carolyn.

madder and madder…

$
0
0

I made a dress, using this very precious piece of fabric that I have been too frightened to cut in to for years now … ok so I’ve just checked back and it first came into my life back in August 2015,  FIVE YEARS AGO!!  well it’s about well overdue that I made it up, hey…

So what is this, hmmm?  well I did a fantastic one day, natural dyeing workshop with Niji iro Kitta during which I dyed a length of pure white linen with natural madder root.  They had two options; you could either choose to dye with madder, or indigo.  I (obviously) chose madder, the natural dyestuff from the root of rubia tinctoria and since I later got a chance to also dye with natural indigo too, I’m so glad I chose madder this time!  I went along with Nicki (this is moonlight), Sue (fadanista) and Megan (meggipeg), and first posted about it here

It was heaps of fun!  I remember our fabric had been soaked in soya water and dried first, which apparently helps the dye “take” thoroughly.  Before dyeing, we had to embroider our initials or something marking the fabric as “yours” in some way.  I did mine in red thread; and when it came time to cut out my dress, I carefully made sure to cut around and save the corner with my initials.  And rather than use one of my usual labels I stitched the little square of linen featuring my embroidery inside as a sort of reminder of the day.

I used Vogue 2900 to make my dress… I’ve used this pattern twice before and I really love it!  I think it’s all of comfortable, elegant, classy and beautiful too… I mostly made it just about exactly as per the instructions, topstitching all the seams with matching thread.  I think my only difference was leaving off the pocket facings because I had enough fabric to simply cut the pocket piece and lining also from the self-fabric linen.  I also had enough fabric for a mask!

Hmmm, I wonder if we’ll ever need to wear these here?  I could be making all these masks for nothing!  I guess we’ll have to wait and see.  I sure have nothing against wearing one.  Also, I know I sound like a broken record, but again we are so lucky to have no community transmission of the virus here.  So lucky!   for now!

I finished all the raw edges inside with red overlocking thread, and used a red invisible zip in the CB seam. The natural madder root produces a colour that I would describe as more of a coppery pinky-orange rather that a red actually… and I really like the red inner workings inside against this colour, I think it’s a really pretty contrasting feature.  Of course a pretty contrasting feature that no one is every going to see, haha.  I mean, that’s ok, because who do we do this for but ourselves anyway, hmm?  Exactly.

This is the eleventh thing in my list of 12 things I was going to make this year, from the 12 fabrics I nominated as well… hurrah!

 I have just one thing left on the list, and I think I’m going to be able to manage it.  And I love this dress!  I adore the colour, and the style is right up my alley, so I’m so happy Yoshimi recommended the pattern to me all those years ago.  🙂


Details:

Dress; Vogue 2900, madder dyed linen
Sandals; super old, from an oppy… I love these and really really need to replace them!

I propped up my phone in a tree and snapped a quick picture on our walk, even though it’s a bit blurry… oh well!

pinterestmail

The post madder and madder… appeared first on Handmade by Carolyn.

I’ve been making a whole bunch of stuff…

$
0
0

Ok… stuff!   I just have to write this quick blog post or … I dunno, explode or something!  because right now I am the Red Queen, running as fast as I can just to stay in the same place… and if I don’t just get on with a thing right this very minute then will it ever ever get gone on with, at all?!  That is the question?  So, on with the stuff!

So, a while ago I’d written about how the Burda baby onesie pattern I’d been using for Arthur had proved itself to be too wide for the height of it? Like way too wide, fall off the shoulders wide, while the poppers at the crotch were straining to stay shut?  Well, I made a new pattern, and it’s super cute.  Of course it is!  When are tiny weeny baby clothes NOT cute, hmmm?  Exactly!

So above is the first one… yellow striped cotton jersey from Spotlight stores…  At the same time that we got this fabric, we also bought some lengths for bunny rugs for the baby.  When I say “we” by the way, that is NOT the royal we, although I am indeed in the thick of watching the Crown at present and as such am become quite proficient in such conversational niceties…  no, actually Cassie and I went to Spotlight together and selected fabrics for the new baby’s, new nursery.

I had also previously bought some white cotton jersey, to make a maternity frock for Cassie.

She’d sort of semi-designed what she wanted in the dress, a tank dress, with the tank front able to be lifted up for breast-feeding, layered over a sort of boob tube with an elasticated top edge underneath.  The skirt is a quarter circle skirt. It’s a pretty simple design and style, and she loves it!

Side note: I’ve had to look at the messy lower half of this dresser for years.  It took putting the house on the market for me to finally do something about making this a wee bit prettier to the casual observer.  Voila!!  A sweet lace curtain!  Side note to the side note;  we sold the house… very quickly as it turned out.  The beach house also sold very  quickly, like before it even went officially on the market.  My head is spinning!!  I’ll talk more about this later, right now it’s all still a bit overwhelming.

Next!  I bought this shark print cotton jersey from Spotlight… actually, ALL these fabrics are from Spotlight, to be honest!  I bought this fabric months ago, pre covid, always with the intention of making a little Watson bra and briefs set… ta da!  Simple, pretty – well as pretty as a shark can get I guess! – and comfy.  And finally done!

Lastly, I had a small bit of sharky leftovers.  So, obviously…  🙂

This one is a little bit bigger than the yellow one.

So, I think that’s it for now!  I have a few other things in the works, and will definitely/hopefully?! be posting everything before the end of the year.  I’d better pull my socks up, eh?

pinterestmail

The post I’ve been making a whole bunch of stuff… appeared first on Handmade by Carolyn.

baby swing and coconut ice

$
0
0

Tim and I made this adorable little swing for Arthur!

peekaboo!!

Kelly found the design and Tim suggested it be a joint project between us, with me making the swing and Tim taking care of the woodwork etc… Kelly and Arthur and I went to Spotlight together and bought the stuff… apart from the fact that it was like 41C that day it was fun!

Arthur’s first trip to Spotlight!

We bought this cute orange-based kangaroo? wallaby? print which Kelly thought would go really nicely with their deep blue/grey walls and jarrah floors, bamboo wadding, which I used doubled up for extra padding, and white webbing and a white clip-in catch to make a safety belt too… also Tim got pine dowelling and nylon rope from Bunnings.  We based our swing on this one on a blog the Thud… I think that Kelly had found it through Pinterest? I think?  anyway I recommend checking it out because she is hilarious!!

I did have to make adjustments to practically every dimension though for several reasons:

a. the dowel Tim had was 2.54mm (1″) instead of the 19mm dowel used in the tutorial so extra height was needed at every top edge.

b. we wanted the back rest to be above the arm rests because it makes good sense to have the back highest, I think and also makes a nice visual to the layers.

c. I wanted all the kangaroos/wallabies to face UP, so I split the bottom/side piece into two, and cut and joined so the animals stood up each side.  Furthermore, I arranged it so the seam in the back/side piece was on the opposite side for each piece, the inside and outside of the swing, if that makes sense.

d. I added a little seat belt for safety.  The part that goes around his waist is stitched in each side of the back piece of the swing, and the front is stitched in with the seam between the front and the bottom/side piece,

e. I also made a little flat, square, seat cushion, partially for comfort and also so the kangaroos face up when you look inside the swing too.  In addition, I made an extra, super-fat cushion to sit in the back of the swing, which looks cute, and also narrows the opening a little so he’s less inclined to pull his knees up and try to stand up in it.  Although, Tim and Kelly tell me that when he’s in it he just loves chilling out in his swing, mostly just sitting quietly resting against the cushion in it, and happily swinging.

Here is my (amended) pattern…

and Arthur, chilllaxing in his swing … CUTE!!

Oh, and of course everything is going to be an anticlimax after that cutie patootie! but anyway… so, every Christmas I usually make some sweet treat as a gift for extended family and friends.  This year I made coconut ice, but partly due to small supplies of red food colouring I decided upon a slightly different colour scheme from the usual.

I think it all turned out super pretty!  Also, delicious, obviously!  btw, this quantity pictured looks a bit mean but is really just for “pretty” photographic purposes, because everyone got at least four times this amount in little reusable lunchboxes.  I used this recipe from Taste.com…

pinterestmail

The post baby swing and coconut ice appeared first on Handmade by Carolyn.

Viewing all 829 articles
Browse latest View live