Quantcast
Channel: Handmade by Carolyn
Viewing all 820 articles
Browse latest View live

High-waisted apricot skirt

$
0
0
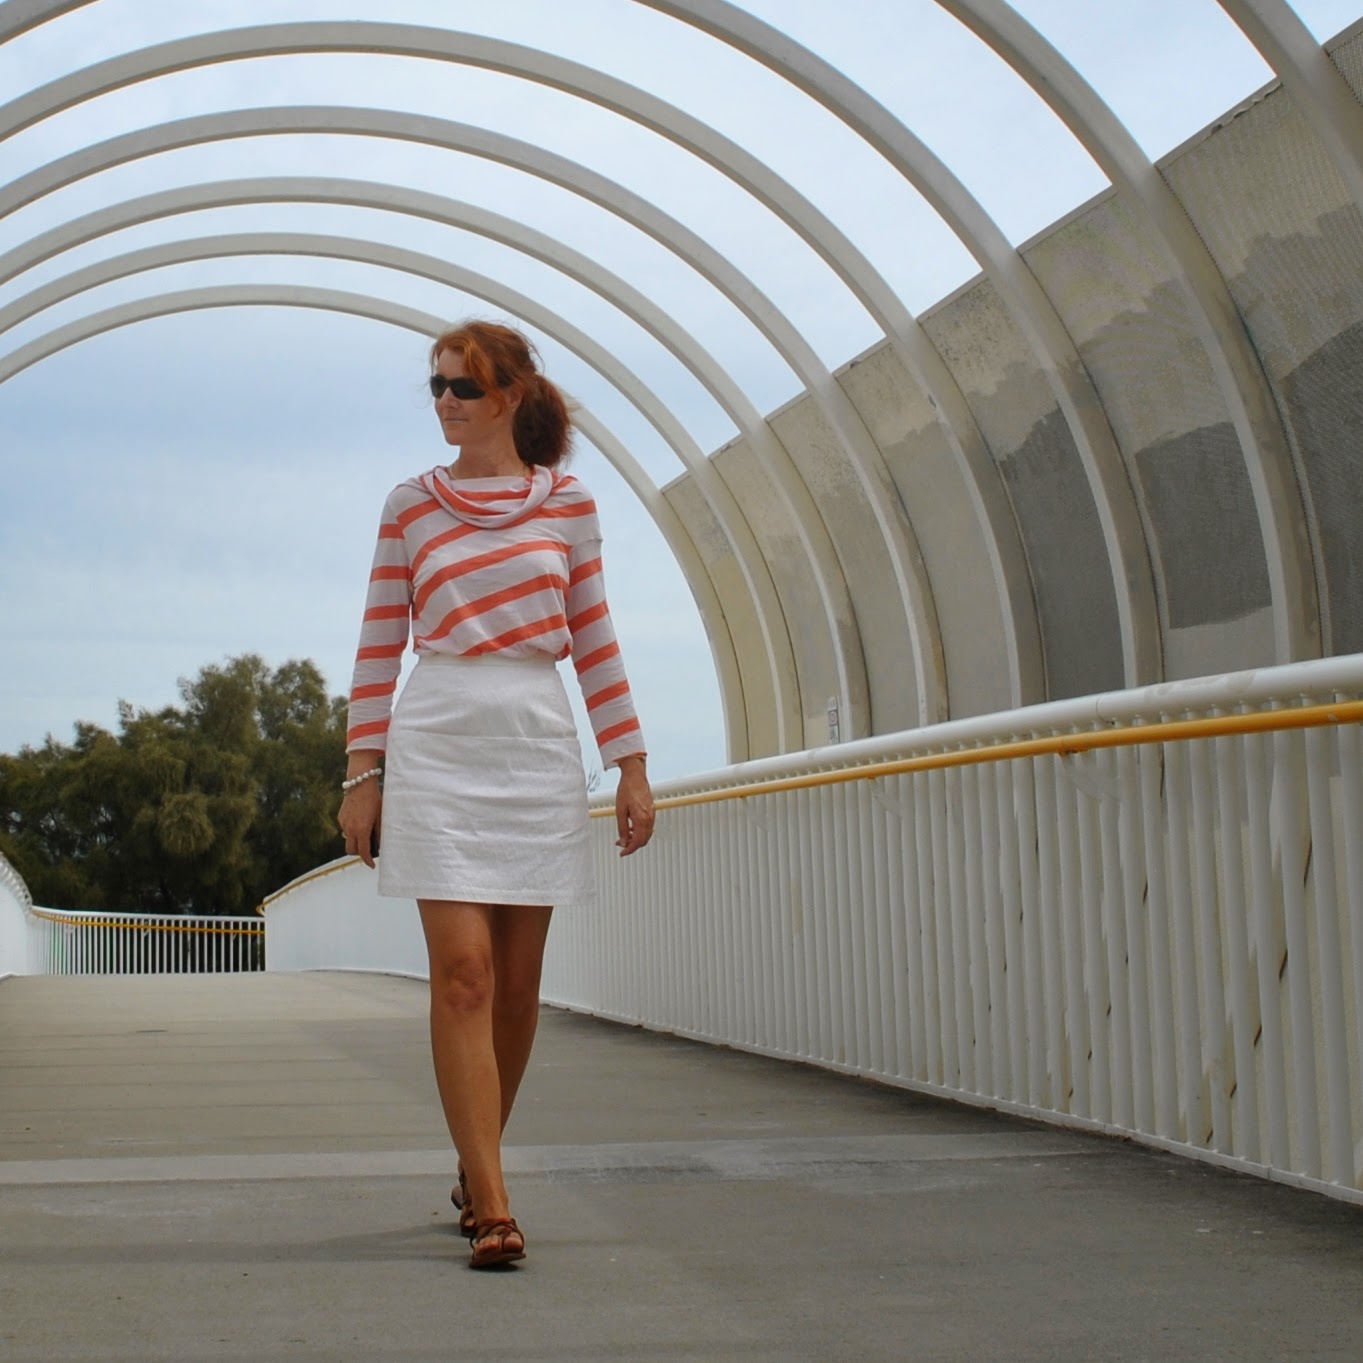
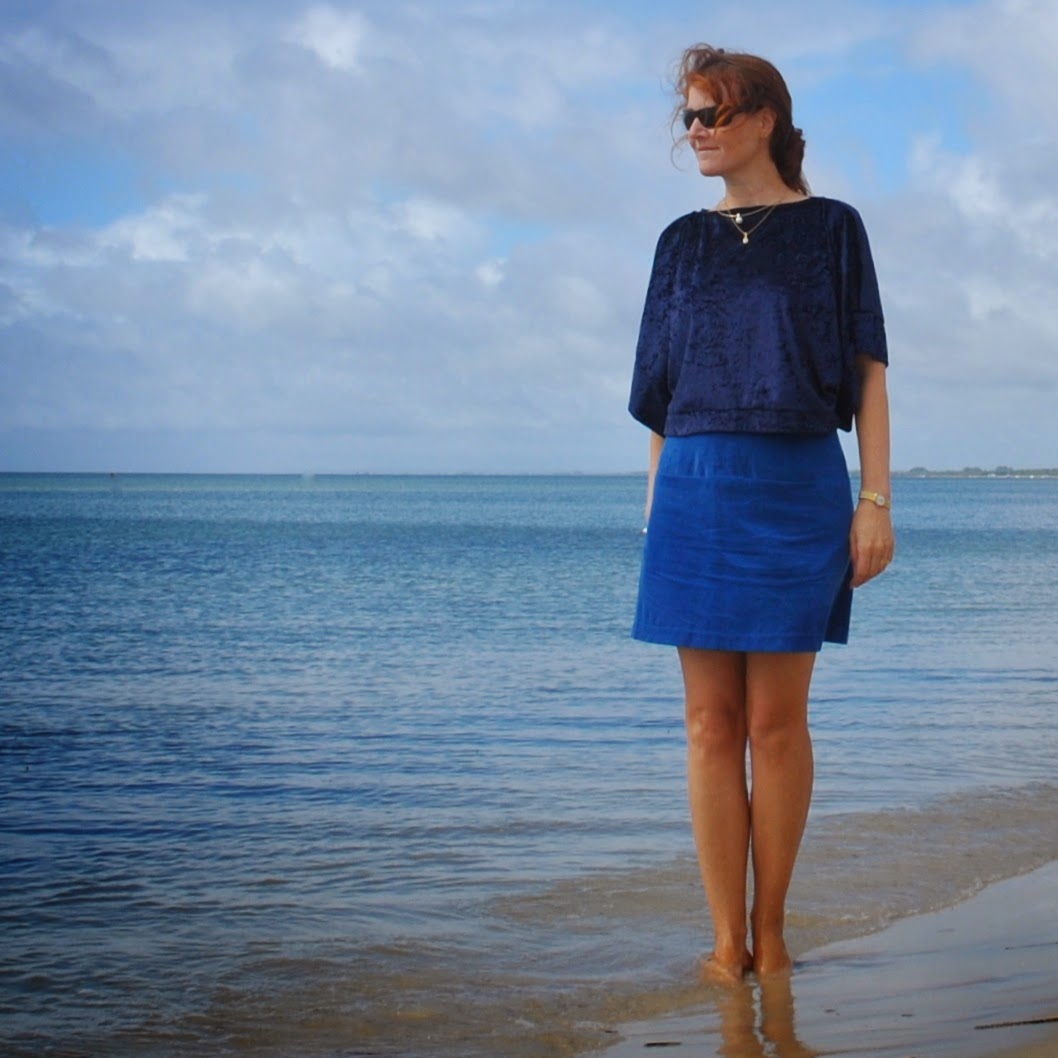
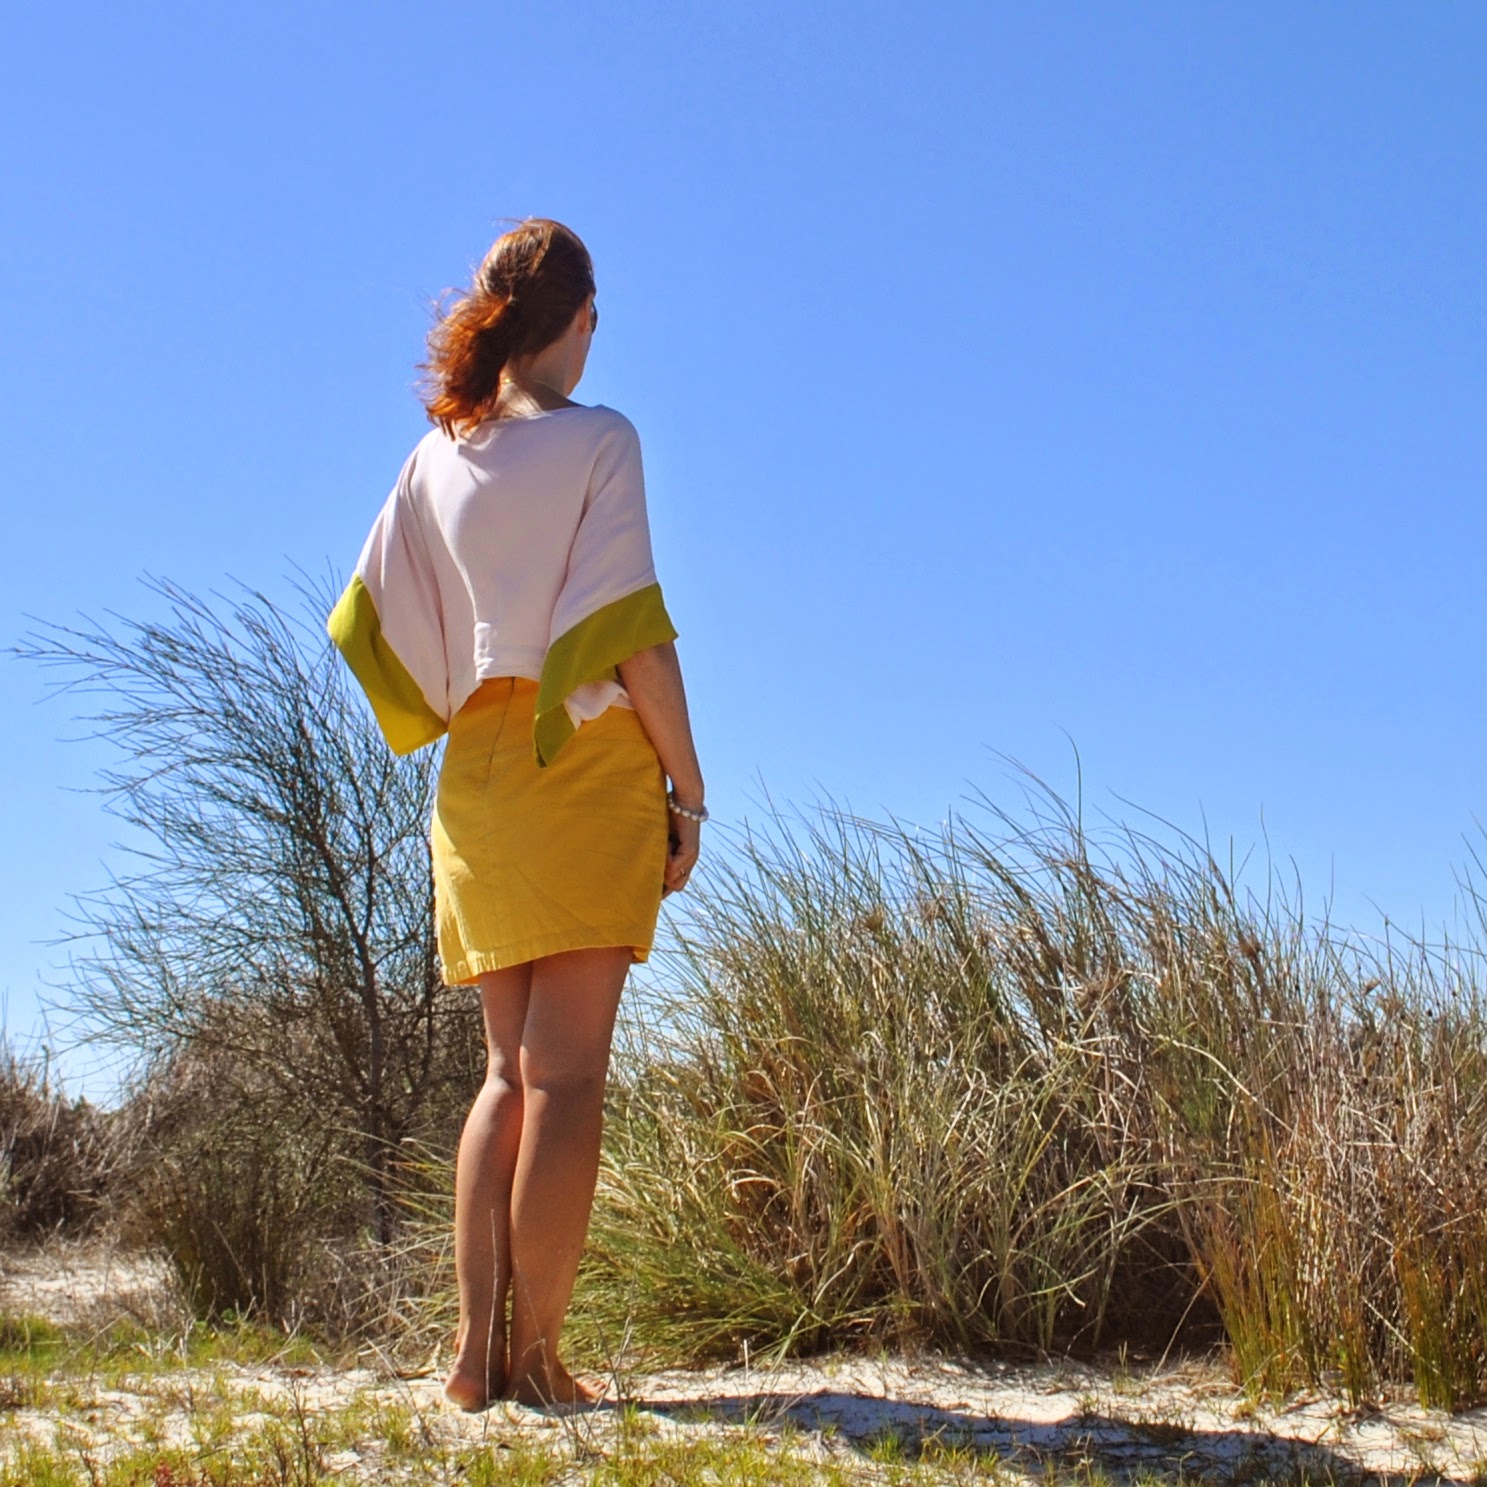
I've made a new skirt; a high-waisted, knee-length straight skirt, with a self-belt, long double belt loops and in-seam arrow welt pockets.  This is skirt 114 from the Solo in White collection from Burda style magazine 04/2014.  I've waxed lyrical about this collection previously just because of the dreamy colour palette, but a closer perusal of the design lines had me lost in admiration anew for the designs themselves.  This is now the third piece I've made from the collection; others here and here.  May not be the last either, because all pieces are quite lovely; classical but still with their own interesting little twist.  Honestly, it has to be said; Burda magazines are simply the hands down best value for money around.
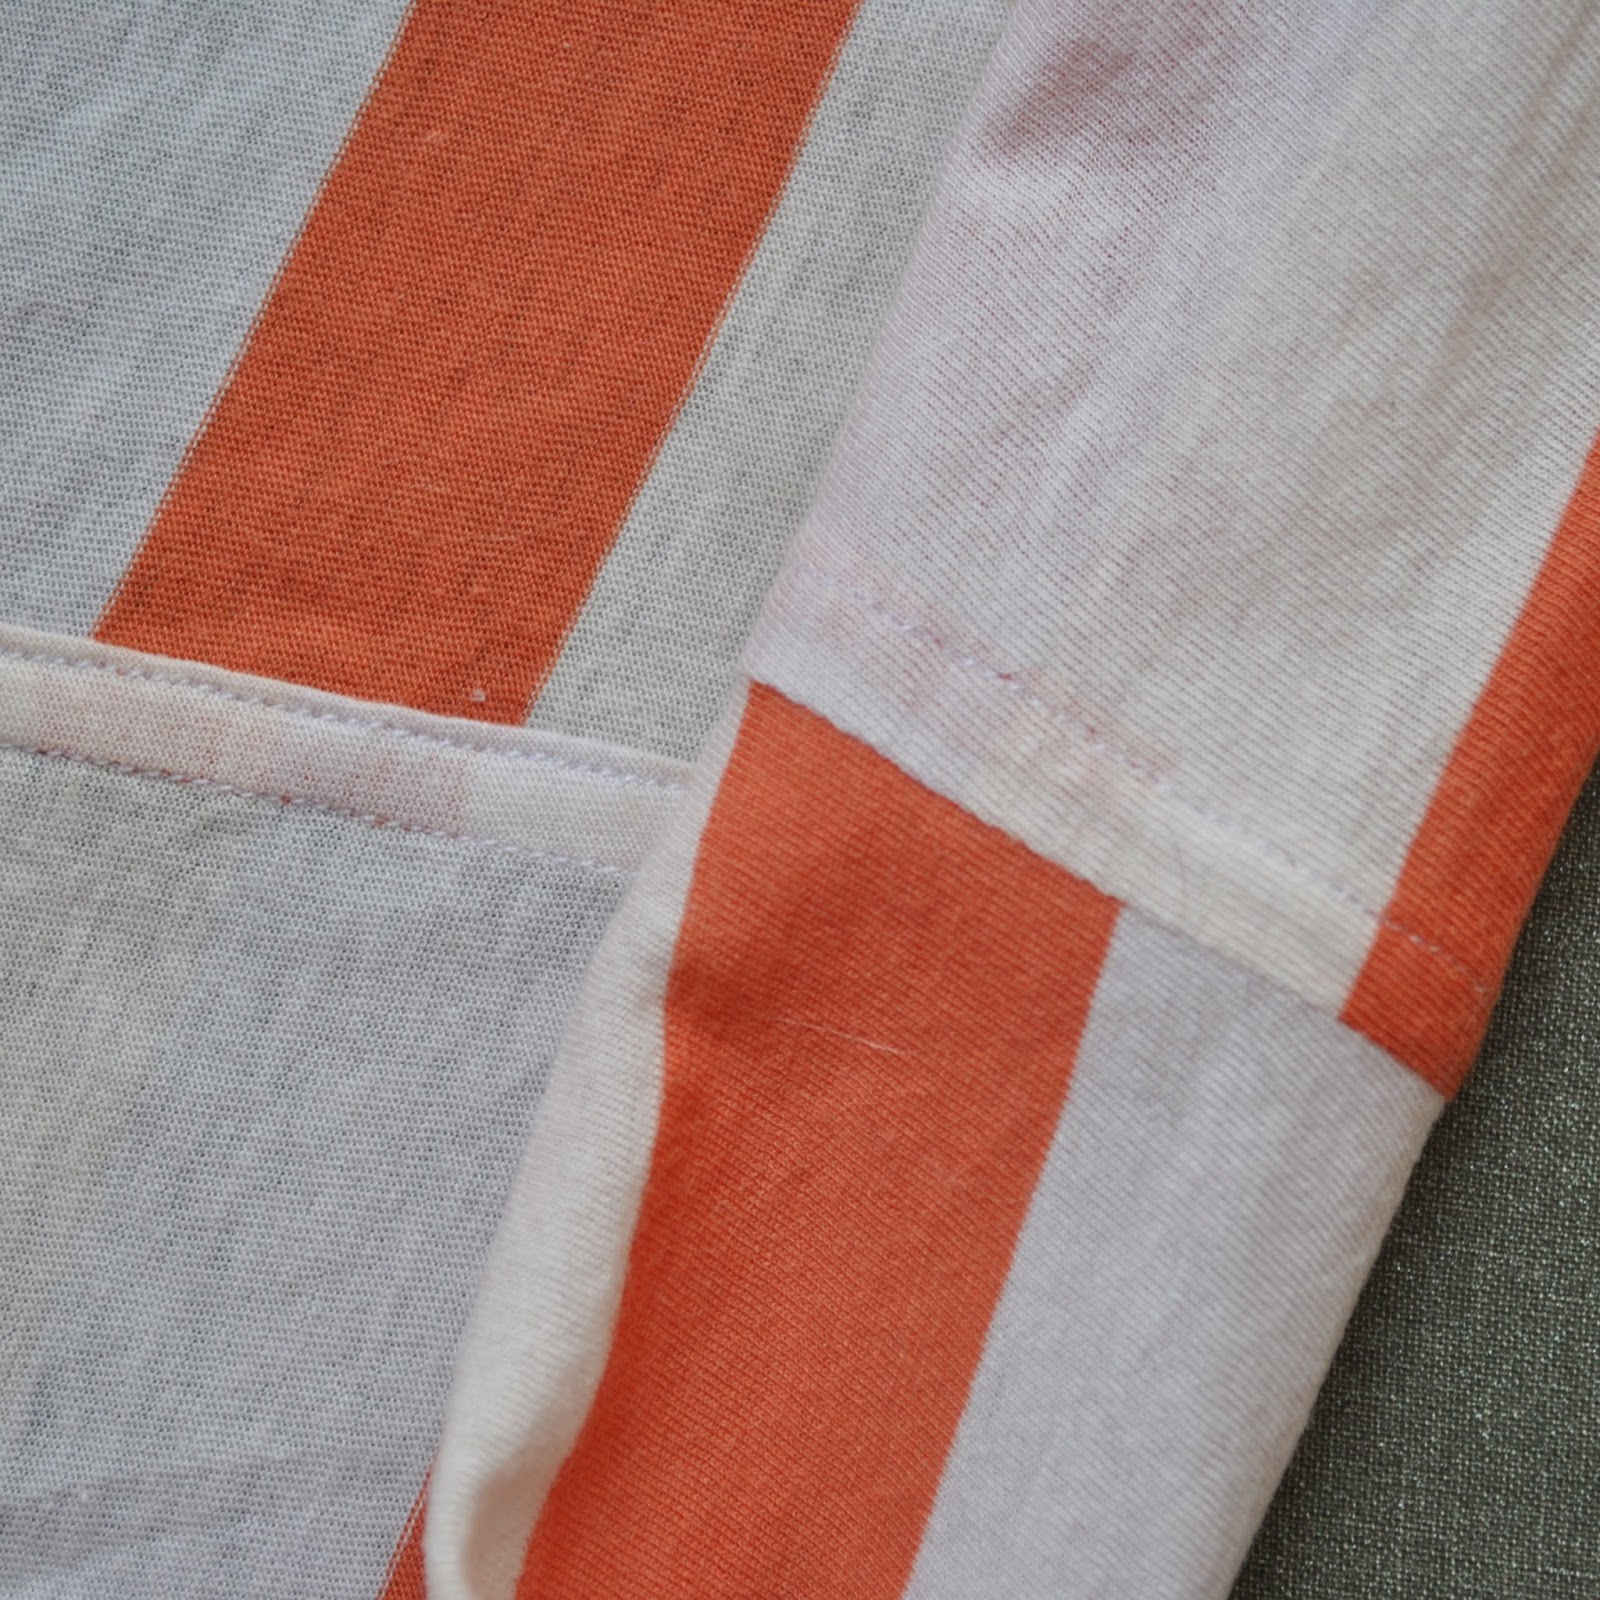
The fabric is from the Fabric Store in Melbourne, bought during my last trip there with Mum and Cassie.  I think it's a linen/something mix, woven of various thickness fibres, stiff-ish and almost like thin upholstery fabric.  I didn't think it too thick for the slightly more complex sewing required of those arrow welt pockets, and think they turned out ok.  I got the skirt pieces cut out of my piece with the barest of scraps to spare.  Honestly, my wastage was less than a scrunched handful of fabric.  Win!!!  After cutting the pieces I overlocked all edges before doing a single other thing, because it frays like a madman.
Changes: I cut a size 40 at the hips grading into a size 38 at the waist.  In fitting to myself I ended up taking a little bit more off each edge at the waist.
I cut my pocket pieces to be substantially bigger than the pattern piece.  My one gripe with Burda patterns is that the pocket pieces are nearly always laughably small.  Or do I have giant flipper hands?  Ummm, probably the latter!
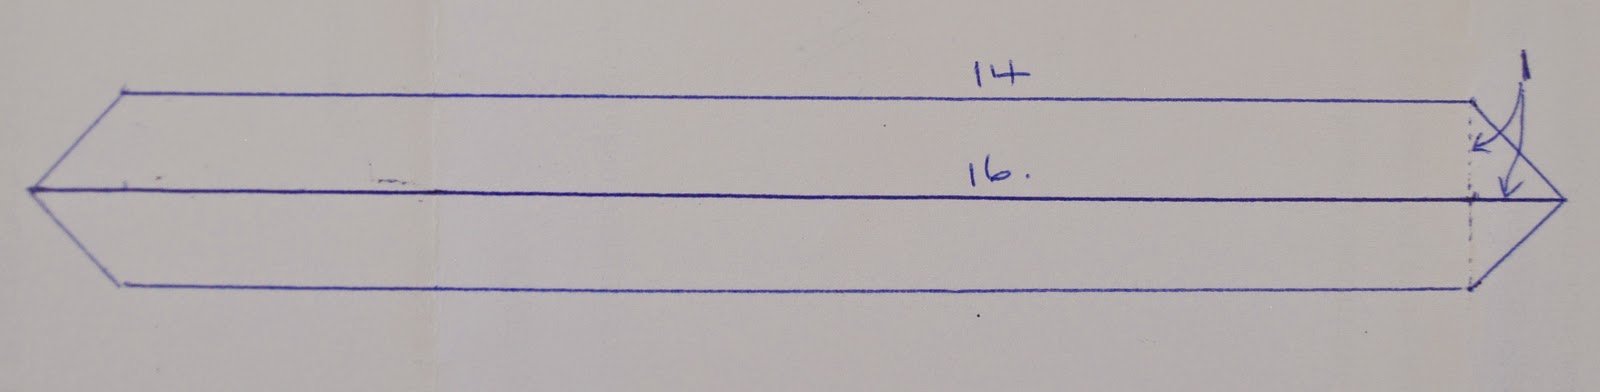
Another small gripe I have with this style of skirt is that the in-seam pockets are frequently situated too close to the CF for my liking, and so when you've got your hands in your pockets you end up feeling like you've got your hands sitting coyly and weirdly right over your crotch.  Hate that! So I cut my skirt pieces so the front piece was 4cm wider at the CF, and folded 2cm down the centre of each side front piece.  This moved the seams 2cm further out to each side, which is just enough to make hands-in-pockets feel not so weird to me.
I fully lined the skirt with cream coloured polyacetate from Fabulous Fabrics, mostly because my fabric has some stiff and sharp fibres in it that I could imagine over time would become scratchy and super annoying against soft tummy skin.  Lining pieces are not provided with the pattern, but it's easy enough to make a lining; by splicing the front pieces together along the seam lines, cutting from the facing allowance down; and folding the width difference in along the top as a pleat.  The back dart allowance can also be folded as a pleat in the lining.
I cut the facing and pocket pieces from pale yellow polycotton, and pieced the pocket with a strip of the self-fabric at the opening edge, so that is what shows if the insides are glimpsed during wear.
The instructions for the in-seam arrow welt pockets, contained in those for skirt 113, are quite difficult to follow; I was thinking vaguely of doing a little pictorial here to illustrate how they are done.  Maybe.
Anyway, that's it!  It's still too hot for this skirt yet, but I'm happy to tuck it away in the wardrobe, awaiting some lovely cool weather.  I bought some perfectly matching fabric to make a top to go with it too, so should get on to that thing next.  Ever onwards!

Details:
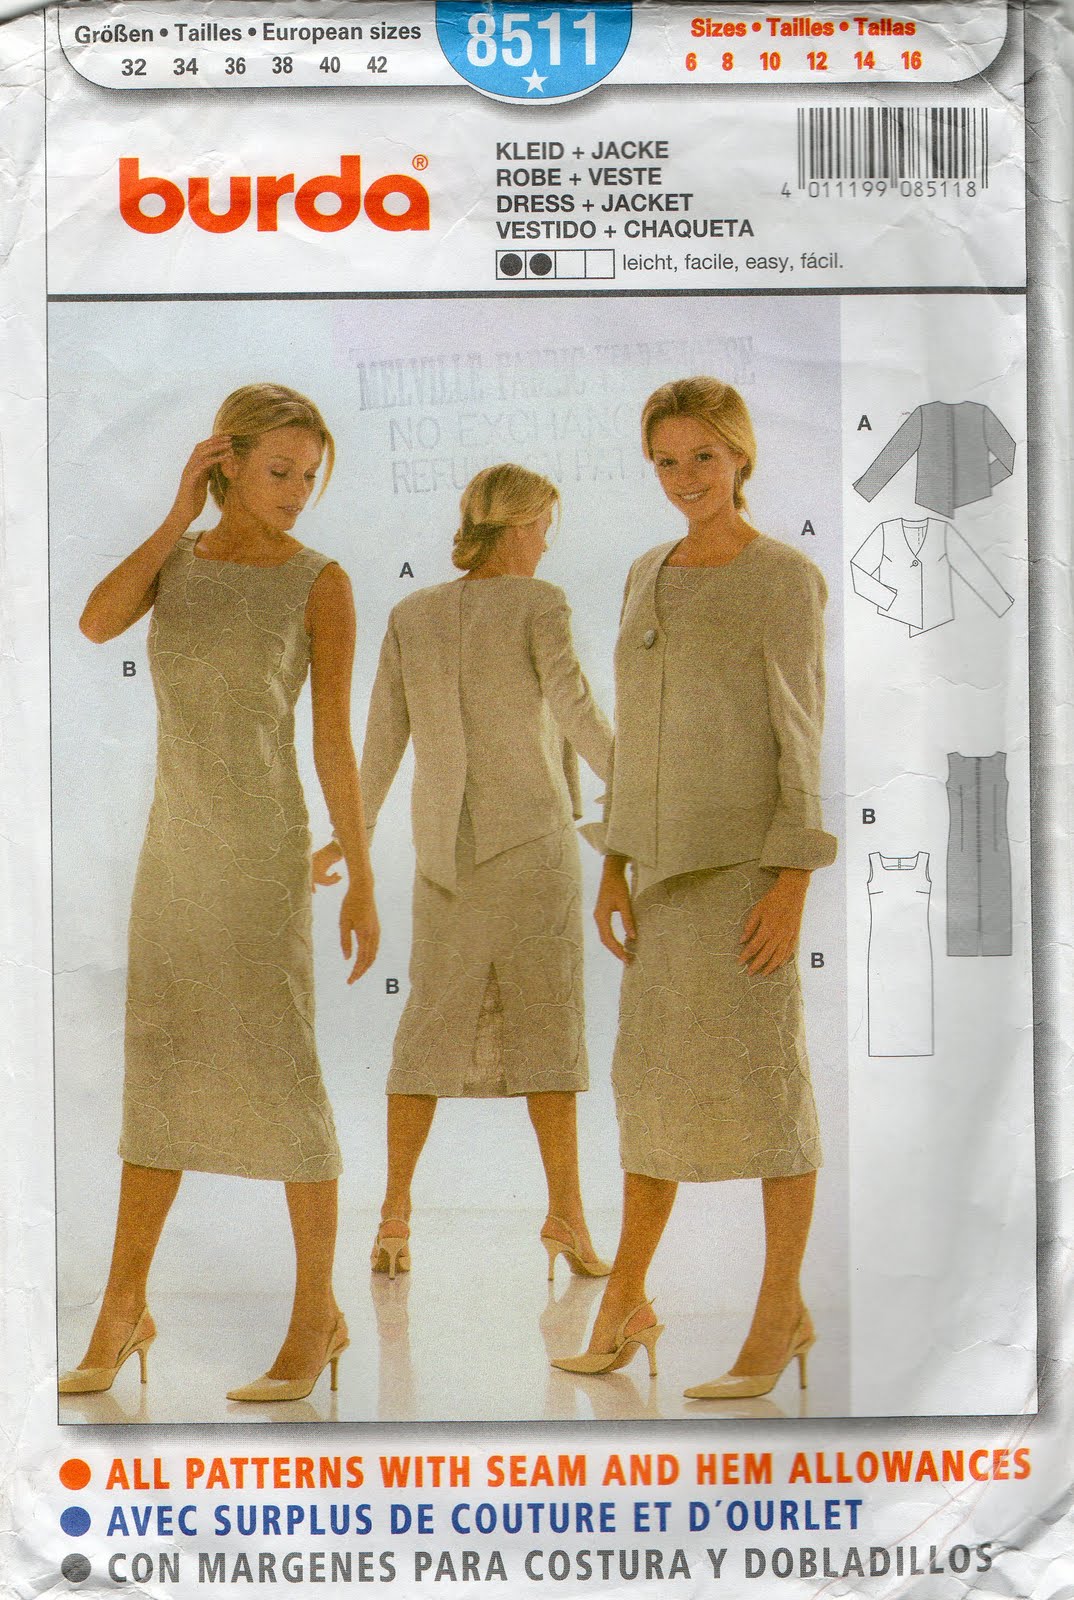
Skirt; Burda style 04/2014-114, apricot/cream linen/cotton woven
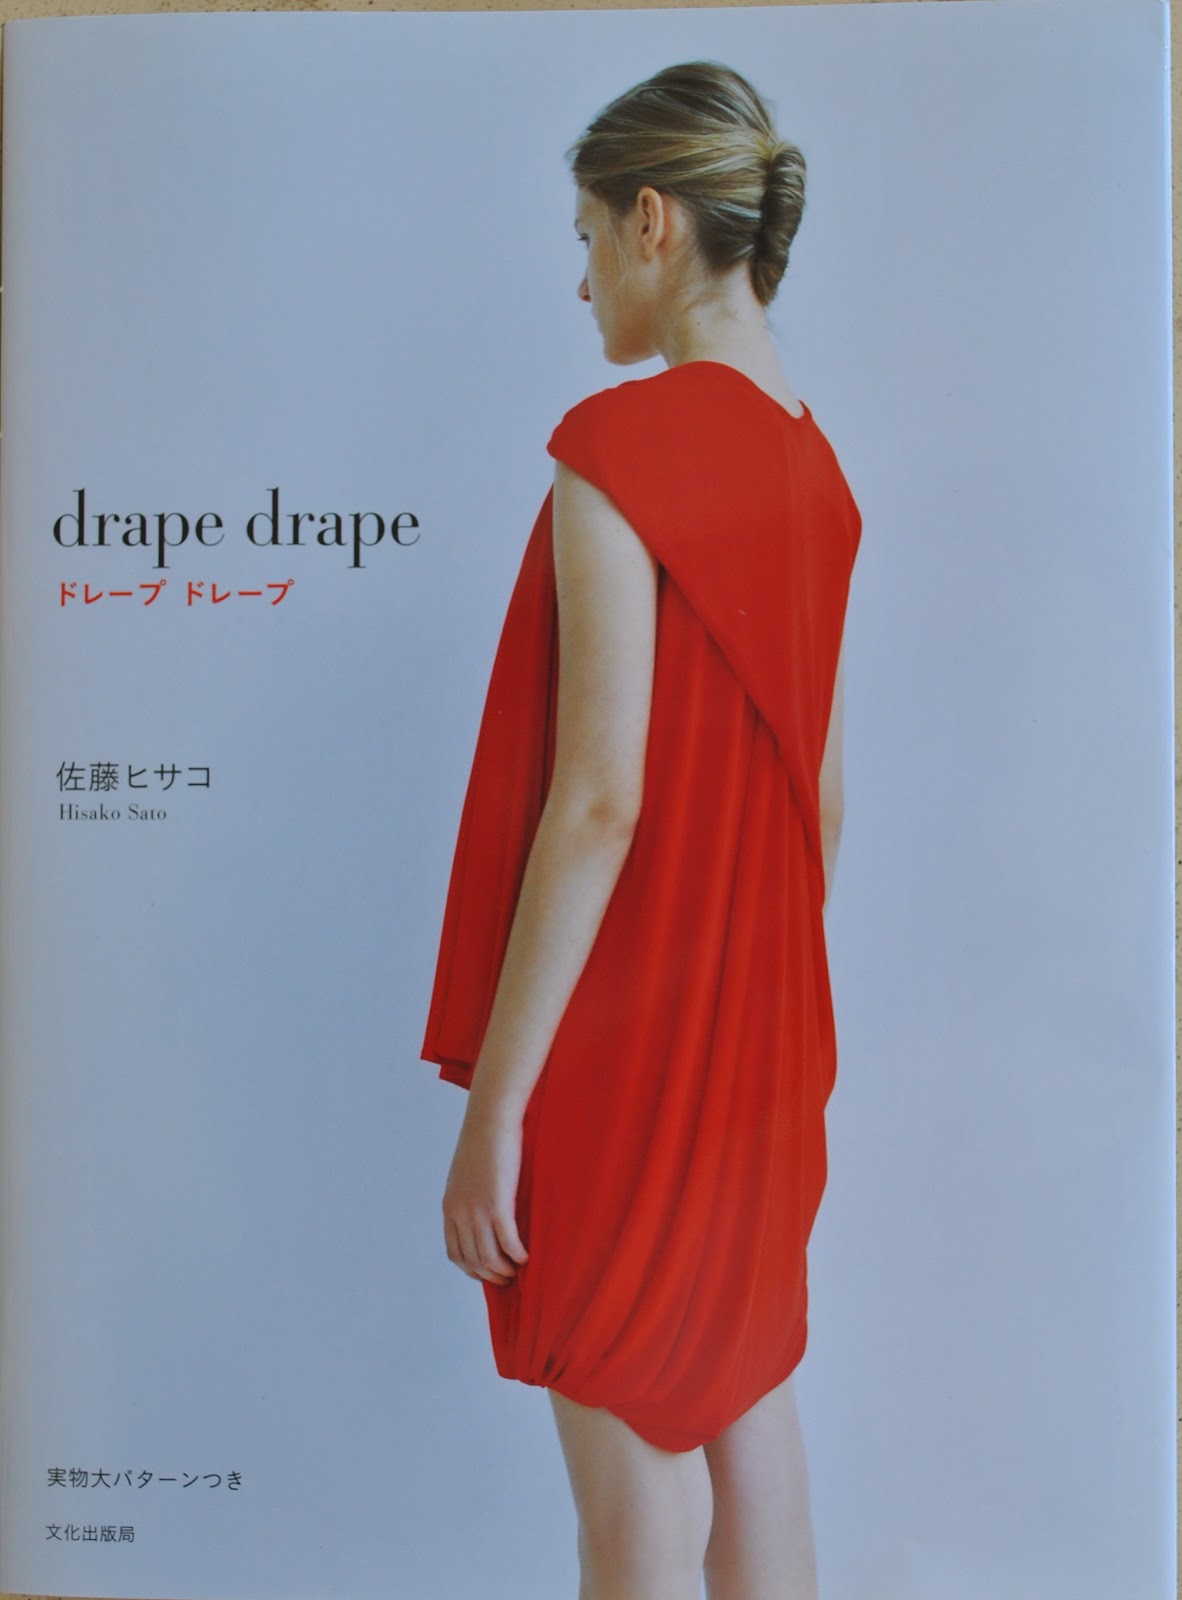
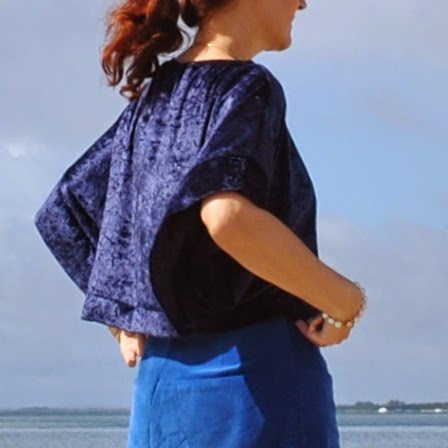
Top; adapted from the loose drape top from drape drape, by Hisako Sato, cream jersey knit, details here
Sandals; Zomp, from Zomp boutique

Inseam arrow welt pockets

$
0
0
My example shows a skirt pocket with a 16cm length opening edge bordered by 1cm width welts, although obviously all measurements can easily be altered to give any width of welt or pocket desired.

Apply a strip of iron-on interfacing to the wrong side of the garment, where welt pockets are to be situated.
Fold bias cut welt strips wrong sides together and press, pin to the stitching line of the garment edge; with folded edges to the outside.  Mark the upper and lower points of the long edge stitching line.  It is essential that the upper and lower markings on each welt be as square as possible and give exactly the same length on each side; in this example, the stitching lines are 14cm long.
Stitch, starting from exactly the upper marking on each welt and finishing exactly at the lower marking.  It is most important that your stitching be an even width from the outer folded edge of the welt, rather than the cut edges.
Snip the seam allowances of the garment from the raw edge in to the first and last stitches of the previous stitching, taking care to not cut into the welt.
Turn the seam allowances of the welt inside the garment and press.
Mark on the folded edge of the welt the upper and lower tips of the arrowhead, in this example 1cm out from each stitching line for a 16cm finished pocket opening.
Turn out the garment over the welt again, with the snipped seam allowance splayed over the welt and raw edges squared.  Pin through from the previous marking to determine where the short seam will end, secure seam allowance to welt with another pin.
Stitch from the snip point diagonally out to the marked top point.
Turn welt back out, press; stitch the remainder of the garment seam from the upper/lower points of the welt out; press open.
Pocket pieces; in this case I pieced the wider pocket piece with a strip of the self-fabric at the opening edge; this is the under pocket piece that will sit under my hand in situ.  
From inside; open out the welt again and pin the relevant pocket pieces right sides together to the seam allowances of the welts.  Stitch pocket pieces to the welt SA from underneath the welts ie. with interfacing uppermost.  This is to ensure that your stitching goes directly and exactly over the previous welt stitching line.
Stitch the pocket pieces together and finish edges.
From the right side of the garment, stitch in the ditch through all layers along the two short diagonal edges of the arrowhead.
And, ta da! finished!

Cassie's terracotta dress

$
0
0
I made this belated birthday present for Cassie; we recently went on a girly shopping expedition together for her birthday present and spent hours browsing, looking at pretty things, chatting, having hot chocolate and enjoying ourselves! we had lots of fun but she couldn't decide on anything that she liked.  Finally I suggested, hesitantly, would she like to go to Fabulous Fabrics to get some fabric of her choice and I could make her a dress of her choosing? and she delighted me by immediately agreeing.  She's so sweet  :)  I say "hesitantly", because while I love to sew things for my family I absolutely do not want to force the products of my sewing on them.  And I often worry that my love of sewing is influencing them to ask for me to make something for them, just to make me happy; if you know what I mean.
Anyway, happily she says she loves the new dress, and plans to wear to work at her office with her black ballet flats as well as sometimes on the weekend with sandals.  The pinky-brick/terracotta viscose from Fabulous Fabrics is a fabric Cassie has loved for "ages" and she chose the dress style based upon one we had seen in Morrison, with some minor design alterations to make it what she wanted in her birthday dress.
The result is quite plain, with its main feature being a wide front tuck emanating from the neckline and disappearing into the body of the dress.  I started out with my standby, plain sheath dress pattern Burda 8511, and rotated out all darts, cut it with an 8cm tuck allowance in the front panel, i.e. an extra 16cm width at the neckline tapering off to nothing by the hemline.  I scooped out and widened the neckline, added inseam side pockets, rouleau belt loops and a long self-fabric sash.  
The side and pocket seams are French seamed, with a hand stitched, narrow hem.
I'm extremely happy with how chic Cassie looks in the new dress  :)

Details:
Dress; own design, using Burda 8511 as a starting point, terracotta viscose
Shoes; from Hobbs shoe boutique

purple skirt, with "tulip" pockets

$
0
0
I've made a new skirt.  This new skirt is un-noteworthy except that I gave it some rather unusual little side pockets.  They sit down at the hem, inserted in off-set side seams.  They're not very big pockets, just a nice size to hold my fitbit and maybe my phone at a stretch.  Really, I was playing; got the idea to put them in a skirt and went for it.
The pockets are based on those in this picture, which ?I think? is from a vintage design.  To accommodate them in this otherwise very plain little skirt I drafted for myself a 4-panelled skirt pattern using an old favourite Vogue 1247, a straight skirt with waistband, as a starting point.  I treated the pattern like a "block", and spliced, cut and spread and sliced and rotated to eliminate darts etc to make a 4-panelled pattern with a narrow front and back and two, even narrower, waist-to-hem side panels which host the pockets.  
Fabrics; outer and lining fabrics are both from Fabulous Fabrics, a greyish purple silk hessian for the outer shell from the remnants table and burgundy polyacetate for the lining fabric.  I only had 60cm of the silk hessian, barely big enough for anything at all!  Extreme laying-out skillz were employed, hehe.
lining was cut using spliced-together Vogue 1247 straight, with the waist darts simply pleated into the waistband.
The grey cotton jersey edging on those pocket panels is harvested from off of an old Tshirt of Tim's, and lack of fabric forced me to use it for the waistband facing too.
front view is kinda boring

So...  skirts.  I've been having some deep thoughts.  Well, about as deep as can be expected on the subject of skirts, which is approximately puddle-depth in the scheme of things ... but still.
Keeping tabs of my wardrobe over the past few years has not been totally fluff n' puff with no substance, believe it or not some actual useful conclusions have been reached.  *gasp!* 
Into Mind writes about finding your "uniform" and I find I tend to favour two quite distinct and different kinds of skirts; plain and straight "little" skirts like my new one here and then longer, three-quarter length ones that can be a bit more visually interesting, more pfouffy with layering and/or detailing. 
During winter, well I could happily and comfortably live in the former, plain, straight, little skirts, all winter long.  I like to wear jeans every now and then, but really, if I'm being honest, skirts are just far more "me".  
It's nice to have some skirt-and-top "outfits", that go together so well they don't need to go with anything else, ie. my Alabama Chanin ensemble; but obviously solid-coloured separates are the absolute best workhorses for mixing and matching the sometimes disparate elements of my wardrobe.  Colourwise, I have seasonal favourites and basics and neutrals, sure, and I also like to have some odd colours, "outliers" in my wardrobe to choose from too, to suit whatever changing mood I'm in.  And, I don't know if it's because I pluck them from my wardrobe more frequently, or because of their straight shape, or both; but all my "little" skirts always seem to bag out and die more quickly too.  
Sadness ensues.  Cue tiny violins.
Anyway, just some random thoughts.  Ergo, I'm stocking up on some little skirts in a few different colours.  So sensible!  It's early to judge it yet, but I think this sludgy purply-grey colour might be a totally excellent one in my winter wardrobe.  It's not obviously a neutral, nor a colour, but manages to be a bit of both, if that makes any sense at all.  We shall see, we shall see...  :)
 back view, also kinda boring

Details:
Skirt; my own design, derived from Vogue 1247 as a "block", deep purple silk hessian
Top; the loose drape top, modified, from drape drape by Hisako Sato, white cotton jersey, details here
Shoes; Zomp, from Zomp shoe boutique

watercolour silk dress

$
0
0
I've made a new dress  :)
Every year, my friends give me a Fabulous Fabrics voucher for my birthday; aaaah! they know me so well...!  :)
and last year I spent it on this gorgeous, water-colour-y silk charmeuse.  And have made it into dress 35 from Patrones 7; this magazine was itself a gift to me from Merche Martinez from a few years ago.  This is the second time I have used this same dress pattern, my first version is here.
So, I have worn it a scant handful of times so far; for dinners during our recent holiday, and I'm wearing it today as well to show it off to my gorgeous gal-pals who gave the voucher to me... and I have to say I'm quite besotted with my dress already.  Honestly, bias cut silk, there's just nothing quite so lovely to wear.  It's a beautiful gift from you to your skin.  Seriously, my skin is thanking me every single second I spend in this dress.  It's pure and utter heaven.  *dreamy sigh*    
To go the whole nine yards silk-wise, I fully lined the dress with creamy-coloured silk habutai.  Pinky-purple lining seemed at first to be a better colour match; but upon checking how the fabrics looked when layered together I found any colour just very subtly dulled those large white-ish feathery-floral areas, whereas a lighter creamier-coloured backing really enhanced the colours of the charmeuse and gave them a beautiful inner glow that I preferred.   Something to bear in mind when choosing a lining for lightweight, patterned fabrics; hold lining underneath the fashion fabric to check how it affects the colours before making a final decision.  Sometimes an unexpected colour choice will look better.
The dress lines are quite simple and feminine, with a slight a-line curve, small cap sleeves and I lengthened the neck-tie to extend right around the length of and beyond the v-neckline, so it is both a tie and also a sort of "collar" that finishes the neckline.  The skirt is cut flatteringly on the bias and I gave careful thought to the colour placement over the body.  I wanted the darker, moodier colours to feature mostly and aimed for the splashes of those big abstract feathery flowers to appear over one shoulder and to bloom down the side and hem of the dress, front to back.  ie. not on my tummy or right boom on the derriere.  The dress closes with a burgundy invisible zip in the left bodice side seam, and I hand-rolled a narrow hem on the sleeves and lower hemline.  All seams in both dress and lining are French seamed.
I altered the bodice pattern piece substantially from my first version because ultimately I decided that that dress incorporated an excessive degree of blousiness for my particular shape, or lack thereof, ahem.  I pinned out about 3cm width from the lower edge and curved the lower edge up as marked in red, cutting out up to 5cm in height at CF, this removed a tonne of blousiness and so is only about a thousand times more flattering on me, rough estimate there.  In lieu of lightly gathering the bodice evenly along most of its width into the skirt, instead I folded the width into four little folds, evenly distributed just out from either side of CF, treating the lining as underlining and folding them together.  These folds can be seen more clearly from the inside of the dress.
I also added about 4cm in length to the skirt at the lower edge.  I'm slightly doubtful about this added length, I don't hate it but also am not bowled over with love for the length right now either.  I may just live with it for a while but that extra 4cm may or may not just get lopped off at some point.  I'll just have to see how I go; weighing up the pros, such as would it look more chic if it was a bit shorter? against the cons; the main one being that I would have to re-do that hand-rolled hem.  Hmmm...
Now, on another note: anyone who follows me on IG would know already about our recent, most utterly paradisiacal holiday ever!  yep, I took my pictures on the beach during our holiday in the Maldives.  And I thought I would show one example of my set-up for taking my own pictures when away, an activity at which I now consider myself an expert!  I'm a big fan of packing as light as possible and saving myself any packing and carrying around bulky camera equipment.  Just cannot be bothered with all that.  Yeah, lazy, I know :) 
When travelling, I just take my small travel camera and nothing else.  And I look out for and take full advantage of any flat surface that I may come across, although if nothing presents itself I can at a pinch just sit the camera on its own little soft case.  This is not completely ideal, but it's doable if no other handy flat surface is around.   Good flat surfaces include, but are not limited to: park benches, curbs, low walls, a level spot on a rise in a path.  Rocks sometimes too, though rocks can be tricky and it's imperative to check carefully that the camera is sitting perfectly stable and isn't going to topple over and smash.  
In the case of our last holiday, our cabin was on the beach and I used a flat-bottomed cup from our room.  My camera sat up, safe and clean, up off the sand as pictured.
Anyway, whatever flat surface is at hand; I just set the timer function on my camera, pop the camera up on said flat surface, push the button and then race out in front.  Voila.  Does the job, and requires no big bulky camera equipment.  Win!

Details:
Dress; Patrones 35-7 modified slightly, silk charmeuse
Location: Valessaru, the Maldives

raspberry/navy Alabama Chanin tank top

$
0
0
I've finally finished my latest Alabama Chanin project...  
Below is how it appeared on this blog previously...? (shudder) well, that dress has undergone extensive renovation over the past five months and now at last, I am quite satisfied.
I received loads of fantastic suggestions, thank you so very much to everyone who gave me so much helpful and wonderfully thoughtful advice  :)  I am very grateful  :) *mwah*
The pattern is the fitted top from Alabama Studio Sewing + Style, by Natalie Chanin, and I had modified it slightly by giving it a higher rise at the neckline at CB, which will help keep the straps firmly on my shoulders and not slip off, like they occasionally do in my previous, first version of this pattern.  The print is Abbie's Flower design from the same book, enlarged by hand and printed as described here, and I employed the reverse appliqué method from the book, stitching running stitch around all motifs using crimson Gutermann upholstery thread, and then cutting the printed motifs away to reveal the base layer of fabric underneath.
I really liked Ann's suggestion to bring some navy into the equation.  I bought some royal blue cotton jersey from KnitWit.  This was but a starting point; the original blue was a nice colour, but flat and not quite as edgy as I would have liked against the warmth and liveliness of the raspberry.  Some dyeing fun was called for.  I made haste for the lair and dragged out ye olde dye-pot, mwahahahaha
A short stint in a half-strength bath of iDye in Brown later and it was darkened and deepened up very nicely; transformed it into a very satisfactory shade of mottled dirty-navy.
Hehe, I just re-read that description and had to laugh at how the exact opposite of attractive that colour sounds!  well, I do love me some ugly colours, hehe.
The seams are all hand stitched in running stitch, with the occasional backstitch to "stop" the seam, something I learnt to do in hand- stitching quilts; and the seams then felled using running stitch, as per the Alabama Chanin way.  
I cut the binding strips for the armholes and neckline from the same dyed navy jersey and hand stitched them down in herringbone stitch using navy blue Gutermann upholstery thread.
A new tip; in my previous Alabama Chanin embroidery forays, I pinned the fabric layers together for the embroidery stage, this time I thought of a better solution.  I pinned and basted around all raw edges, then simply ran rough basting lines of long stitches, about 4-5cm apart, right across the pieces using my sewing machine.  Quick and dirty, nicely stable, and the long stitches are very easy to pull out as the embroidery progressed.  And far better than having to worry if my pins were going to fall out, only to get discovered on the sofa and produced as hard evidence in the Case against Sewing Taking Over the House.  Please, take a moment to consider the danger to one's beloved husband whose bottom came to rest right beside that tiny little pearl-headed pin! not to mention one's innocent offspring and cute fluffy pets!  
Hehe, no need to add further fuel to that particular flame  :)
 My next Alabama Chanin project? already in the works!  Fortunately I made my original dress double layered and so I still have quite a good quantity of the raspberry fabric left after cutting this out; and I also dyed enough of the navy so that now a matching, though not identically patterned, skirt is awaiting in the wings to be made, as we speak.  Type?  Read?  One day, someone is going to come with a satisfactory verb for this kind of interaction  ;)
Anyway, I am super pleased with my new Alabama Chanin top, and the good thing about that satisfaction is the renewed enthusiasm it brings for me to get on with that skirt quick sticks, to have something else to wear it with.  Ever onwards!

Details:
Top; the fitted top from the Alabama Studio Sewing + Style book, hand-dyed, -printed, -embroidered and -stitched in two different colour fabrics
Jeans; the Closet Case patterns Ginger jeans, navy stretch cotton denim, details here

Carolyn shirt and shortie shorts, take one

$
0
0
Hello!  So what's new? hmmm not much.  
Well OK, of course I am wearing something that has not yet appeared here on the ol' bloggeroonie.
My shirt and my shorts are another pair of Carolyn pyjamas by Closet Case patterns, made a few months ago.  These are the first ones that I made actually, months ago! using an earlier version of the pattern, before Heather changed the shape of the collar for her final pattern release.
So technically they are not really new, nor are they "pyjamas" for me either since I have every intention of wearing each of the pieces as daywear, actually out and about and in public.  Why? well, I used such really nice fabric, a particularly lovely slubby soft cotton from Fabulous Fabrics and I feel like it's just too good for bed!  Also, maybe I'm biased, since well, you know, they have my name on them and all! but I do really like both the pieces in this pattern such a lot.  The shirt has such a crisply classic, yet easily swingy shape to it, with a very nice curve to the lower hemline.  I left off all piping, and I like to wear the shirt with their long cuffs casually and cooly rolled up.
I made the set really as nicely as I could, flat-felling all the seams in the shirt.   Well I've been flat felling all the seams in the shirts I make for my boys for ages so felt like maybe I too deserved a little of that same attention to detail  :) 
My own tip for flat-felling a shirts curved armscye seams is here, and another for just regular flat-felled seams is here
I think the shortie shorts are very cute too, and I actually have worn these out and about! in public! *gasp* several times during our holiday, with the elastic waistband hidden away underneath a longer overhanging top, so it doesn't show.  I am slightly allergic to visibly elasticated waistbands in daywear.  But yes, of course they are super comfy, that cannot be denied.  I think the shorts with a turned-up cuff, peeping out underneath a long top, make a really fun and playful look for summer.
Just exactly the same as I did for my previously blogged black Carolyn shorties, I like for shortie shorts to have the turned-up cuff look, so I constructed the cuff slightly differently to the pattern to have this feature.  I left off the piping, and sewed the cuffs on with a narrow seams allowance and then turned up and pressed a 1cm fold-up.  Then turned under the cuff and pressed under the other SA so the SA fold sits directly underneath that stitching line.  Then underneath the first fold, I sewed all the layers underneath together by stitching-in-the-ditch of the shorts/cuff seam; so that folded-up cuff is sewn securely and permanently in place and you can see no visible stitching on the outside, since it is all hidden inside the cuff.

Details:
Shirt and shorts; Closet Case patterns Carolyn pyjamas, in white cotton

top; wonky apricot stripes

$
0
0
So, I bought this piece of very nice, thin, cotton jersey from the Fabric Store in Melbourne, during Mum, Cassie's and my trip there late last year.  It is elegantly drapey, feels deliciously soft, and the ivory, pale yellow and apricot stripes went perfectly with my apricot skirt fabric.  I bought them together, planning a nice little skirt/top set.  Which of course explains why I am not wearing them together right now! ha! the logic, I lack it; clearly.
Anywayz, I chose and bought the fabric, washed it, pegged it up and only then! noticed a horrific thing, the stripes were printed on the fabric terrifically off-grain, which in itself would not be too much of a disaster except that it had been cut in the store for me as though the stripes were on-grain.  I had only planned a little top, so had only asked for a little piece.  So I had this rather smallish and off rhombus with which to somehow wrangle a top.  Great.
So although my plan was for something very simple, it didn't seem like it was going to be simple at all.  I agonised and pondered for a bit.  Finally I was just like, oh to heck with it! I've got to just make something.  Anything!  
I decided to embrace the wonkiness, and make a wonky, off, little top from out of my wonky, off, little piece of fabric.   This is Burda 04-2014 111, and is the second version of this pattern that I have made; my first version is here.  
Because I am rather obsessive about corralling at least some sense of order to my wonkiness, I cut my top on-grain and very carefully measured, cut and sewed my body piece so that the stripes matched up as perfectly as I could get them at the one side seam.  So the stripes have become one stripe, rotating around and gently down my body like that on a barber shop pole, and because of the twist of the top are slightly more horizontal on the back.  
the side seam
The inner seams are finished with the overlocker, but I didn't want any overlocking "on show".  So I flat-felled the seam in the cowl part of the neckline, so it looks nice and neat if you happen to catch sight of the inside.  In this design, a very probable occurrence.  The shoulder seams are also flat-felled for strength.
I left the raw edges of cowl and sleeves raw, because the jersey is very stable and does't really need finishing. The edge naturally curls up quite nicely and I like how this looks  :)
To get as much length to the top as I could I added a wedge of fabric onto part of the bottom edge.  The lower edge is simply overlocked, turned under once and stitched using a twin needle.  One thread is white, the other ivory, but I'm just fine with that.  Didn't want to wind another bobbin for just one little hemline.  For what should have been a nothing-much top, I reckoned I'd expended enough thought on this thing already!

 Details:
Top; Burdastyle magazine 04/2014, 111, jersey stripe
Skirt; Vogue 1247 lined, ivory curtaining fabric, details here and my review of this pattern here
Sandals; 2 baia vista, from Zomp shoe boutique
stripe ever-so-slightly more horizontal on the back

Maldives; a travel wardrobe

$
0
0
We have just returned from the most wonderful holiday on Velassaru in the Maldives *sigh* and it's time for me to have the usual retrospective think about my travel wardrobe.  Such as; how did my selection work, was it appropriate, and could I do better for next time... if we should ever be so incredibly fortunate as to have a next time!
Time away:
7 days
Where to:
the Maldives
Season:
the tail end of the northeast monsoon, or dry season.  Beautifully warm 24 hours a day, with a daily temperature range of roughly 28-31C.
Expected activities:
well, very little! haha! specifically; wandering along the beach, laying about on the sun lounge, reading, um.... a bit of knitting? *blush* gawd I'm such an old biddy...  Occasional spurts of swimming, snorkelling, canoeing, and of course cocktails and dinner!
Colour scheme:
a very summery, and hopefully pretty, selection of white, pink and blue!
What I packed:
from left to right, top to bottom, each garment is linked to its original construction post
powder blue dress
ivory broderie anglaise petticoat
pale blue tunic dress
red gingham dress
white linen dress
pink leather bag
watercolour silk dress (for dinners)
hot pink cardigan (Metalicus)
(left) white broderie/lace top
beige top with white print
pink patchwork top
white cotton LS shirt
white shorts
charcoal shorts
ivory corduroy hat
green floral bathers
white thongs
black sandals
not pictured, selection of underwear, nightie, toiletries

My daily outfits:

Thoughts:
Well, going to the Maldives has been my dream holiday, numero uno on my bucket list for only like, forever! so for a few brief mad moments I had happy daydreams about making for myself an entire new wardrobe in the honour... tonnes of white and turquoise!  floor-sweeping maxis! a fantabulously elegant super-widebrimmed hat! anyway, clearly I got sensible and just took a selection of the regular clothes I've already been wearing all summer.  
And that was just fine! if not so exciting as a whole new wardrobe.  That would've been very nice!  ;)  but well.  Clothes are not supposed to define your holiday.  Our island, Velassaru, which let me just say is the most beautiful place imaginable, everything I could have dreamed of,  like heaven-on-earth, and more!  well, it is super quiet, easy-going and very relaxed and I pretty much spent most of the time in my bathers and hat with a loose dress or top n' shorts tossed on over, and only really "dressed" for brekkie and dinner.
I enjoyed my colour scheme; it felt easy, unobtrusive and quietly pretty.  For my bag, I took my really old pink leather Country Road bag; it fitted in nicely colour-wise, was just the right size for my essentials, as well as perfectly beachy-casual and old enough that I didn't mind tossing it down on the sand.
Shoe wise, I took my nice black leather thong-sandals for nice shoes, just in case, and they never even left the suitcase!  I only ever wore my white rubber beach thongs, since the island was basically a white sandy beach all over.  I wore them on the plane too! comfort ruled over glamour this time ;)
It was too warm for my white LS cotton Carolyn shirt, so that didn't get worn at all either, but the other clothes eked out nicely for the week.  Even though your clothes have no opportunity to get actually dirty,  you do get a bit saltwatery-y and sweaty in the sun, so you do need to change every day.  My hat got worn continuously, and I was glad I had my one nice silk dress (at far right) to look swish for dinner.
My old, hot pink Metalicus cardigan went with everything but then wasn't needed on the island at all! however it was essential for the plane which was, as expected, freezing!  For the same reason, I wore my cream broderie anglaise petticoat/dress underneath other dresses on the plane for warmth, my plane outfits are the first and last pictures above.  And also I thought that dress could be a spare if needed.  It wasn't, but again I was so glad I had that extra layer on the plane!

jumper of triangles

$
0
0
I've knitted a jumper  :)
I've knitted jumpers before but this one felt different because I didn't feel like I was knitting an actual real entire jumper, a process that can sometimes feel a bit never-ending while you're so engaged... this rather unusual and innovative design is essentially a patchwork comprised entirely of plain and identical triangles.   So all you're doing is knitting is a whole bunch of very quick and simple triangles, separately, one by one... you knit a triangle, toss it on the pile, knit another, whenever.  The triangle itself is a super quick n' easy pattern that you've memorised after the first couple.  Making it a fairly mindless and terrifically painless project.  Once you have enough you stitch them together into a jumper shape.  So really it's like, the jumper to knit when you don't want to knit a jumper!
I bought the pattern pamphlet from Spotlight, thinking about the awkward quantity of fiddly diddly leftovers in my collection that were not enough to do anything with on their own but that were too much to throw away.  Mission: Use Up Leftovers; and I think I've accomplished that quite successfully, ahem *smug self back pat*  I used several different shades of grey, chocolate, beige, black, navy blue, mustard, natural and white; various Patons 8 ply and Rowan tweeds and several others too, basically a small collection of disparate leftovers I've held on to for forever.  I also had to buy some new, don't you always?! I bought some of the recommended Cleckheaton Country Naturals 8 ply from Spotlight.   Which is where I bought the pattern pamphlet too :)
The pattern can quite easily look like a, er, regular jumper too if you aren't keen on the multi-coloured harlequin look; you can always just use one colour for all your triangles.  In the pamphlet there's also pictured another, rather chic and stylish version made up in deep flecked charcoal which looks quite classic and mainstream and normal, and not patchwork-y at all! 
But, as an interesting way to make good use of little bits and bobs I reckon this is a pretty good design idea, and is a nice and easy project for beginners too  :)

Details:
Jumper; knitted by me from various 8ply yarns, a Nikki Gabriel design for Cleckheaton
Shorts; Burda 7723, made from an old charcoal gabardine skirt, details here

two sea change tops and a little blue skirt

$
0
0
I absolutely adored the new Lily Sage & Co Sea Change top when Debbie debuted it on instagram and rushed with unseemly haste to sign up when she called for testers.  My love has not diminished upon making up a few either.
The top can be made in either a stretch or a woven, and I elected to make up one in each.
Exhibit A is in a deep blue stretch panne velvet, from the leftovers from Sam's Magicka robe here.  Basically, it's a big, roomy, cropped, oversized velvet Tshirt.  Ha! I know that sounds weird and like the kind of thing that has potential to be hideous, but I think it turned out absolutely not.  I love it, unequivocally.
The Sea Change is a gorgeous design; modern and stylish, comfortably roomy, chicly oversized and tres elegant.  It is also a super easy, quick and simple project; a "can be started the night before to wear the next day", kind of a project.  My measurements fell on the upper side of Small, lower side of Medium, so I elected to go Medium.  This feels fine, but the top is quite unfitted and intentionally roomy so I would have been equally comfortable in the Small too, I think.
So, that's top numero uno.
And theeeeeeeen...
Having done a little cleanout recently I realised that I had very few skirts that matched my lovely new top... the horror!  I raced to rectify this terrible situation.
I unearthed from le stash a few smallish pieces of bright blue cotton corduroy, the leftovers from my dyed blue ray dress here.  I had just exactly enough to eke out the pieces of Vogue 1247... o joy!  It's bordering on embarrassing how many of these skirts I have made by now.  It's such a fantabulous little pattern; a. on its own merits, nothing else considered; and also b. for using up a pile of awkwardly too-big-to-throw-away leftover scraps, and also c. it's hard to have too many of these classic little A-line skirts in winter.
The brightness of the blue is borderline OK/not-OK for me.  I'm humming and haa-ing about it a bit.  I've been entertaining very tempting thoughts of dyeing it a deeper darker dirtier blue; a colour which I think will blend in a lot better with my current colours hanging in the wardrobe.  But for now I'm just going to live with it for a while and see how it goes...
I bound the inner seam allowances of the skirt with some pretty pink and white polycotton gingham, itself the leftovers from a lemon-butter bottling project, and also used for this nightie.  I have now used up every.  Single.  Last.  Weeny.  Scrap, of this stuff.  Hurrah!
The only thing I had to buy new for this entire outfit was the invisible zip for the skirt... and then this is a whole new outfit ALL from leftovers! So it feels kinda free, in a way.  Double hurrah!

But wait, there's more...
Exhibit B.
My second Sea Change top is made from a very lightweight and drapey crepe from Fabulous Fabrics.  All new fabric for this baby!  It is a rather divine and heavenly pale pink in colour, and sheer enough that I decided to underline totally in a slightly deeper pink, poly organza.  By "underline" I actually sewed all shoulder and side seams, the sewed the two different tops together around the neckline, right sides together, turned the organza top to the inside and under stitched and top stitched around the neckline... then, from then on, treated the two layers as one.  So, that's not really the same as underlining, but I have no other, more accurate word for that process.  All seams are concealed away within the layers of the top and bands.
I embroidered a tiny "x" to mark the back...
The armbands are the same stuff, in a garish lime-y greeny yellow that I was drawn to immediately.  While I was petting it another lady in the store remarked, "that is your colour!"
*cue immediate purchase*
I bought enough for a matching skirt too.  I'm rather excited about the skirt; which I have to confess is already made, finished and hanging in the wardrobe but not yet worn or documented, whoops!! anyway I'm excited about wearing it because I think it will go very nicely with both of these tops, and a whole lot of my current existing tops too.  In fact, I'm quite looking forward to mixing and matching all these things in with my new and existing winter wardrobe.


Details:
Tops; the Sea Change top by Lily Sage & Co, (1) dark blue stretch velvet, and  (2) pink and green poly crepe lined with pink organza
Skirts; Vogue 1247 lengthened, (1) blue cotton corduroy, and (2) yellow cotton corduroy, details here and my review of this pattern here

fractal

$
0
0
I've made a weird patched dress using twelve old Tshirts of my boys'.  I know it's bizarre and crazy and probably a little bit ugly but I totally love it!
I'm constantly pinning patchwork-y and randomly asymmetric things.  I'm actually very inspired by and crave to wear stuff like this A LOT in reality, even though I also make and wear a lot of plain things.  I think I have a very non-cohesive brain, wardrobe-wise.  It plods along all plain and quiet and unobtrusive for a while, "fitting in" with the norm *yawn* and then will suddenly have the urge to zoom off into arty, thrown-together-land.  Making something kinda weird and wild like this makes me feel quite exhilarated; sorta free and unconstrained and satisfied and happy.  I don't think I act upon this often enough.  Clearly, I need a little more such craziness in my life!
Anyway, the new dress.  I was inspired by this dress credited to Jurgen Lehl.    
I used one of my oldies, Vogue 7795 with some adjustments; namely with the front bodice tucks and back bodice darts removed and the waterfall skirt drape transformed into an asymmetric box pleat.  Also I made the back bodice and back skirt as one piece each, with the CB seam removed from both.  In my memory this is a very drop waisted design, so I also shortened the bodice pieces by about 4cm.
I've made this pattern up a couple of times before; both many years ago, my first version in white swiss dotted voile is pictured here looking tres touristy with a gelato and at the Fontana di Trevi in Rome, and my second version was pink, although I can't find any pictures of that one.
When you're making a large scale, randomly patchworked design like this one, I've found it's a good idea to draw out the adjusted pieces full scale and lay them out as a guide for the patchworking.  That way, you can see how the design is looking on the scale of the dress as the piecing progresses.
I selected twelve Tshirts, all old, some very old, cast-offs from my boys.  This is one of the things I love the most about it actually, in that I am so familiar with each and every one of these shirts, having watched my boys run around playing in them a zillion times, also of course I've washed them all, hung them on the line, folded them and tucked them away into their dressers about a zillion times each also.  
A sentimental dress then, in a way  :)
There's also one "new" fabric, harvested from a recent Absolute Fail... *sad face* IG'ed here.  
I cut all the fabric into varied width strips and then just got creative.  
In a super random design like this one it's good to install some order to the thing somewhere, and in this case I stuck to the same order in the colour arrangement.   I finished the neckline and armscyes as simply as possible with strips of black Tshirt, stitched on right sides together, then folded to the inside and topstitched.
So, my dress is fulfilling several intentions; firstly to satisfy that creative urge, and my desire for a bit more crazy in my life as outlined above.  Tick!
Secondly, I made it as a kind of a muslin for another project that I'm planning right now.  Then I had the patching idea, was distracted and got  a bit carried away.  I may or may not go ahead with that original plan, but I'm very happy with this particular result! I'm pleased to say  :)
And lastly, I recently received an email from Charlotte regarding the sew solidarity challenge run by the charity TRAID.  Essentially it's this: to commemorate the Rana Plaza garment factory collapse you select an old, not new! mass-produced garment, possibly from Bangladesh although I didn't restrict my options country-of-origin-wise, re-fashion it fit for a new life and then you're supposed to wear it on 24th April.  Last year I joined in the same-aimed Fashion Revolution movement by wearing my self-made clothes inside out.  Theoretically this year I could do either of these commemorative activities... option 1, wear this dress as per the Sew Solidarity challenge; option 2, like last year wear something else I've made inside out as per the Fashion revolution challenge; OR option 3, combine the two challenges and wear this dress inside out.  The only problem with option 3 is that I'm pretty sure my insides might be kinda too ugly for me to get away with this in my very conservative suburb!  The insides are a gridlock of overlocked seams, and because I used some fabric pieces wrong side out, the prints are then on the inside of the dress; so it's a bit of an unholy mess in there.  But I guess the option is there, should I choose to look irredeemably ridiculous.
Details:
Dress; modified Vogue 7795, made from old Tshirts
Shoes; Zomp, from Zomp shoe boutique

Inside Out

$
0
0
Today is Fashion Revolution Day; where we are supposed to reflect upon the question; who made my clothes?  And yes, I am wearing everything inside out too even though I have no labels.
You can find out more about how to get involved here 

Details:
Dress and petticoat; Vogue 1160, brown chiffon and silk charmeuse, details here and petticoat here.  It was a little difficult to get the zip on the dress done up inside out!! so it's only partway up  ;) but the evidence is covered up with my cardigan so that's ok
Cardigan; Audrey in Unst, knitted by me from wool I bought in Paris (Renaissance dyeing 4 ply poll dorset), details here
Sandals; la soffitada Gilde, from Zomp shoes

Now, on another note; I have been updating my daily outfit blog for the last year and a third and although I will continue to do so I have decided to make that blog private, for the time being at least.  There's no sudden or dramatic reason for this decision, just call it a dawning self-awareness, if you like.  I guess I'm starting to feel a little self conscious about it, like publicising it is a bit silly.  And that maybe I prefer to maintain a higher standard for the material I am dumping out there, for public perusal, on the poor ol' world wide web, since few my daily outfits are particularly exciting.
Except um, haha, *blush* I've just remembered that I've signed up for me-made May 2015! But I'll be posting those on the Flickr group, just like everyone else  :)
Thank you so very much to everyone who "liked" my posts  *mwah* and probably I'll still do a 6-different ways post here periodically, to round up some of my favourites.  I'll see how it goes  :)

lurid green skirt

$
0
0
A delightful morning tea with Sue and Megan this morning seemed like a good opportunity to crack out my new skirt for its maiden voyage.  And we were meeting in Kings Park which is one of Perth's most beautiful parks, so naturally I snuck along early avec camera et tripod to have a quicksticks photo session in a blissfully empty park, prior to our morning tea! haha, doesn't everyone do weird stuff like that?!  hmmm, don't answer that!
This is skirt "d" from the Japanese pattern book shape shape, originally called Unique Clothes Any Way You Like, by Natsuno Hiraiwa.  To be honest, I'm a little bit sad the book was renamed to be something cool and catchy in English.  I liked its first title; I thought it quite charming and I expect it was also likely a more accurate portrayal of the original Japanese title's intention.  Much in the same way that I prefer the title "she has a mannish style" over the new English title "she wears the pants" and speaking of that I have a bit of a grumble about that very misleading new title since there are VERY FEW pants patterns in that book! and almost all of those gorgeous pants pictured are NOT available as patterns!! but more on that another day...  I'm still quite glad I bought that book while it still had that original title too!
Back to my skirt, ahem.
I've made this pattern once before in silver grey, here.  Oooh, I loved that skirt, and have been wanting to replace it in my wardrobe for years now.  Now I have! although the colour is a little less, um, shall we say easy on the eye, haha!
This skirt is such a very simple and yet quite unique and clever design, cut in one piece with part on the straight grain and part on the bias.  I think it can be seen from the different angles how the drape of the skirt changes quite distinctively around the skirt from the seam around to the seam again.
The bias dropped a bit before hemming, as it is wont to do, and I really liked how that looked, so hemmed the skirt without evening it off. 
I like wearing it with the buttons situated just slightly asymmetrically to the left like here, putting the bias drape to the left/back, although the skirt can be swivelled around to wear it with the bias to the back or the right, or even the front although the longer length at the front looks a wee bit odd.  You can wear it any way you like, in fact.  Thus the original title of the book!
Please excuse the multiple pictures, but I think the skirt looks at its absolute very best when in motion, the bias part really comes to glorious, rippling, swishy life.  Really, there's few feelings more lovely that that of soft slithery fabric swirling around and against your legs as you walk.  Bliss.
All my materials; fabric, lining and buttons, are from Fabulous Fabrics.  My fabric is a rather eye-searingly intense chartreuse poly crepe, the same fabric I used for the armbands on my second Sea Change top, here, so the two should go nicely together.  A two piece set-tacular!  It's a little nippy for that top here today, so I hauled out a warmer thing.  Winter's coming, yay.  Please note the use of extreme sarcasm font there.  We get very mild winters here, but I'm still that wuss that barely tolerates the slightest hint of cold in the air.
The crepe is on the sheer side so it needed a layer underneath, either a lining or a petticoat.  I decided to line, and bought some poly knit of some sort or another, chosen merely for its excellent colour match.  It's quite stable stuff, so I merely cut it nice straight and even line at the bottom edge and left the lining unhemmed, it sits nice and flat and smooth and doesn't show on the outside at all.  I attached the lining to the skirt at the lower edge of the waist facing, and it does its job fine.  However, the knit seems a little heavy, and I'm worried it actually drags the skirt down just a touch.  I'm toying with the idea of detaching it, adding some elastic to the top edge and wearing it as a completely separate petticoat.  Or maybe not, depends whether I can be bothered.  We'll see how it goes.  Probably I'll plan to alter, while wearing the skirt to the end of its natural life, unaltered.  Story of my life, pretty much!

Details:
Skirt; skirt "d", from Shape Shape by Natsuno Hiraiwa, chartreuse poly crepe, lined with knit
Shirt; Burda 8497 with added cuffs, white cotton, details here
Sandals; Zomp, from Zomp shoe boutique

baggy blue trousers

$
0
0
My new trousers are kinda weird.  They are seriously baggy and they have a seriously dropped crotch.  But they feel sooo luvverly on! I think I'm going to like them, in their weirdness, even though I know I look a bit kooky in them.   *shrug*
See, every now and again I'm seduced by an unusual but super-cool Japanese pattern, the kind of cool thing that looks awesomely cool on cool people.  And then am brought back to earth with a bit of a bump when I look at myself in the mirror and am reminded: I am not very cool.
Ah, well I can but try, haha.  The thing is, these are the comfiest trousers evah, as in incredibly awesomely comfortable, as in like wearing an old pair of trackydacks or pj bottoms, kind of comfortable.  Cool people know a thing or two about comfort, it seems.  Well, apart from the ones that wear skinny jeans, obviously.
Warning; dropped crotch, dead ahead...
My trousers are pattern No. 13, the Tapered Trousers from "she has a mannish style" a Japanese pattern book by Yuko Takada, and  I could see from the picture that they had a seriously dropped crotch,  which is just what you would expect in a "woman wearing a man's pants" style.  So I did something very unusual for me and made a rough muslin.  My husband was a little bemused but Cassie gave them a big thumbs up, assuring me that lots of cool arty kids wear this kind of thing at uni.  This was both encouraging and, um, at my age; also a bit not, ahem!
Whatever, I ploughed ahead regardless; and ta da!
Technical blah-dy blah:
I made them in a deep navy-blue cotton corduroy from Spotlight, and cut the pocket linings and waistband facing from a pair of Sam's old pj's from the refashioning bag; nice soft and well-washed, navy-and-white plaid cotton flannelette.  I used a navy jeans zip, and a jeans-style, hammer-in stud for the button.  The pattern had patch pockets on the back, but since precisely zero of my husband's trousers, not jeans, have patch pockets, I put in double welt pockets instead.  This gives a far more authentic "menswear" look, imo.
My measurements put me at size ML to L, however I found the waist/waistband in this size to be seriously oversized, by 10cm at the very least!! even taking into account that you make a tie with D-rings to cinch in the back of the waist, paper-bag style.  So I removed a tonne of extra width in the waist, while still trying to retain the boofy, oversized pants vibe of them.
I drastically enlarged the front pockets, by about double.  Seriously, the originals were so tiny you would not be able to fit barely anything in them, let alone hands.  I'm used to having to enlarge my pockets on patterns but these were teeny.  I very much liked the way they were constructed, with self-fabric facings and with a French seam to finish.  I think the finished pockets look really nice, both inside and out.
I'm not keen on the way the fly front was constructed, with the fly pieces cut separately only to be sewn back on immediately, leaving you with an unnecessary and bulky seam in the centre front.  I really cannot see any advantage in this, and prefer for the fly pieces to be cut-on.  And will do it in that way in the future.
btw, I have read reviews for this book saying that not all the instructions are given for a pattern; well they actually are but not always on the same page as your pattern.  The book only gives the instructions for doing a thing, like a fly front, once and once only in the book.  For example, the instructions for doing a fly front are given on p71, with the Semi-flare Culotte instructions.  It does mention this in the Tapered Trousers instructions, but since they are in rather small print in amongst the Japanese characters then it's understandable why people might have missed that.  All the actual sewing instructions are illustrations, very clear and quite easy to follow.
So; in conclusion? I like my new trousers although, well to be honest I am a wee bit nervous of them, being so cool and all.   But I think my street cred will survive wearing them.  Actually, they remind me a bit of pants we used to wear in the early 80's... omigod, did I just admit to that?!  Eeeeeek!  Street cred in tatters!
I think when you read a lot of sewing blogs and online forums and what-have-you, like I do, you can get swayed by the very popular notion that Fit and Figure-Flattery are the King and Queen of Sewing.  As in, everything has to skim your body just to the perfect degree, not too tight, not too loose, and be perfectly right for your figure type.  Hey, there's absolutely nothing wrong with that at all; I buy into those rules all the time myself too.  Just that, sometimes it is fun and nice to stretch yourself beyond those rules, to make and wear something that is not particularly fitted, is not particularly figure flattering, and is just stylistically interesting and cool and fun and kinda weird.  And comfy.  Fashion should be fun, after all.  I think it's ok to try out new and unusual stuff once in a while.
And they are so warm and comfy, I'm going to love every minute that I have them on.  Well, every minute that I'm not worried what people might be thinking.  
Did I mention they are comfortable?

Details:
Trousers; the tapered trousers 13 from "she has a mannish style" by Yuko Takada, navy blue cotton corduroy
Tshirt; Closet Case patterns Nettie, with short sleeves and a breast pocket, in thin white jersey, details here
Cardigan; Miette, hand-knitted by me in Debbie Bliss Donegal Luxury Tweed Aran, in Gold, details here
Shoes; Enrico Antinori, from Zomp shoes

Black moto jacket

$
0
0

Finally! A wintery day!
It's pretty unusual for me to get excited about a wintery day, haha.  Believe me, winter is my very least favourite season... but I have my reason, see; I'm happy for an excuse to wear and show off my newest thing.  My moto jacket!
*sings* the leader of the pack...  brrrrm brrrrm brrmrrrrrrm!
Silke, the designer behind schnittchen patterns contacted me asking if I would like to road test one of her patterns and I chose the Tina jacket; a blouson style with an asymmetric front closure by exposed zip, and a wrap-around collar.  
Danke, Silke!
I immediately envisioned making something in a combination of leather/wool... well; making this, wot I'm wearing here, essentially.  My jacket here is made up pretty much exactly to the pattern... except I made my sleeve cuffs a little wider, because I have quite long arms apparently, and I added leather sleeve tabs, sewn into the sleeve seams and wrapped around to close with two hammer-in press studs.  I also fully lined my jacket using black polyacetate lining fabric.
Also I top-stitched the body and armscye seams, stitching the seam allowances down inside. And a little bit of narrow zig-zagging along the top of the pocket openings, to strengthen that bit.
And I also made the pockets about 2cm deeper.  So, just a few teeny alterations here and there, after all  :)
All of my materials are from Spotlight.  The "leather" is obviously vinyl, very thin, soft and pliable and a little stretchy.  I found I could use my regular sewing machine needle on it just fine.
The "wool" is a wool/acrylic mix tweed.  It felt quite stiff when I bought it, but a pre-wash in my machine on the gentle/wool cycle brought it up beautifully soft and fluffy, and the collar feels heavenly snuggly against my neck skin.
I chose to fully line my jacket.  The pattern doesn't stipulate lining but that's no biggie.  I used the pattern pieces, and to save myself the trouble of tonnes of piecing the multiple body pieces, I spliced the side front/side pieces together to cut them as one piece in the lining fabric, and also the centre back/side back pieces I spliced together in the same way.  When laying down the centre back piece; I laid it down with the centre fold line 2cm away from the fabric fold, giving myself an extra 4cm in width at the centre back. 
Note: re-enactment shots, when I realised I hadn't taken any pictures, doh!
This extra width at the CB I folded into a box pleat and basted it in place for the first 5cm in from each edge.  Doing this gives me a nice bit of wearing ease in the lining, which is always a good idea in a jacket.  I learnt this little tip from my standby McCalls 5525 coat pattern.


When cutting the pocket pouches, I cut them of half lining fabric with a leather facing at the opening edge, so there's no danger of any lining fabric peeking out unattractively.
Also, when cutting the sleeve linings; I tapered out by about 1cm down each long edge, again to give the lining a bit of elbow-bending ease inside the sleeves.

Thoughts?  Well, the pattern is a lovely classic style and the pattern works beautifully, all going together and fitting in place like a dream.  I really love the style, and how my jacket worked out.
However this might be a challenging project for the non-German speaking, beginner seamster.  This is a German pattern with German instructions and an English translation, with no illustrations or pictures.   Occasionally there were some innovative words and phrasing, reminding me of that time I typed a set of Patrones instructions into Google translate.  Memories.
The schnittchen website does however have an excellent step by step photo tutorial which clearly illustrates all steps and is very helpful.  I think if you had made a jacket before you would be absolutely fine with the English instructions.  They gave a good construction order and they worked perfectly well. 
Finally and most importantly, I'm super stoked and excited with my new jacket.  According to the fashion report on the news the other night, leather and leather details are IN this winter.  How fortunate!
Whatevs the fashion, I'm going to LOVE wearing it.  It's very cosy, comfy and super warm.   Its edgy vibe is a nice bonus  :)

Details:
Jacket; the Tina jacket by schnittchen patterns, faux leather and wool mix
Tshirt (under); white cotton, using my own custom fit pattern, details here
Skirt; Vogue 1247, overdyed purple cotton denim, details and my review of this pattern here
Tights; black polyester stretch, using my own custom-fit pattern, details here
Boots; Roberto del Carlo, from Zomp shoe boutique
In other making news, I ran up two new pairs of black tights for myself, in stretchy polyester knit.  I know I had this whole thing about how I wasn't going to make my own tights any more, just buy them... but I'm taking part in me-made May again and going ALL me-made, as is my "thing".  And I just decided that to cop out on the tights when it's so laughably easy to make the darn things, well it was just that; a cop out.  I bit the bullet.  2m of fabric, half an hour of cutting/sewing, whack in an elastic waistband; BOOM yah.
Two pairs of new, super warm tights.
Also I *cough cough* um, "made" a scarf....  as in five minutes of zig-zagging the cut edges of a nice piece of fluffy brushed cotton plaid and fraying with a fine-toothed comb.  I found this plaid in Homecraft Textiles.
Like most of the world, probably, I fell in love with the Zara blanket scarf that was all the rage last Northern winter.  And though we do actually have a brand new Zara store here in Perth now, I don't think we're going to get the scarves here.  However I still kind of fancied one for myself.  So I have my diy version now.  Yay!  And if I get tired of it I can always cut it up and make a top or something with it still!  Double yay!

Kryptonite lingerie

$
0
0
As soon was I saw this kryptonite-ish print I was just like, o gawd! must have....  And, naturally, lingerie was the very first thing that popped into my brain.  Well, of course.  It was only logical.
Mixing up my sci-fi sources there, but y'know wot I mean, right?
Haha! I've gotta be honest, this set gave me such a giggle to make.  I've been humming the Superman movie theme in my head the entire time I was making it.  Really.
Da dadadaaaaaaa! Da da dada dadaaaaaa!
I'm pretty rapt with them!  I think they're super cute.  Super cute, gettit?   Haha.  I think even Superman might approve.  Or at the very least, Sheldon.
Sorry.  I just can't help it!  The thought of superhuman underthingies just cracks me up  :)


Technical blahdy-blah...
Well, aside from the loud print the set itself is quite plain and featureless, really.
I used MakeBra 2610, and McCalls 2772 for the two pairs of matching undies.  All black findings and elastics.  The kryptonite print stretch fabric is from Fabulous Fabrics, the lingerie elastic I used for the undies is from Spotlight, and all the other bra elastics and findings are from MakeBra.
And I followed the absolutely fabulous MakeBra Youtube tutorial when making my bra.  Honestly, MakeBra is fair dinkum the best resource for bra-making I've come across, not that I'm an expert or anything, but just in my experience in making 16 of my own bras; that is my honest opinion.  They have a very nice range of findings and the.youtube tutorial is the most brilliant little tute, well worth taking the quarter of an hour or whatever to watch, if you have ever been tempted to have a go.  It demystifies bra-making and takes the difficulty out of it, but totally.  If you've been intimidated by the thought of making a bra, please do not be; it's really not actually that hard!
My original review of the MakeBra pattern is here
squeezing detail close-ups into one jumbled-up shot

pale pink Issey Miyake skirt

$
0
0
Why a pale pink skirt, 
I hear you cry?
why not a pale pink skirt,
is my reply.

Poetry.  Nailed it.
Sorry.  I'm in a silly mood and obviously having trouble thinking of intelligent-sounding stuff to write...
Ok.  So, at the beginning of the year I pledged to sew five items from my vintage patterns... this latest effort is my first; woot!
The pattern is Vogue 1384, a 1984 Issey Miyake design.  30 years old is pretty "vintage" yeah?  yup I reckon so.
I'm slightly amused at myself that I signed up actually since a few years ago I was so allergic to the very word "vintage" and could not hear it without an involuntary eye roll.  I was like, o gawd, so done-to-death!!  I should say I wasn't against any thing vintage, in itself, in fact I love antiques, and old things.  It was just the word "vintage".  Hehehe.  I must be mellowing somewhat.
Anyhoo, back to The Thing: my cool new skirt.  Or should I say, my skirt of a very very cool design.  As we can usually expect from Issey Miyake, it a quite unique, intriguing and interesting approach to a skirt; being a few oddly shaped rectangles cut, spliced and resewn together at seemingly random places, and boom; you end up with an asymmetric skirt.  Fabulousity!
I know, and I agree; creations made from "vintage" patterns can be a little annoying to read about on blogs, thanks to the patterns being so rare and hard to come by.  Not very helpful; and sorta inspirational rather than aspirational.  I'm sorry!
I used a heavenly soft pink poly crepe from Fabulous Fabrics, the same fabric I used for my other Sea Change top.  So the two make another matching skirt/top set, should I desire to wear them together.  But I think it will go with lots of other tops in my wardrobe too.
The pink poly crepe is on the sheer side, so I lined my skirt with ivory polyacetate fabric.  I managed to cut the lining as just one piece: I worked out how to do this after sewing the skirt pieces together and could see how the skirt "worked", so to speak.  I spliced the skirt pieces together at the relevent joining points and marked and sewed in the waist shaping darts at the top.  It ended up looking kinda like a big quarter-doughnut shape.  Then I just included it in with the skirt when sewing on the waistband at the top.   Simple dimple.
The waistband is of matching, pale pink silk dupion, also from Fabulous Fabrics.  I chose this because it is nicely stiff, inflexible and very stable, which is really good in a waistband for a skirt like this.  While the floaty, ripply, slithery poly crepe is really lovely for the skirt part of the skirt, it is not the slightest bit stable.  And this is very much a waist-defining skirt design, for which a structurally sound waistband is imperative.  
Some skirts are loose and flowy all over and are ok sitting low on the hips in a casual bohemian way; others need support, and the waistband is it.  This design is firmly in the latter category.
Summary:
What do I love: the asymmetric shape, and the random waterfall-y ruffle-y thing falling down into a handkerchief like hem at the front.  Divinely floaty fabric in the heavenliest soft pale pink.
What don't I love; it's nearly winter here and I'm going to have to put it away for a few months.  Boooo!
OK, I have nothing else remotely intelligent to add; so, until next time, amigos!

Details:
Top; the loose drape top, modified, from drape drape by Hisako Sato, linen cotton jersey.  I discovered a little hole while I was putting this on this morning, aaagh! Immediate emergency darning ensued!  I love this top!
Skirt; Vogue 1384, pale pink poly-crepe
Cardigan; I also wore my calico cotton cardigan today...
Sandals; Zomp, from Zomp shoe boutique

Orange is the new Black

$
0
0
We don't even get that show on TV here, but I've heard the name bandied about and thought it remarkably apt for my newest creations!
Now, is everyone else joining in the latest pretty underthingies making-fest?
Haha, sorry, of course it really goes by a far more lovely and grammatical name; "Everyone Deserves Pretty Knickers", and is the brainchild of Susan of Measure Twice Cut Once.  It's on its second year and I sadly missed last year.  Well, partly because I didn't know about it then.  Which is a bit sad because I love making underthings! it's fun! and also I'm an any-excuse kind of a seamster, as y'know.  Anyway, as soon as I read Susan's IG post I signed up.  Couldn't resist!  
The sweet nothings extravaganza starts 31st May running until 6th June.  So, I'm sorry to jump the gun, but I have a few things coming up on my plate at that time and if I was going to join in and make something I knew I had to get onto it right away  :)
My new set is a re-cycling of an old thing... some tights!
I think I used the pair on the left.. no, the right.. no, the left.... no, wait, maybe the right...
A few years ago I made two pairs of deep orange tights, and wore one pair a bunch until it sprouted holes in the toes.  I even gave them a 6 different ways post, that's how useful they proved to be in my wardrobe.  Anyhow, one pair were finally on their last legs (haha) and I considered cutting the feet off to make leggings from them, stretch a bit more wear out of them.  But the second pair was still hole-free and going strong, and instead I thought I could re-cycle the fabric from the worn-out pair into something different instead.  I managed to cut out the pieces for a new lingerie set, avoiding the areas of highest wear from the tights which were the knees and soles of the feet.
Paprika poly stretch originally from Spotlight, black stretch lace from Fabulous Fabrics.  Sliders, rings, hook/eye tape, black ribbon for bows, shoulder strap elastic and knicker lingerie elastic from Spotlight, bra foam and other remanding bra findings from MakeBra Some of the findings were recycled themselves from older bras that have bitten the dust too.
Patterns; I used MakeBra 2610, a balconette style bra pattern and my old McCalls 2772 bikini pattern for the two pairs of matching knickers.  I know right?, same old patterns, like a broken record, story of my life underwear drawer.  Well, when a thing works, etc etc...
black lace, and I made black ribbon bows
Sometimes I used red topstitching thread, sometimes black 
Shown here on Cassie's dummy Clarissa.  Confession time; my bras, while they fit me, are an awfully tight squeeze on my own dummy Bessie.  Whenever I've used her to model bras in the past I've had to stretch the bejeezus out of them, or pin them open at the back.  She is a wee bit, ahem, broader in the chest than I!

me-made May 2015; an overview

$
0
0
So, this year I took part in Zoe's me-made May yet again.  This is my eighth time joining in!
Obviously it's practically an institution now, and even though I'm pretty sure it's not aimed towards people like me; who comfortably wear an entire outfit made by myself every single day and have done for years, well, I still like to join in.  It's fun and maybe I'd feel out-of-it and maybe a bit bereft if I did not!  FOMO!  
ha, did I just successfully employ un buzz-acronym of our time? wow.  Before I know it I might even have got to grips with something else non-dinosaury, like my phone even.  
Or not.
Anyway.  My outfit pictures with the links to everything I am wearing are all in my MMM15 Flickr album here, should anyone wish to have a proper lookie.  I have no idea why some of the pictures are huge, sorry about that.  I think it's the way Flickr organises them or something.

So, the obligatory postmortem...
Did I learn anything?
Nope!  Not really!  That's ok though, I'm fine with just joining in for the sake of it!
Any holes?  Any workhorses?
No holes in my wardrobe, massive surprise, that! haha.  I had a few repeats, but mixed it up some and discovered a few nice new combinations that I liked and will repeat over winter. Most importantly, have reluctantly wrenched some old but tired things, kicking and screaming from my wardrobe and transferred them to the potential Salvoes bag.  *sigh*  The camera is a harsh and wretchedly truthful beast!
Workhorses: in this season; white tops, black tights, little knitted cardigans and brightly coloured little skirts.  For warmth; my moto jacket, and my peppercorn cardigan for lounging around in the evening.
Thoughts on the photos?
I've kind of got my tripod-and-remote routine down pat now and so it's pretty painless and easy.  I kept to one very convenient-to-me location, and allowed myself no more than 1 minute to take a few photos, and just selected one for the Flickr group.
I've thought of doing "interesting" daily photos again like I've done in the past for previous me-made months, but for this year and my current life, just doing boring ones was a good choice for me.

And that's it! I think?  Until next year.  I'm sure I'll probably continue to join in and do this as long as Zoe chooses to host it.
Viewing all 820 articles
Browse latest View live