Quantcast
Channel: Handmade by Carolyn
Viewing all 820 articles
Browse latest View live

New (not) khaki leggings

$
0
0
Hello  :)
I'm still renovating my wardrobe... and can I just say, beige leggings, hmmm.  (shudder) I'd taken a hearty dislike to mine over recent weeks.  But they still had some wear in them.  Wasteth not, wanteth not.  It was really just the colour that had become offensive to my eyes.   Corrective action was called for.  
To the dye pot!!! 
(spoken in the same tone as one says "to the bat cave!" of course!)
Before...
the transformative materials...
I used only a shake (that's an official term of measurement there) each of iDye in Brown and Chartreuse.  Probably a pinch at the most, plus heaps of salt.  Pinch, heaps;  some other highly technical terms.  Trust me, I'm an analytical chemist!
my tutorial on dyeing

Details:
Leggings; self-drafted of beige cotton knit, dyed khaki, originally posted here
Tshirt; self-drafted, grey knit stuff, details here
Dress; the gathered hole dress from Pattern Magic by Tomoko Nakamichi, charcoal suiting, details here

the paper doll project

$
0
0

Screen-printing: giant beachy polka dots

$
0
0
My latest screen-printing project  :)
Searching for design inspiration, I randomly set myself a theme.  The beach!  I sketched out several ideas and variations, some abstract some more literal, and spent ages agonising over which one I should do... aaargh, so indecisive!!  Eventually settled on this very simple and abstract one, obviously! since we are really pushed for time and space in our class and it's best not to to turn up with very ambitious ideas.  I had to finish this one at home since I only managed to get halfway through in class.  But I am seriously considering setting up at home to print at least one of my other beach-related ideas too.
I used a lovely lightweight cotton/linen from Spotlight, in a soft sandy shade.  This is probably the nicest, classiest fabric I have printed so far.  It was scary, but I felt ready to take a risk.
The colour palette (6 colours) :
The dots are all printed using the same imperfect circle template, but oriented different ways so they don't look identical to each other.
Funny moment; my friend J, with whom I am doing the class, on seeing my stencil "um, it's a hole?"
When printing I tried to vary the visual texture of the dots; at times I did a scanty pull, to get scratchy dots, at other times I put together blobs of slightly different shades of the colours without mixing properly, to get streaked or blotchy dots.
Before class, I cut out all my pattern pieces and tacked an accurate 11cmx11cm grid all over each piece.  When printing the dots I placed the screen just slightly off every now and again, because I like how a little imperfection makes the design look more casual and fun.  Plus, wonky designs are the beginner screen-printer's best friend!!
The whole shebang...
Thoughts: I am super happy with how the print turned out! and am pretty excited to see how the final garment will look.  I'm motivated to sew it up quickly, because my teacher specifically asked me to show it at our next class.. which will be our last!  Yes, I'm a little sad that my weekly class is going to end, but this isn't going to be the end of my screen-printing adventures, that's for sure!

Autumn leaves sundress

$
0
0
I made a sundress using my autumn leaves fabric, screen-printed by me here.  Those who like wonky weird imperfect prints are going to like this, if you don't, then avert your eyes!
The pattern is an adaption of dress T, from the Stylish Dress Book, the design Reana chose for me to make my sew bossy dress here, which now looks like this.  That one is such a great dress to wear; so comfy and easy to throw on it has quickly become one of my favourites  :)
For this new dress I didn't have enough fabric to make up the pattern as is.  I left off the sleeves, and removed about 15cm in width from the centre fold of both the skirt front and back, so there is no gathering into the bodice ... that's a whole foot taken out of the skirt's circumference overall!  and there was still plenty of room in the skirt for me to have inseam pockets.  I cut these from a much nicer, lightweight white swiss dot cotton.
The front neckline of the bodice has been scooped out a bit deeper than the pattern, and I split the front bodice and made a little placket, with buttons and buttonholes.  Just because, I dunno (shrug), something to focus on other than those weird and wonky leaves.  The front and back bodice each have a full facing, cut from a lightweight plain white cotton.
 Hehe... would you believe I've only just noticed, when I uploaded this picture? that one of the leaves on the front of the bodice is missing its stem??  Only just noticed! LOL!  And while drawing them in I checked and checked...  I've fixed this up now, but didn't bother to take another picture.

I'm a bit meh about this dress, partly because my print is ... funny; and partly because the fabric itself is a pretty poor quality.  It is a bit stiff and almost calico-like in texture.  Now I'm kinda kicking myself I didn't take the risk and buy a finer quality cotton in the first place, problem was, I had no confidence in myself and started out with the assumption I was going to stuff it up.   I will wear the dress, because it's airy and cool and will be great to have in the wardrobe in the hottest days of summer when I just want to grab something casual, and I'm hoping it will soften up over time with wear and washing.  The thing is, I usually judge my self-mades by posing the question; would I buy this if I saw it in a store?  And realistically I would probably pass this over, laughing at its hideousness.  Oh well.  
A thought...  I can always use it as an apron, for future screen-printing sessions?!  Ha!


I did learn something pretty important in printing and making this dress...  Cut out the pattern pieces before printing! 
This approach is hugely superior to printing a length of fabric and then deciding what to make with it, like I did here.  Several reasons...
There is less wastage of fabric ink and your own effort, since you are not printing fabric that you won't use. 
You can make sure that the print is properly covering the pattern piece as you are going along. 
You can if desired place the print just exactly how you want it to appear on the piece.  
It's guaranteed that you will have enough fabric printed to make what you want, there'll be no laying down the pattern pieces and being disappointed that you underestimated just how much you would need.
Another consideration... there will be no angst when cutting into your precious print since it is already cut out and ready to go!
And, learning from my own mistakes... yes, I have already sewn together my giant polka dot pieces too, and I'm pretty happy with that one.....  Stay tuned!  :)


Details:
Dress; based upon dress T from the Stylish Dress book by Yoshiko Tsukiori, screen-printed ivory cotton
Hat; Vogue 8844, ivory corduroy, details and my review of this pattern here

Screen-printing: golden curls

$
0
0
 We had our last screen-printing class (sad face)   I'm going to miss heading out to class!  Anyhow, since I feel up to doing regular screen-printing on my own at home I had decided to try out a couple of the less usual techniques; so, foiling...

I put a lot of thought into marking the placement of my design ... and came up with the following idea; those straight cut-out lines on either side of my stencil were masked with clear, see-through sticky tape, and are intended to be a sort of "window" through which I was hoping to see the lines of red tacking stitches, in order to put the screen down as accurately as possible.  Of course, you could just put the screen down on a large piece, print with a wide margin all around, and then cut out your pieces afterwards, but I had only exactly just enough of this pale grey silk/linen for my pieces and needed to be as fabric economical as possible.  This approach worked beautifully! and I would definitely do this again if I wanted to print a border design like this.
 Ta da!  the foiling glue actually looked pretty cool all by itself on the fabric, subtle and rustic in a tone-on-tone way like ancient stone carvings or something, and I was tempted to leave it like this!  But nothing ventured, nothing gained, or let's hope so anyway...
...and Eureka!
I tried in places to achieve a very subtle mix of shades, but mostly went for gold.  I only wear gold.  She says, all la-di-da like.
I quite liked my design, and how it turned out, but the foiling glue is trickier and even messier than regular fabric paint, if you can imagine! so I'm not sure if I would do this technique again.  The glue is like a close relative of epoxy, and if you make the mistake of getting any on your fingers it rapidly turns into a tenacious tacky stain and nothing short of Gumption will get it off.  No kidding!
Below should give an idea of how I'm going to use these pieces, when I get around to it.  Sometime, soon.
I'm really going to have to get cracking on the sewing machine  :) 

Army jacket; 6 different ways

$
0
0
My khaki army-style jacket has been my go-to coat/jacket this winter.  I made it two years ago, completely inspired by all the fabulously cool examples I had seen out and about in Tokyo.  I got home and pretty much immediately set about gathering all the bits and pieces to make one for myself, adapting a jacket pattern from Burdastyle magazine so the features matched the ones I had seen in Tokyo.
Australia often marches to the beat of its own drum, fashion-wise; and looks that are IN! overseas may or may not take off over here.  You can never tell.... but anyhow, this winter army jackets were IN! here and I remembered that I had made one (o serendipitous moment!) pulled it out and have been wearing it pretty solidly since.  It is sooo warm!  
Now, you might think it could only been worn as a casual thing, but being such an on-trend item I've found it incredibly useful and the deep olive colour goes with everything I have in the wardrobe.  I also made an attachable fur-lined hood to go with it but obviously such a thing is pretty irrelevent to our climate and so I've never attached it.  Maybe one day I will visit a snowy climate soon and can happily button on the hood without looking ridiculous?  A girl can but dream.... but in the meantime these are some of my favourite combos with it from this winter.

Below: at left; casual to the max, worn with my purple flared jeans.  Funny thing, I've kind of gone off jeans completely lately and don't want to wear them at all.  I've semi-tossed these ones out now... they're on probation....  At right; the jacket kept me toastily, snug-as-a-bug warm on our coldest day (15C) along with my crocheted Granny squares skirt, a black Tshirt, black woollen tights and biker boots.  I had my knitted gloves on for part of that day too, but not for the picture... brrrr!
At left; I've seen sequins combined with utilitarian khaki in a gazillion gorgeous street-style photos, and loved the craziness of the look, so I wore the jacket over my own silver sequinned skirt, a drapey white top, and with black suede pumps to a dinner with friends, and felt like an ultra trend-ite, for once!  At right; sporting a symphony of satisfyingly subtle sludgy goodness, worn with my khaki linen shirt, my sludgy little skirt (incidentally, the same fabric as my purple jeans in the photo above, dyed brown), my olive leggings, and olive knitted socks (not really showing here)   A bit drab maybe? but then again drab is my middle name.  Seriously, you should see the looks I get when I fill in forms.
(10pts to anyone who can pinpoint that quote....)
At left; worn into the city, with my rusty-red wool/silk skirt, black woollen tights and high-heeled booties, and at right, worn with my gunmetal blue silk dress, red hoodie and paprika tights.  Incidentally, this is today's outfit, and I had a lovely lunch out with Dad.  He was wearing this shirt, actually nearly every time I see him he seems to be wearing it!  Which is super nice of him  :)
So, the weather is warming up gradually, in fits and starts, and soon I'll stop reaching for this jacket but I've sure appreciated and enjoyed its cosy comforting warmth and its easy-going style.  Hopefully the trend will stick around for a few more winters to come!

Beachy polka dots dress

$
0
0

So, we had some purr-fectly dee-lightful weather last Monday, allowing me to wear, and take some piccies of, my dress. The product of my giant beachy polka dots fabric, screen-printed by moi.  Um, I'm completely satisfied with how it turned out.  And I can think of nothing further to add.  Not like me, I know  ;)
OK, just a few things.  
I used the pattern for dress F from the Stylish Dress Book by Yushiko Tsukiori, chosen because I wanted an almost featureless tunic dress, with no darts and minimal shaping to interfere with my print, but still had a certain je ne sais quoi.  This design, with a short neckline split and two piece open sleeves with a discrete but pretty little ribbon to tie them closed, was exactly what I wanted.  I cut out all the pieces before printing and sized my print to fit the pieces.
A stylistically simple design, like my stylistically simple print.  I added the obligatory-to-me pockets, ahem; deep inseam ones.  These are cut from the same sand-coloured cotton/linen fabric as the dress, but unprinted obviously.  The same goes for the bias-cut sleeve ties, and bias neckline finish and the neck facing.  There are advantages to printing your own; you can leave it off all the "invisible" bits of your dress, and that is a vast improvement... nothing to show through!
It's been a thoroughly satisfying project in that the result truly matches my vision.  I'm going to really enjoy wearing it.  
The creativity demon inside has been sated... for now  :)

Thoughts on hem lengths; linings and slips

$
0
0
One of my wardrobe renovations performed lately was to shorten this skirt by a good several inches; a super quickie reno, but one that nevertheless completely transformed this skirt for me from something that almost caused me to shudder whenever I happened to catch sight of myself in a shop window reflection, to something that I have been wearing with a lot more pleasure and more confidence in how it fits nicely in with my style now.  Although I made it to wear this winter, it didn't really "go" stylistically with any of the tops and cardigans, heck not even any of the shoes and boots that are the mainstays of my current winter wardrobe.  When I trialled pinning it up a few inches; hey presto, problem instantly solved.
I do have this theory that when it comes to skirts we all have a personal Ideal Hem Length; that is good for YOU, and it could be a bad idea to mess around with it too much.  For me, I think I prefer winter skirts to be EITHER about 10cm (4") above the knee, OR quite long at midi-length, like roughly 20cm (8") above the ankle.  These are lengths that just look better with all my tops, all my shoes and that suit my personal style.  Obviously I reserve the right to change my mind about that one, at any moment, according to any and all fleeting fashion whims.
Good thing I can sew for myself, hmmm?  ;)

I had already finished the lower raw edge with violet bias binding, so to unpick and re-stitch it up a coupla inches higher was an ultra quick renovation...  and the extra length is still there, should my wardrobe tastes migrate to embrace the aesthetics of different hem length.


now that's a nice deep hem!


And now to another topic, slightly related...
Kathleen wrote a comment bringing up the topic of skirts; specifically, to line or not to line? That is the question! which I thought worthy of further exposition.
In the photo above I am actually wearing a full slip underneath my outfit, not that you can see it, which is the point really!

I line the majority of my skirts but not all of them, and it is always something to consider, how do you choose which gets lined and which does not?
I'm sure we're all familiar with the horrible experience of your unlined skirt slowly and inexorably riding up your stockinged legs, as if driven by some strange evil impulse of its own... which is why a lining is a good idea.  But for many of us in hot climates a lining can be a pesky thing that clings hideously to your sweaty legs for most of the year.  So what do you do if you want a bit more versatility, for your skirts to see more active duty, to be an all-seasons item as it were?
The answer is of course, a separate slip or petticoat.
I chose to make this skirt without a lining because I wanted it to be transitional thing, to wear on both winter-y days and warmer bare-legged days too.  And on cold days when tights are on, as above, I have a few slips, or petticoats that I can wear underneath, that do the same duty as a lining.  In the outfit above, I am wearing a pale blue silk petticoat, chosen because the colour went with the rest of my outfit, not that you are supposed to see it! but still, just in case  :) I like my colours to "go".  So when re-hemming the skirt I was careful to hem it to a length that I could still wear my petticoats underneath it.
It's always really good to have several petticoats or slips on hand from which to choose.  I have eight full slips or petticoats in total, half of which could pass as little summer dresses if worn with extras: this pale blue one, a pale pink one, a beige one (easily my most useful one), a cream broderie anglaise one and a black one, shown long here but I have since re-hemmed it quite a bit shorter, and also three long and full-skirted ones, in yellow, pink and a white Metalicus one.  I don't have any half-slips... but then until I started listing them for this post I didn't realise just how many petticoats I actually had and maybe I have an abundance already!
So, in summary: To Line, or to Slip? that is the (paraphrased) question...

Later edit: for those looking for a pattern; the lovely and clever Sherry of pattern scissors cloth (I miss her!) designed and uploaded the Ruby slip, a pattern for a simple bias cut slip with the option for a lace bodice, and also generously provided extensive and super helpful instructions.  Available for free download here  


Details:
Top; Vogue 1115, blue denim details and my review of this pattern here
Skirt; Vogue 8363 heavily modified, green cotton corduroy, more details here and my review of this pattern here
Petticoat; Burda 8071, pale blue silk, details here
Tights; self-drafted, blue denim-look jersey, details here
Shoes, Francesco Morichetti, from Zomp shoes

In which Sienna models some spring-y attire...

$
0
0
The Perth fashion festival may be over but some are still dressing to impress.
Sorry, I just could not resist, these pictures put such a smile on my face, she looks so funny.
I hope she puts a smile on your face too  :)
She is also appearing today on photo maisonette

oo helloo there!

the paper doll project

$
0
0
(I've pledged to wear only clothes handmade by me this year and to sketch my daily outfits in my Fashionary.  I'm calling this; the paper doll project)
6th-11th September

12-17th September

18th-23rd September

G'day  :)
So, you may have noticed that I haven't put in any links to the individual items in this post... see, I kind of figured that that probably that wasn't very interesting to anyone by now, which is ok of course   :)  However if anyone is interested in seeing a particular sketched garment for real in a real photo then please ask and I will provide a link to that post in the comments.
Cool?
In new-season wardrobe news, I have been making and have things to show.  The photography-me is typically lagging, like the proverbial tortoise, way behind the making-me.  Which is a hare.  Racing ahead.  Um, bit nonsensical there, but hopefully my drift is getting got!
The weather has been awful lately.  We've had staaacks of rain; officially it's been the wettest winter in a decade.  The thing is, rain is actually very good news here because we have had a terrible drought for the past decade.  So rain is technically a good thing, but everyone is a bit depressed and not coping simply because we have forgotten what it is like to live with rain!

Libra

$
0
0
... the sign of the scales.
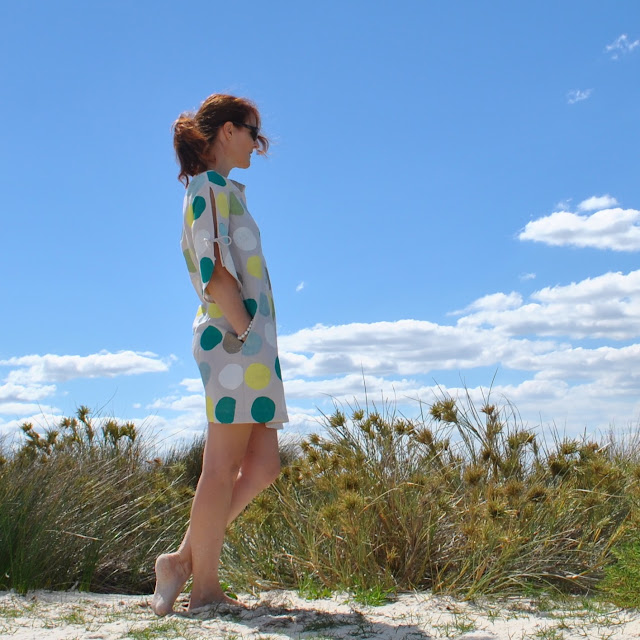
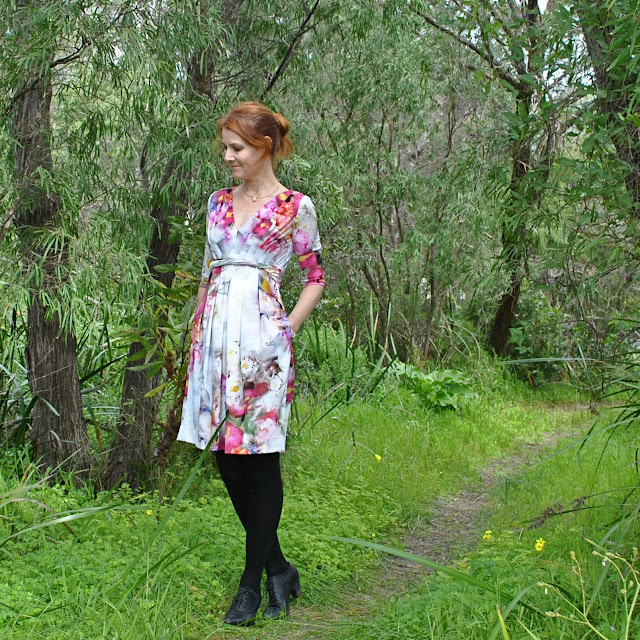
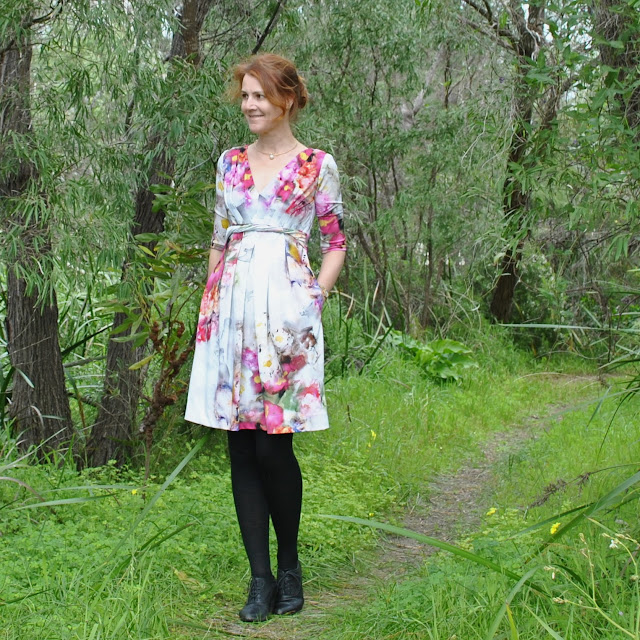
So at first sight there may appear to be absolutely nothing scales-y or balanced or anything at all even vaguely Libran about my ensemble.  So what on earth is the Libran element here... ?  Well ME!  Yes, it is my birthday today.  And I have made for myself a birthday dress, especially for socialising like the flirty sociable little butterfly that Librans are supposed to be.  Hehe, I can't help but laugh at that description since I am the complete opposite of a social butterfly, seriously!  It's a miracle that I'm not still tucked in the corner of the laboratory hunched over the HPLC, but actually do have friends, and a husband!  Although maybe I just swapped the HPLC for the sewing machine?  Yeah.  I think I totally did.  You just can't escape your true nature...
However, socialising has been had.  Monday I had a delightful morning tea with friends, who gave me a Fabulous Fabrics voucher.... aah they know me so well!  And I intend to make a nice dinner and cake to have with my fambly tonight.
But, enough blahdy-blah... my new dress.  Florals, for spring.  I know right?  soooo innovative! :D  But everyone loves to have a pretty new dress for the new season, yes?
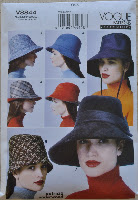
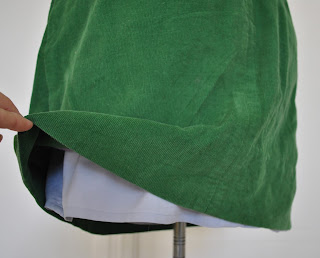
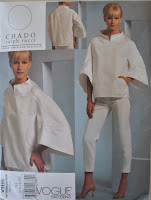
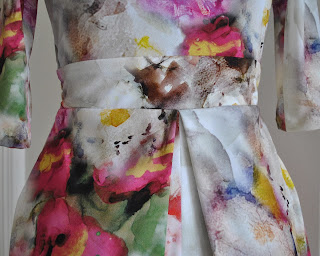
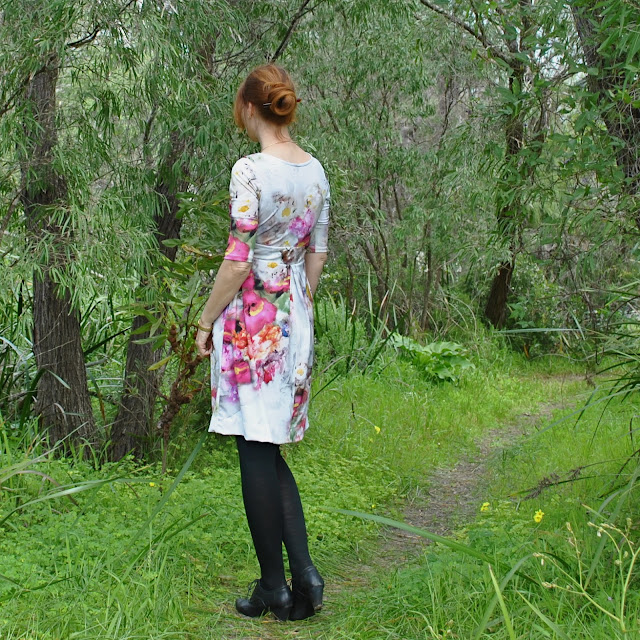
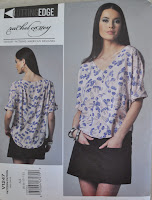
This is Vogue 1194, a pattern I bought not long after it first came out and have just never got around to it.  I made it pretty much to the pattern except with just a few minor variations... I folded the excess fabric at both shoulders and also at the centre of the skirt back into pleats, pictured below, rather than have gathers as per the pattern.  I'm afraid I just do not like gathers very much, poor things.  And I have shortened the sleeves to elbow length, more suitable for our warm weather.
The fabric is a gorgeous watercolour-y printed stretch knit from Fabulous Fabrics.  So, actually I originally wanted to make this fabric into a lingerie set, and the day I bought it I was meeting my friend J for lunch and showed it to her.  She seemed slightly horrified that its loveliness was never going to see the light of day and urged me to make a dress instead.  I went away a little thoughtful, a little dampened, but still fairly determined to make lingerie.  I showed the fabric to my mother, and to Cassie next, both of whom vehemently agreed with J that to make it into lingerie was the silliest idea they had every heard.  Well, they put it more tactfully than that but that was the gist of it.
I felt even less certain about my lingerie plan.
The final kicker though was when I laid down my fabric and pattern pieces and discovered that the Vogue 1194 skirt pieces plus a few others pretty much fitted perfectly and I only needed to buy a bit more to get out the remainder of the pieces.
The universe was telling me something and I was finally getting it.
So I cut out the dress instead natch... and ended up making my lingerie set from my poppies print instead, so all's well that ends well, no?
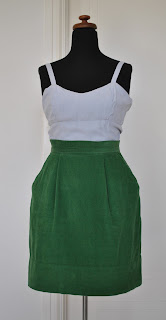
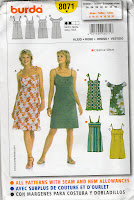
After all my talk about slips and linings the other day, maybe I should mention that the dress is unlined, but that I am wearing my beige satin petticoat underneath.  Hope that's not tmi.  Or course the petticoat cannot be seen, which is just the way things should be, yes?

Details:
Dress; Vogue 1194, floral stretch fabric
Petticoat (not seen): Burda 8071, beige satin, details here
Tights; self-drafted, of black merino wool, details here
Shoes; Django and Juliette, from Zomp shoes
Pattern Description:
Pullover, mid-knee length dress has loose-fitting front pleated and gathered bodice, bands (twisted front), raised waist, A-line, front pleated and back gathered skirt, side pockets, stitched hems and long sleeves.
Pattern Sizing:
Size 8-14. Other reviewers noted that the pattern runs a little big so I went down a size from my usual and cut a size 8.  This was a good decision.
Did it look like the photo/drawing on the pattern envelope once you had finished sewing it?
In essence, although I wanted a springy dress so cut my sleeves to three quarter length.
Were the instructions easy to follow?
Very! and also it is rated an Easy pattern by Vogue
What did you particularly like or dislike about the pattern?
I have always liked the simple softly draping pleats on this one, and the flattering V-neckline.  The skirt is full enough to allow deep side pockets and yet still appears slimline and not pouffy or bulky.
The look of the gathering on the skirt back on the pattern envelope caught my eye in a not-good way, fortunately it is easy to instead fold the excess fabric into a sleeker-looking box pleat.
For my size the pattern stipulates that 1.9m of fabric is needed.  Cutting the sleeves to elbow length, I found 1.3m of fabric to be sufficient.
Fabric Used:
Printed stretchy fabric 
Pattern alterations or any design changes you made:
I pleated the excess fabric in the front shoulders, and also I folded a symmetrical box pleat centred on the skirt back joining seam, thus eliminating all gathering in my version of this pattern.
I hand-stitched the sleeve and lower hems.
Would you sew it again? Would you recommend it to others?
OK, so I always say yes I will sew it again and then only occasionally do I follow through, but this is such a basic and classic silhouette and so easy to run up very quickly, so I am absolutely certain that I will, soon  :) 
And yes, highly  :)
Conclusion:
Easy, stylish and flattering, this basic yet prettily feminine design is very lovely in my opinion.   I'm very happy with my new dress!

Snowy-white Nougat

$
0
0
The clever AnaJan of Stepalica is designing patterns now!  and I was honoured when she very kindly sent to me her debut design, the Nougat dress to try out.  Thank you so much Ana!
The Nougat is a classic, waisted, sleeveless A-line dress with a pretty swirly-skirted silhouette and closure by invisible zip in the left side seam.  Where the pattern is extremely clever however, is that it includes three variations of various degrees of difficulty, meaning there is a something for all skill levels.  If you want a challenge then version A with its multiple curved seams will give you a good one; if you want a pretty, A-line dress then version C delivers this too.  I went for the trickiest version A for my first go, but the one pattern includes all pattern pieces and instructions for the two progressively more simplified versions B and C, and there are comprehensive instructions to walk you through constructing the more fiddly bits of the more advanced version A.  I was a bit late for the Nougat sewalong, but I consulted Ana's posts when I did get around to making my own version, and I found all her sewalong instructions to be detailed, thorough and very helpful.
Ana suggested for the bodice and skirt yoke pieces to be cut from different colours of fabric, to enhance and showcase the swirl effect of the piecing.  The seaming can be seen far better on Ana's very impressive blue version of the dress here with absolutely perfect seam joining!  However, I really just wanted a lovely fresh plain white dress to ring in summer, so used a small portion of an embarrassingly ginormous quantity of white fabric that I have stuffed in bags in the cupboard under the stairs  (mwahaha)  This fabric originally spent a few years as pictured below.  Until I decided that big white swags of fabric decoratively framing a bedhead were a haven for spiders as well as pretty passe.  I took it down many years ago, but obviously I kept all that wonderful fabric!  It is actually very nice fabric; a mixture of synthetic organza and chiffon which means of course that the dress can be just tossed in the washing machine, will drip dry, and will never ever need ironing.  Yeesssss!
before...
 The bodice and skirt yokes are made of double layered organza, with the inner/lining layer a plainer version of the pattern, relatively un-pieced apart from a few basic shaping seams and darts.  Because all my fabrics are pretty fray-tastic plus see-through, I put quite lot of thought into how I could stabilise all those raw edges.  There are so many of them in this multi-pieced design!  I didn't want to overlock because the stitching would show through and be super obvious on the outside of the dress.  So for the organza bodice and skirt yokes I sewed the seams, pressed open, trimmed the seam allowances quite narrow with my cutting wheel, and then double top-stitched each side of each seamline.  I posted a close-up picture of the seam detail on photo maisonette last week. 
The skirt is actually three separate identical chiffon skirts, layered.  One is attached to the shell of the dress, the other two sandwich the lower edge of the lining.  Each side seam is sewn in French seams, and I finished the lower edges of each skirt using the rolled hem stitch on my overlocker.  I do really love the romantic ripply look of the layered skirts.  The design is a very lovely shape.  Very twirl-tastic, yes?  I did a twirl photo, just because.  Hehe, one of my pictures revealed that I am a fairly grim-faced twirler.  I am so impressed by people that can twirl and have a happy, carefree facial expression at the same time.  Me, I need to concentrate on not falling over!
I am wearing my new ivory summer sandals too.  Aren't they lovely? Obviously ivory is one of my favourite colours anyway, no matter what the season, and I really like the woven wedge heel too.  These will be appearing in lots more summer piccies to come!
Making my dress was not all plain sailing.  There are boo-boos.  I didn't notice at first that the two halves of the back bodice were different to each other and so mistakenly constructed it as a mirror image of one side; therefore three of my seam lines on the right side of the dress do not join up.  One on the shoulder, one on the bodice and one on the skirt/bodice seam.  Rats.  But since I did use just one colour you can't really tell without super up-close inspection, hehe.  My other seams all mostly join up  ;)


Details:
Dress; the Nougat dress by Stepalica patterns, white organza and chiffon
Sandals; c/o Misano shoes

it's hard to know what to do with your arms when taking side view piccies... 


Pattern Description:
The Nougat is a classic, waisted, sleeveless A-line dress with a pretty swirly-skirted silhouette and closure by invisible zip in the left side seam.  The pattern includes three variations of various degrees of difficulty, the most advanced option has a complex swirled twisted diamond motif in the front bodice, with sunburst seamlines radiating out and then back in again to join together at the left hip. 
Pattern Sizing:
European size 32-44. I cut a size 34 in the bodice, grading out from the waist to a size 38 at the hip level.  Because of these personal sizing changes I also cut the skirt pieces to be a bit more flared going down to the hemline than the pattern to give a better look proportionally.
Did it look like the photo/drawing on the pattern envelope once you had finished sewing it?
Yes.
Were the instructions easy to follow?
The instructions are very clear and well written, and very helpful.  I definitely needed them for that complex diamond motif! but I did use some of my own preferred sewing construction techniques for some of the basics.
What did you particularly like or dislike about the pattern?
The silhouette is not one I would normally go for, and I quite thrilled with how much I like it.  I really love the line of the skirt.
I really enjoyed the challenge of sewing the diamond motif and in spite of a few boo-boos I am pleased with how it all came together.
Fabric Used:
Synthetic organza for the bodice and skirt yoke and chiffon for the skirt 
Pattern alterations or any design changes you made:
I stuck pretty closely with the original design, and just cut the skirt a bit more flared for my version.  I sewed double rows of topstitching flanking each seamline on the bodice and skirt yokes, both to visually define them better and to anchor and stabilise the seam allowances and guard against fraying.
Would you sew it again? Would you recommend it to others?
I think I only need one of version A in my wardrobe since it is quite a distinctive design, but I would definitely sew either of versions B or C again.  I recommend version A to the advanced seamster looking for a challenge.
Conclusion:
I am very pleased with it!  I really wanted a white dress for summer which is why I went for a solid colour version of the pattern, and now it reminds me of an old-fashioned tennis dress.  There is something quaint and ladylike and yet still sporty about the silhouette that I really like.  The seaming is really interesting, and I am in love with the swishiness of the skirt.

A Hunter Miette

$
0
0
Hello!  I've knitted the Miette cardigan.  This is a free downloadable pattern by Andi Satterlund
This design first caught my eye when I saw Carmela Biscuit's utterly perfect LBC (little black cardigan) during me-made May.  So perfect!  Everyone needs a cardi like this one, I thought.  I mentally filed the name away to check it out sometime... and when the Handmakers Factory announced a Miette knit-along, I discovered it was not only cute, but a fabulously free! pattern!
This is a gorgeous little design, subtle lacework around all borders but with plenty of stocking stitch so you can knit happily in front of the telly and not miss anything.  I really like how it is knitted top-down and all-in-one so that you can try it on as you go to check for fit.  Plus you can keep knitting to add length, using up excess wool should you so desire.   I did so desire, and added an extra two pattern repeats  'cos the original is a tad on the tiny side. As in cropped-tiny, not tight-tiny.  More like a bolero than a cardigan really.
Knitting all-in-one-piece also means that once you've finished knitting there is not even one single seam to be sewn up.  This is Smart knitting; a new-ish concept for me knitting-pattern-wise but one that I am absolutely head-over-heels in love with already.  Let's face it; sewing up the pieces is a bit of a pain and everyone hates that bit, right?  Really, a clever designer can easily dispense with all the seams in any knitting pattern, since your garment ends up as a one piece thing then logically there's no reason why most designs cannot be knitted as one piece as you're going along.
This should have been a super quick and easy knit, but I still managed to take forever.  It was just one of those projects where nothing seemed to go right.  Following is the truncated saga of my Miette...
Did tension square.  Tension just slightly off but hyper-enthusiastically got going anyway.  Three entire balls later had to admit it was going to be too small.  Unravelled in entirety.  Started again in larger size.  Ran out of wool.  Wool shop sold out.  Wool shop not ever getting it in again.  Searched a coupla real life shops.  Searched online.  Ordered from the UK.  Waiting on extra ball.  Missed end-date for knit-along.  Waiting.  Waiting.  More waiting.   Ball finally shows up, cardigan finished mere hours later, worn and photographed same day, bam!  
Phew, mission accomplished!!!  (air fist pump)

Details:
Cardigan; Miette in Debbie Bliss Donegal Luxury Tweed Aran, in col.Hunter (360026)
Skirt; my own design, stretchy layered lace, details here
Tshirt (under); self-drafted, white cotton jersey, details here

Sandy top with gold bits

$
0
0
OK, so I've made a top.  Simple, fairly plain, unexciting even? but I'm totally happy with it anyway.  Hard to see in the photo above, but the front and back neckbands have little golden swirls, twirling and tumbling sinuously around it.  Screen-printed by me!
The neckbands are of pale grey silk/linen from Fabulous Fabrics, and the remainder of the top is made using a pale sand-coloured cotton-linen from Spotlight,  the leftovers from after I cut out the pieces for my giant polka-dot dress.
I used the pattern for top 136B from Burdastyle magazine 07/12.  Sam gave this mag to me for Christmas last year, but this is the very first thing I've made from it  (oops!)  No matter, I reckon Burdastyle patterns never really go outta style  :)  When planning my top I knew exactly what I wanted; a pull-over loose top with a big wide neckband for screen-printing, and either a wrap-front or something to define the waist.  I searched through, only like every single one of my patterns, the lines of this one leapt out as pretty close to the vision I had in my head.
Technical blah-dy blah: I have to confess that while stylistically the design was perfect, technically it was far from a perfect fabric/pattern match: the pattern was designed to be tight for stretch knits and came graded for Plus sizes 44-52 only; and I wanted "loose" in a woven and I generally go with a 38.  But I reckoned it could work; those factors have the opposite effect to each other so it's like they cancel each other out right?  It was worth a try, anyway.  I've never let fabric inappropriateness get in the way of my creative vision! and was pretty sure it would be OK.  
I traced a size 44 and just cut my pieces with quite big seams allowances, plus a touch extra at three areas just in case: the underarm points on the front and back, around the widest part of the sleeves, and with extra width at the hips; essentially, the places where you might expect extra ease would be required.  Basted the pieces together and tried it on, ensuring the raglan seams matched the notches on the neckband pieces as a set-in-stone point of reference and just made a few little adjustments in and out and here and there to some seams.  I reckon it turned out OK!
The waist ties are meant to be attached inside the centre neckband seam, from the top to the bottom of the seam, which means that not only would it have covered up part of my print, but when you wrap it around your waist it would have dragged the V-neck right down, thus rendering it a very cleavage-tastic top indeed.  How it is, is quite cleavage-y enough for me already, thanks!  Burdastyle's coy description is "Impossible to ignore!"  Ahem, so I sewed mine on further down, only just covering the very lowest tip of the neckband.
The neckline is a flatteringly wide portrait neckline, which means that my bra straps are showing.  But I'm cool with that, since I just happen to have a bra with straps that just about perfectly colour-match this top.  Now is that good wardrobe planning, or what?!  I reckon they just look like little camisole straps.
And; I have a pair of new flat sandals for summer!  these gorgeous cheerful bright coral sandals are going to pep up my wardrobe so nicely!  They are practically neon!

Details:
Top; Burdastyle magazine 07/2012, 136B modified, with neckband screen-printed by me here
Skirt; Vogue 1247 modified, ivory curtaining fabric, details here and my review of this pattern here
Sandals; c/o Misano

the paper doll project

$
0
0

Gunmetal linen trousers to jacket-y thing

$
0
0
So new top...  well, new? not really, this funky little jacket was until recently a pair of menswear-inspired, wide-legged, linen trousers, that have been sitting in my re-fashioning bag for a coupla years now.  True!  I took them out to wear as fancy dress last year, but they went straight back into the bag afterwards!
I originally made these trousers back in 2009 using Burda 7944, and they have been good trousers.  I wore them a lot and even featured them in a 6 different ways post forever ago. 
 But eventually they got to the stage where they looked like a dishrag practically as soon as they went on and got "knees" in them instantly.  That's linen for ya; I love it to bits but if it's not a quality weave it does tend to lose its integrity quickly.  This linen was not particularly fine-grade in the first place.  Some linen trousers can get away with the dish-raggy look but not a tailored design like this one. 
I've re-made them into a loose-sleeved jacket thingy.  I've done this very same re-fashion once before, making a boxy little jacket out of a pair of Mum's old cast-off three-quarter pants, but these trousers started out with quite a different shape to those pants so have ended up as quite a different shaped jacket.  The waistband is close-fitted, not loose, and those long wide legs with a satisfyingly deep cuff have resulted in long wide sleeves, still with that satisfyingly deep cuff on the ends.  You put it on with unzipped fly, and then zip it up down! and do up the buttons, just like when it was trousers but upside down.  Cool huh?  I really like it in it's new identity.  Making something like this is deeply satisfying to me.  Taking something old, unwanted and un-chic and making it into something different; and I use the term different as in the kind of thing you rarely see a pattern for.  It's hardly mainstream, is it?  This is why I sew; to make things for myself that are individual and unusual.
A quick run-down on the procedure...
Firstly, you cut off the legs to give a "body" section, and cut open the inner leg seam from one inner leg to the other.
as my son says; ironing is for the weak!!!
Re-stitch both the front and back crotch seams to be straight lines from the waistband(back)/bottom of zip(front) to the old-crotch/new-neckline opening,  Cut off excess fabric (the old-crotch curves).
My trousers had pockets; stitch the opening closed and trim off the pocket bags inside.  I know I know, it's slightly painful to remove pockets, even useless ones, but they just do not work in this design.  I also switched the old plastic, colour-matched buttons I had used previously for nacre buttons sewn on upside down with the mottley-brown underneath showing, just because.
Stitch up the shoulder seams and cut armhole curve on the body section, and a sleevecap curve at the top of the cut-off legs, now sleeves.  If you have a great fitting shirt pattern then use this as a guide.  I just tried it on a few times, pinned it and winged it, being sure to keep both sides symmetrical.
Set the sleeves into the body section.
Fold in a hem around the neckline and stitch it down however you choose, I used a short bias cut strip of silk, leftovers from this top, invisibly fell-stitched.
Don't know if it's obvious or not, but it was crazy windy while I was taking these photos.  My tripod actually blew over once!  Goodness knows why I pick the absolute blasting-est days to get out and photograph my makes.  I must be some kind of freaking masochist.  Hair; styled by gale-force winds.  Lovely, not.  But, seize the moment, and all that.  After all, this is what I actually look like here.  Keeping it real.  Man, I'm a loon.
This one gave me a laugh when I saw it!

Details:
Jacket; refashioned from a pair of Burda 7944 trousers, gunmetal linen
Shorts; Burda 7723, themselves refashioned from an old skirt, details here, and see my review of this shorts pattern here
Tshirt (underneath); self-drafted, white cotton jersey, details here
Sandals; c/o Misano

Chequered Elisalex

$
0
0
Hello!
A little while ago Liz contacted me to generously send her copy of the By Hand London Elisalex pattern to me.  Thank you so much Liz!  Obviously I leapt at the chance to try out this deservedly popular pattern  :)
One of the most wonderful things about being part of this online sewing community is how we all openly and honestly share our love of sewing and our sewing experiences.  I've believe the sewing community to be such a friendly group of generous, upbeat and helpful women: so I really want to spread the love and pay it forward and all that, and in turn offer this pattern up to another... a giveaway!  Maybe this is a sorta blogging anniversary giveaway, since I have been blogging for four years as of last Friday, but really all the thanks and credit is due to Liz  :)
As recommended in the pattern instructions, I traced my size onto white plastic table-clothing, which means that the original pattern is still in immaculate condition.  I refolded it carefully back into its factory folds;  I'm pretty expert at that, if I say so myself.  Years of pattern control-freak practice  :D  Anyway, it is all nicely and perfectly intact.  And the pattern packaging is exquisite, truly a thing of great beauty, with two nesting envelopes of high quality blue cardboard bearing elegant drawings of the three variations.  Seriously, this is a gorgeous thing!  So, if you would like this copy of the very popular Elisalex pattern  then please leave a comment saying so.  I will randomly pick a recipient this Thursday, 17th October.  
(Later edit: a commenter has pointed out that my giving away this pattern is morally "iffy" ... obviously this is the very last thing I want! so I have decided to withdraw the offer.  My sincerest apologies to all, and my thanks for your kind comments and I will rustling up something different for a blogging anniversary giveaway very soon... please stay tuned  :)  )

I bought this piece of black-and-ivory patchworked silk taffeta from Homecraft Textiles a while back, thinking about those Louis Vuitton shift dresses, and then had second thoughts since the silk is very thin and slightly floaty and so was really too light to work well in a structured shift dress design.  Shift dresses need a fabric with a bit of oomph.  
Louis Vuitton S/S 2013 RTW, source

I put the idea of a shift dress on ice, but as soon as I saw the big pouffy skirt on the Elisalex the silk leapt to my mind again.  The piece was wide but I only had 1.5m so pattern matching was the biggest challenge.  Also a lot of the squares were not exactly square but are slightly bigger and smaller here and there, and the corners don't always match up perfectly.  I'm pretty pleased with how I managed to get the dress out of my small piece and got my squares, princess seams, corners and box pleats matching up not too badly.  The only area I am disappointed with is the junction between the skirt and bodice at the centre back, where the two ivory squares and two black squares are adjacent with each other and so there is one ivory and one black rectangle instead of squares and the chessboard effect falls into a heap! ... but I think I can live with that little quirk.  Well, I have to because I wasn't going to go out and buy more fabric just for that.  Although I will admit that I considered it  ;)  I have the smallest mere scraps leftover, so I did make very good use of my piece.
My dress is fully lined with cream-coloured polyacetate lining fabric.  The pattern does not mention lining the skirt, so I cut the skirt pieces out as narrower versions of the skirt pattern pieces without the extra "pouffe" at the side edges.  I also chose to add huge inseam side pockets, because well duh!  Sorry to sound like a broken record on the subject, but in my view this design was just screaming out for pockets!! For the pockets I used a lightweight ivory swiss dotted cotton voile.

Details:
Dress: By Hand London Elisalex dress, patchwork silk
Tights; self-drafted, black wool, details here
Shoes; Misano, from Labels boutique

Pattern Description:
An elegant dress with a princess seamed, fully lined bodice, box pleated tulip skirt and exposed zip at centre back.  There are three sleeve variations and the bodice is designed with very little ease to enhance a cinched waist.
Pattern Sizing:
UK 2-16; US 6-20,  Based on my bust and waist measurements I made the size 6/10 and it fits perfectly
Did it look like the photo/drawing on the pattern envelope once you had finished sewing it?
Yes.
Were the instructions easy to follow?
The instructions are warm, encouraging and friendly and would put the beginner seamstress immediately at ease.  There is some idle chit-chat; I'm not criticising, just observing... for example; "Find a quiet room and a big table.  A girl's gotta concentrate, especially when getting ready to cut out" (this particular girl cut out on the living room floor while watching the telly, but then I've always been a rebel) ... But at the same time some key little sewing steps are missing; tips that I believe are really necessary to get a good finish in your garment and that a beginner wouldn't "just know".  For example; to fit the bodice curve in the princess seam, you really should ease stitch the side bodice pieces.  And under-stitching the seam allowances of the armholes and neckline is always a good idea too.
Step 8; very wordy with no pictures, opening with "this is a little fiddly and unfortunately impossible to clarify with a drawing ..." really? Vogue manages to illustrate this step with a drawing in their instructions for this very same technique.  Vogue also mentions and illustrates ease stitching and under-stitching in their instructions too.  Just saying.
The "what you need" section is a little baffling, commencing somewhat hilariously with "your fabric" and then going on to list such things like pins, zipper foot and tape measure.  The actual fabric quantities you need are printed elsewhere; down at the bottom left in an inconspicuous little table.
What did you particularly like or dislike about the pattern?
Likes: The whole design is absolutely lovely.  The size of the skirt pattern pieces gave me pause at first, but when I had basted them together and tried it on I was enchanted with the gorgeous feminine silhouette it gave.  The bodice is a beautiful fit and looks really elegant both front and back views, too.
The pattern itself is beautifully packaged; this is an exceptionally high quality product.
Dislikes: There are NO metric measurements, whatsoever.  This is just about inexcusable in a modern pattern.
I was surprised that the pattern didn't have pockets considering that the big pouffy skirt could so easily accommodate them.  Fortunately it is super easy to put them in yourself.
Considering that the skirt has a tulip silhouette curving in towards the hemline, one would normally measure the desired length of the skirt before cutting out, in order to plan and accordingly cut the side edges so the hem allowance juts out; so that it can be turned under to sit flat against those angled side seams.  The pattern piece doesn't allow for this and it isn't mentioned in the instructions, so I sure hope a novice seamster wouldn't think it is their mistake when they end up with a hem allowance too narrow to turn under smooth and flat...
Fabric Used:
Patch-worked silk taffeta
Pattern alterations or any design changes you made:
Pockets  :)  
My dress is fully lined; I cut the skirt lining as a narrower version of the pattern pieces removing some of the pouffe and folding narrower box pleats in the same spots.
I chose to insert an invisible zip rather than use an exposed zip, as it suited the style of dress I had in mind.
Would you sew it again? Would you recommend it to others?
Yes, I will definitely sew this again!  A really beautiful and classic design.  For winter I would sew this in a rich tapestry or an upholstery type of fabric, with the sleeves.  This is a sure thing in my future.
And yes  :)
Conclusion:
Technically, the absence of metric measurements is quite annoying, and the instructions could do with more finishing tips and details to help beginners.  
Design-wise; it is an absolutely beautiful and classic design, and I am very pleased with how mine turned out.  
Packaging: exquisitely packed, and of very high quality and eco-friendly materials.   For the connoisseur of really beautiful patterns.

Audrey in Unst, in Blue

$
0
0
I am finishing all of my winter knitting projects just in the nick of time for them all to be packed away.  Woot!  This is pretty typical for me.  I think  I really should plan my wardrobe far more efficiently and be more seasonally aware and prepared!
I was struck by something Roobeedoo wrote recently; that since a knitting project takes so much longer than a sewing project and, as well, lasts for so much longer in your wardrobe, the sensible self-tailored individual plans future sewing projects around a current knitting project; not concurrently.  So sensible!  An edict; the singular wisdom of which I had not appreciated before then...   
Thy knitting projects are the key to planning thy wardrobe, y'all!
I bought this lovely wool during my afternoon out in Paris with Donna of Nid de Tissus, so it brings back happy memories to me of our fun chatty lunch and fabric/wool shopping excursion together.  A wearable souvenir!  It is from Renaissance Dyeing;  4-ply poll dorset wool hand-dyed with natural plant dyes in France, colour Canigou.  Terrified of not getting enough I bought four skeins so obviously Murphy's Law decreed that I had overestimated how much I would need... doh!  I can never get that bit right!  The cardigan used just over two skeins, so at some point I am going to order some more and make something else using my almost two whole leftover skeins.  I do already have ideas, hehehe  :)  The full range can be viewed and ordered here.
The pattern is Audrey in Unst, designed by Gudrun Johnston; available here.  I've long admired Roobeedoo's leaf green version that she has worn during me-made May and had decided that at some point I would have to make my own.  The shape is nearly identical to my recently finished Miette! but the chunkiness is the difference between the two.  The Miette is in a thick aran weight yarn, whilst the Audrey in Unst is in a light, fingering weight yarn.  So this is a light little cardigan with much finer stitching tension, and subsequently took a lot longer to knit!  I started this at the beginning of the year  (blush) and only just bought the shell buttons and stitched them on a few days ago.
 The neckline is finished off with an i-cord stitch.  This is the first time I have tried this technique and I think it's quite a nice, neat and tidy finish and a refreshing change from the usual rib.
 The cardigan is knitted bottom up, and is, like the Miette, designed to be knitted in one piece with no stitching pieces together.  WIN!  Well, you are supposed to stitch the shoulder seams together but I elected to graft the stitches together, like I do with the toes of my socks.  This gives a very nice seam; neat and flat and quite unobtrusive.  I can do a step-by-step if anyone hasn't heard of and is interested in this technique?
The pattern has a built-in faux side seam, which is an interesting feature.  Essentially it is just a purl stitch every knit row, and vice versa.  The shaping is discreetly alongside the faux side seam.
 The sleeves are knitted by picking up the stitches and knitting short rows with wrapping and turning to form the sleeve cap.  LOVE this feature and I think it makes for a really nice attractive finish; far smoother and sits flatter than a stitched in sleeve would be.
Are there any negatives?  Well you get started; and 36 long long rows of ribbing later, all that blasted purling through the back of the loop had just about killed me.  Seriously HATED this bit. And I'm curious, does purling/knitting through the back of the loop really make a significant difference to the rib?  and if it does then is it really an improvement on the regular sort?  That's not a rhetorical question btw, I would like to know.

Details:
Cardigan; Audrey-in-Unst in Renaissance Dyeing;  4-ply poll dorset, colour Canigou
Skirt; Vogue 1170 lined, blue corduroy later dyed brown, details here and my review of this pattern here
Tshirt (under); self-drafted, white cotton jersey, details here
Sandals; c/o Misano

the paper doll project

$
0
0
(I've pledged to wear only clothes handmade by me this year and to sketch my daily outfits in my Fashionary.  I'm calling this; the paper doll project)
6th-11th October
from left:
pale grey hoodie, grey skirt from jeans, white Tshirt
khaki linen shirt, grey/green floaty layered skirt
lace shirt-dress, pink petticoat, iceberg knitted jacket
blue knitted cardigan, petrol corduroy skirt, white Tshirt
emerald corduroy skirt, ecru boxy jacket from jeans, beige tshirt (unblogged)
watercolour floral dress, black wool tights, army jacket
12th-17th October
from left:
18th-23rd October
from left:
panelled corduroy dress, chocolate cardigan
corduroy/white hoodie (refashioned from jeans), navy corduroy skirt, white Tshirt (under), russet handknit socks
petrol blue corduroy skirt, purple Tshirt, paprika tights, iceberg knitted jacket
white trees top, wedgwood blue damask skirt
draped blue silk top, beige Tshirt (unblogged), beige corduroy skirt (from jeans)
emerald corduroy skirt, royal blue PM hoodie

O bliss...  the temperatures in the last coupla days have finally warmed up nicely to a level that I feel comfortable and happy in and at which I function the best.  I'm a warm weather bunny who feels the cold something awful, even when it's not really cold; and this spring has been on the chilly side so far.  I'm hanging out for the days when I can pop my bathers on and take a dip in the ocean/pool... Funny thing, I'd almost forgotten about my new(ish) bathers... and was thinking the other day that it was getting close to swimming season and hmmmm, what would I make this year...?  when, oh yeah! I remembered that I do actually have some practically unworn, pristine new bathers already!  hehe  feels like its been aaaaages since I made them, well, probably because it has been ages; nearly 6 months now, and they haven't even got wet yet!  I'm roooolly looking forward to taking them out on their maiden voyage...  when it warms up just a little bit more  ;)

White trees and buttons

$
0
0
I've sewn up my white trees fabric... into a top! I drafted it myself but it is a pretty simple silhouette; basically a big oversized T-shape, with something interesting in the form of the completely open top edge.  The top edges of front and back have a full length button and buttonhole placket respectively, stretching from sleeve hem to sleeve hem along the whole neckline, and it's partially buttoned up to close the top of the sleeves.  Technically, you could button the top edge up all the way, except that the neckline is curved as an anti-strangulation measure.  It's funny though, when you're wearing it you can't really tell the neckline is curved, it reads as an almost straight edge.
It is based on several different sources of inspiration: years ago I had a Metalicus Tshirt that had an open top with snaps, that could open like this from sleeve right the way along the neckline; and also a few months ago Kirsty posted plans for her gorgeous top from the Japanese pattern book She has a Mannish Style, a top with a wide buttoned neckline although with separate closed sleeves. I sorta combined those concepts in the design of my own top.
Most time consuming bit: I fiddled for aaaages with the spacing of the buttons/buttonhole, so it would both look "right" and also that I could have a button placed just at the point on my shoulders where I wanted it to go. 
the back view is unexciting, but I know those of us who sew like to see this bit too....  
Since the front neckline has a lower dip than the back, the buttons are spaced a little more wide apart along the front curve than the corresponding buttonholes at the back.  I sewed up the rest of the top completely, before doing the button/buttonhole plackets along the top edge, this was the last step.  The top edges were interfaced with similarly shaped strips of iron-on interfacing and then I sewed the plackets on.
What else.  Oh, and it's got pockets, too  (blush)
I fear I have some sort of weird pocket obsession...  is pocket-aholic a "thing"?   Guess I should sign myself up  ;D

Details:
Top; my own design, coffee cotton broadcloth, screen-printed by me with little white trees here
Skirt; Vogue 1247, blue damask, details here and my review of this pattern here
Sandals; c/o Misano
Viewing all 820 articles
Browse latest View live